Plugin Settings
Order Settings
It consists of two types of Plugin Setting i.e. Order Wise and Product Wise Plugin Setting.
Default Order Status for any type of plugin setting are Pending Orders, Processing Orders, On Hold Orders, Completed Orders, Cancelled Orders, Refunded Orders, Failed Orders, Trash Orders. Different sheet is available for each order status.
Order Wise Plugin Settings have sheet headers as order wise. To view more sheet headers, click here.
Product Wise Plugin Settings have sheet headers as product wise. To view more sheet headers, click here.
Order Wise Plugin Settings
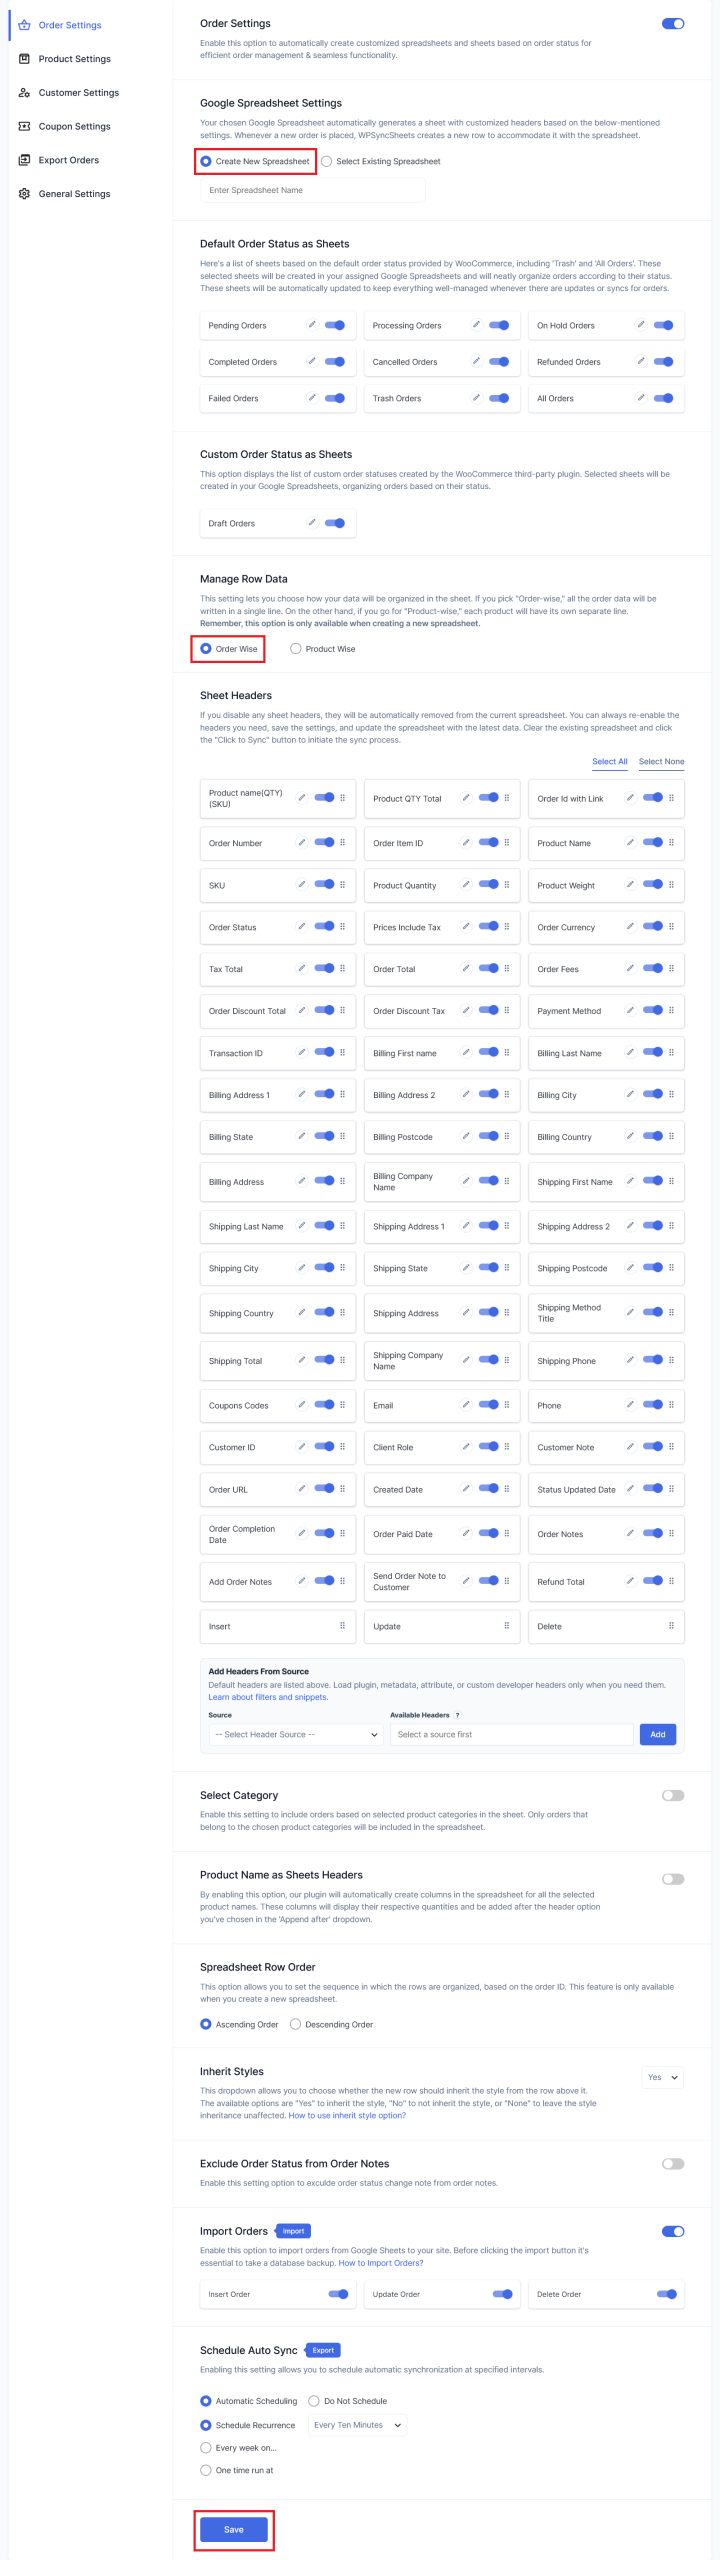
When this option is selected, each WooCommerce order will be added as a single row in Google Sheets. All order-related details, including customer information and purchased products, will be combined into one line. This format is useful for viewing and managing orders at the order level.
For creating new spreadsheet, perform the following steps:
> WPSyncSheets For WooCommerce => General Settings
1. Create New Spreadsheet
- Select Create New Spreadsheet option from given list in select spreadsheet field.
- Enter the name of new spreadsheet.
- In default order status, it shows the status which is set as default from WooCommerce. Each status indicates the different sheets in the spreadsheet. In case, if some of them are not useful, you can disable them too.
- The sheet headers will automatically get sorted as per the selected option in Manage Row Data section. Select all button will select all the sheet headers. You can disable some of them manually. If you want to disable all the sheet headers just click on the Select none button.
- When you click the save button, the spreadsheet will get updated and you can also view it by clicking the View Spreadsheet.
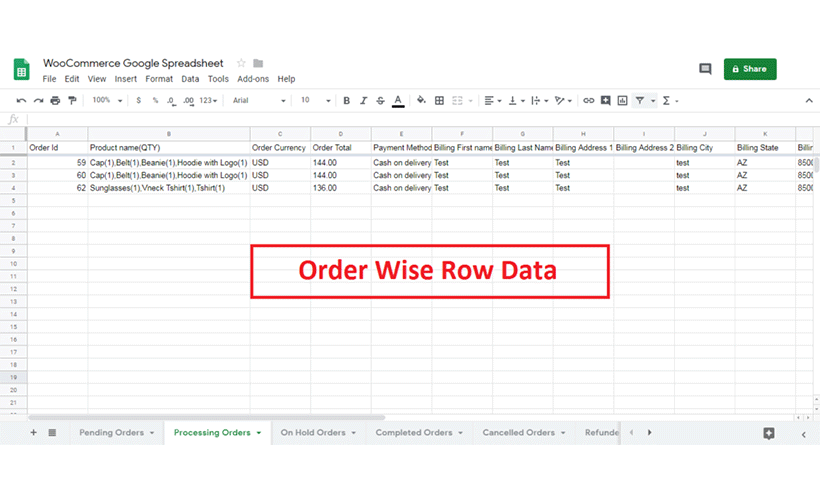
2. Updated Google Spreadsheet (Order Wise)
After saving the above settings, the Order Wise spreadsheet is shown below.
Product Wise Plugin Settings
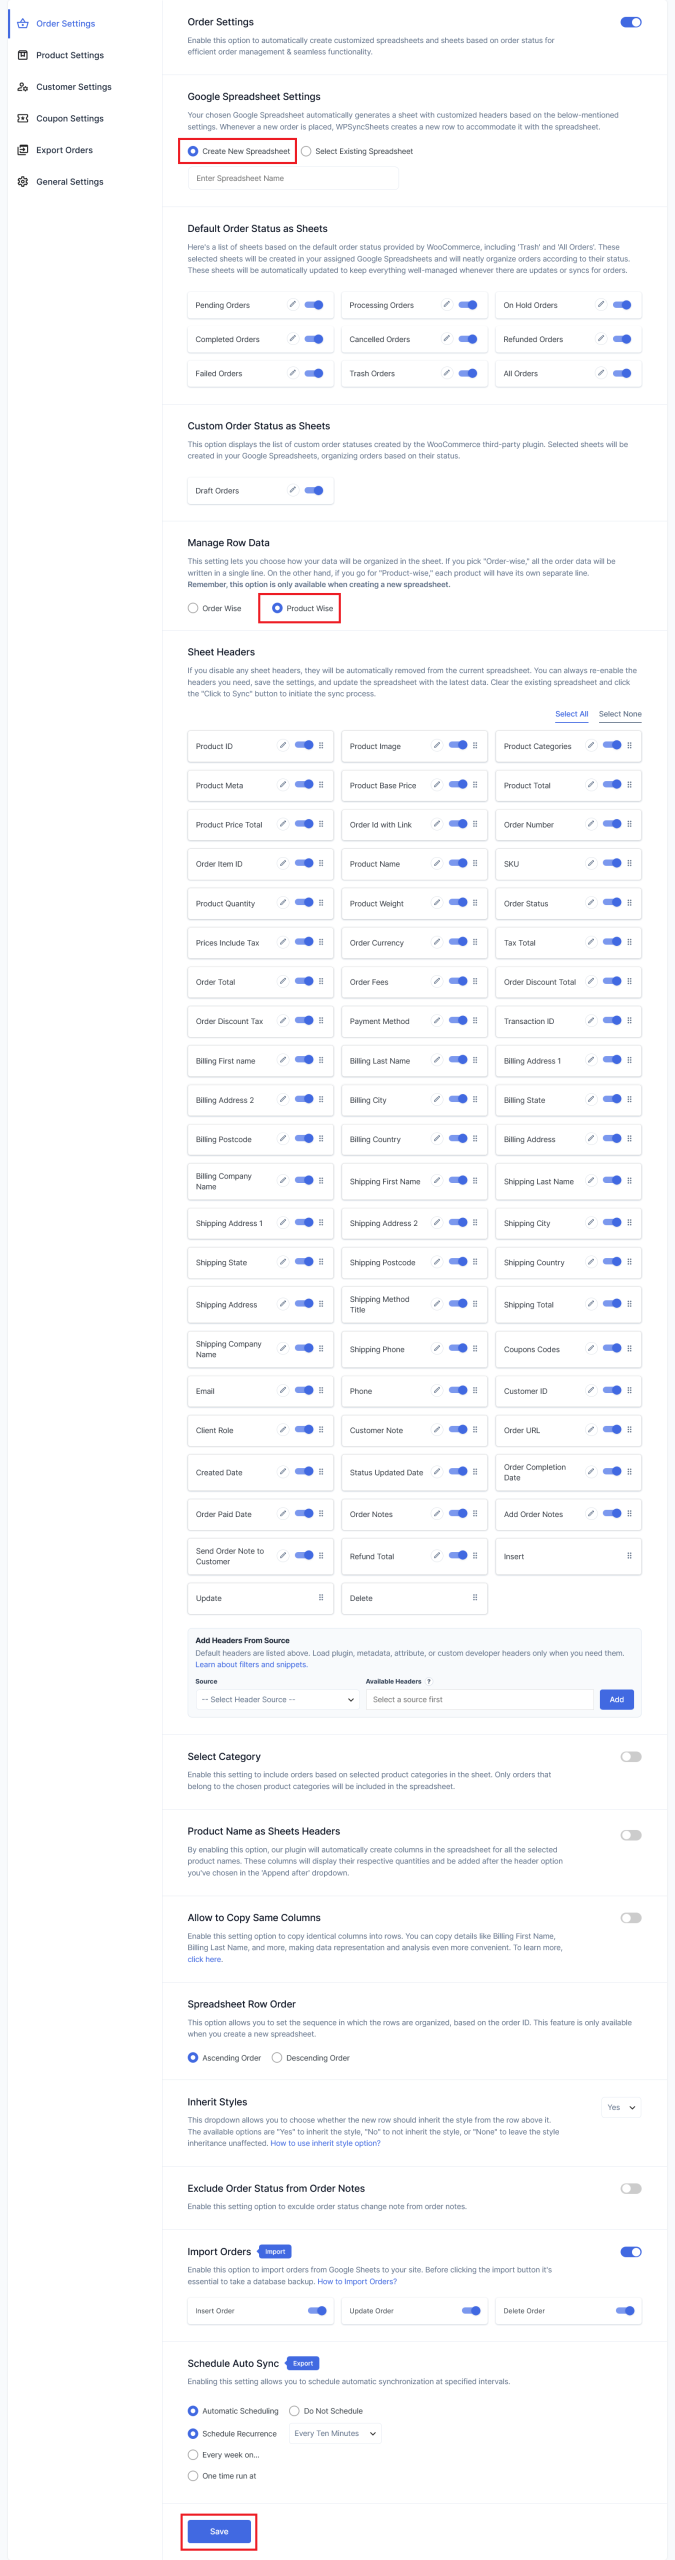
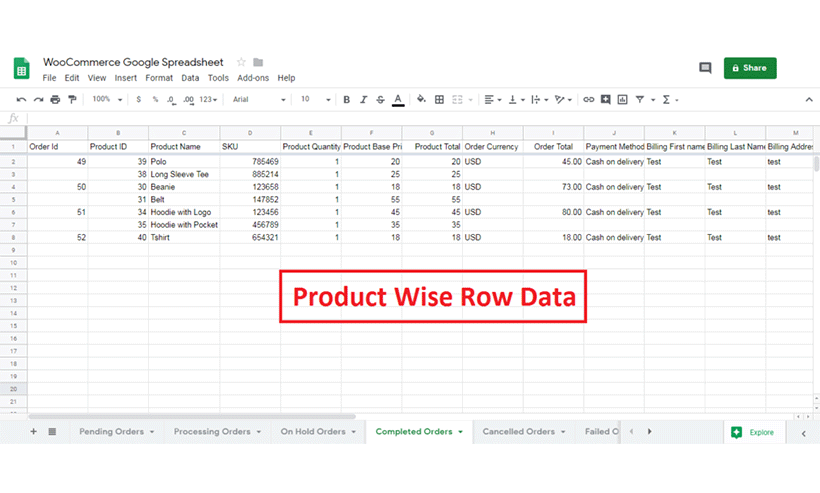
When this option is selected, each product from a WooCommerce order will be added as a separate row in Google Sheets. If an order contains multiple products, each product will appear on its own line along with the related order details. This format is useful for product-level tracking and reporting.
For creating new spreadsheet, perform the following steps:
> WPSyncSheets For WooCommerce => General Settings
1. Create New Spreadsheet
- Select Create New Spreadsheet option from given list in select spreadsheet field.
- Enter the name for new spreadsheet.
- In default order status, it shows the status which are set as default from WooCommerce. Each status indicates the different sheets in spreadsheet. In case, if some of them are not useful, you can disable them too
- The sheet headers will automatically get sorted as per the selected option in Manage Row Data section. Select all button will select all the options. You can disable some of them manually. If you want to disable all the sheet headers just click on the Select none button.
- When you will click save button, the spreadsheet will get updated and you can also view it by click at View Spreadsheet.
2. Updated Google Spreadsheet (Product Wise)
After saving the above settings, the Product Wise spreadsheet is shown below.
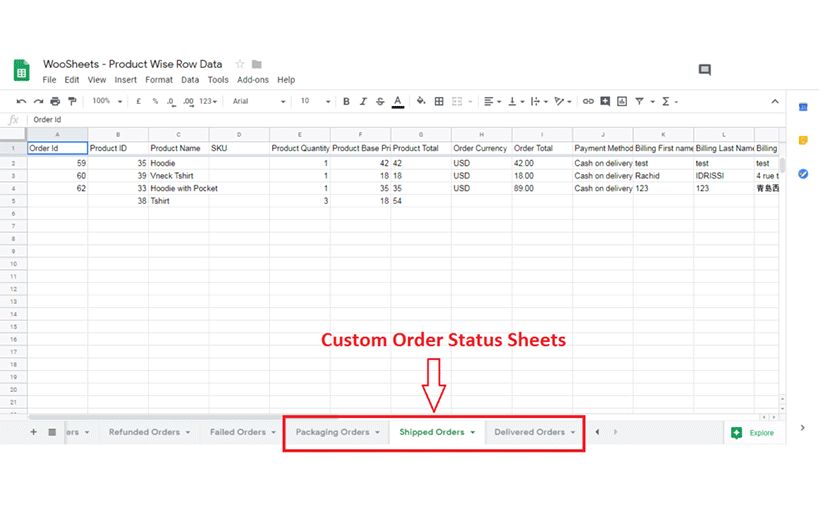
Custom Order Status
In custom order status, it shows the status which are created by the third-party plugin.
1. Custom Order Status
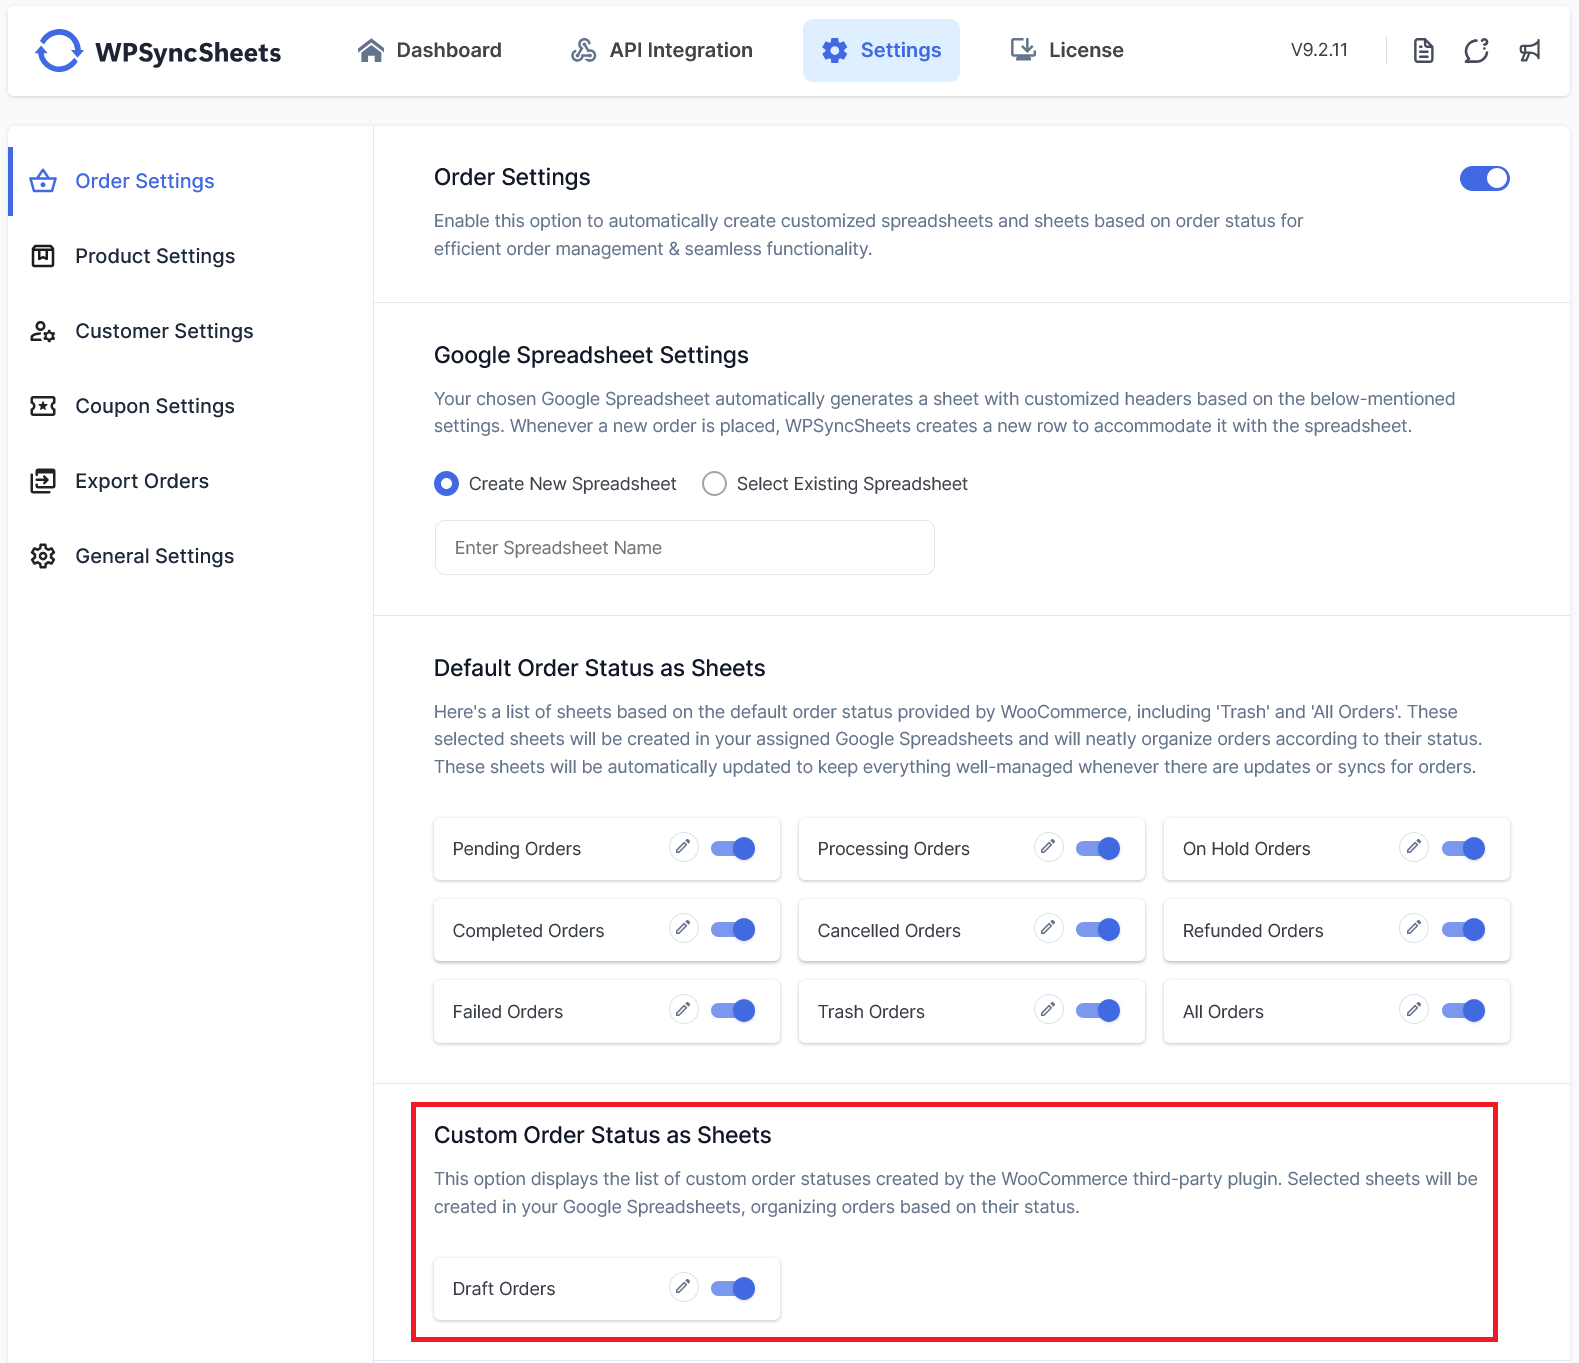
Below figure shows that the status created using third party plugin can be viewed in spreadsheet
General Settings
1. Freeze Headers
When this option is enabled, the first row (header/title row) in Google Sheets will stay fixed at the top of the sheet while users scroll down. This helps keep column titles visible for better readability and navigation.
- Note: This setting will apply to all sheets that are enabled in the spreadsheet settings.

2. Background Row Color
This feature allows users to add background row color in odd & even manner, it is calculated as per their order id.

3. Row Input Format Option
Row Input Format Option has dropdown with two options RAW and USER_ENTERED. If user selects RAW then the values entered by user will not be parsed and will be stored as it is and for USER_ENTERED option the values entered by user will be parsed. Numbers will stay as numbers, but strings may be converted to numbers, dates, etc.

4. Price Format
Price Format has dropdown with two options Values and Formatted Values with Symbol. When selecting an option ‘ Formatted Values with Symbol ‘ it will append a symbol with price values while selecting ” Values ” option it will save value as it is entered.

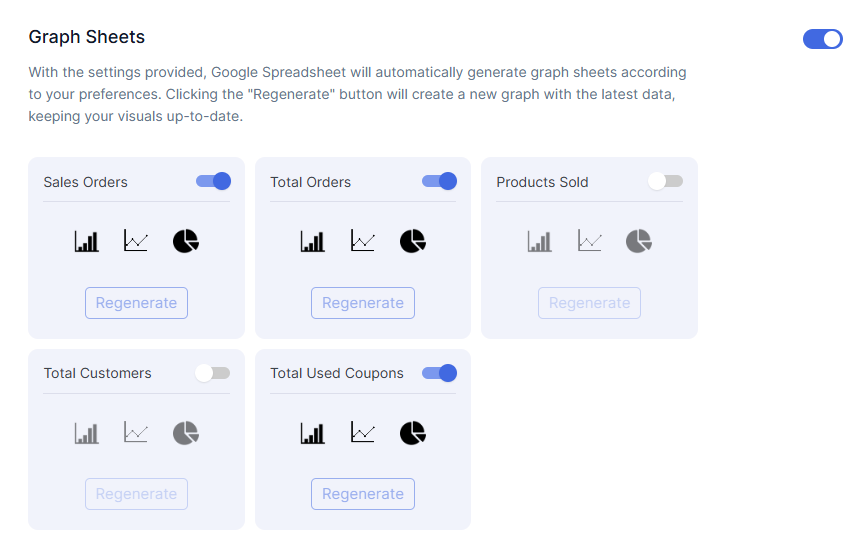
5. Graph Settings
With the configured settings, Google Sheets can automatically generate graph sheets based on your selected preferences. These graphs help visualize WooCommerce data in a clear and organized format.
Clicking the Regenerate button will create a new graph using the latest synchronized data, ensuring your reports and visual analytics always remain up to date.
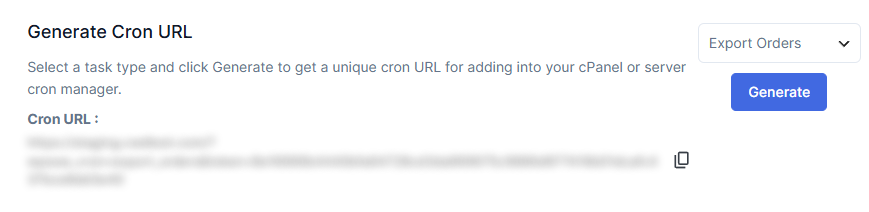
6. Generate Cron URL
Select the required task type and click the Generate button to create a unique cron URL. You can use this URL in your cPanel or server cron manager to automate scheduled synchronization tasks.
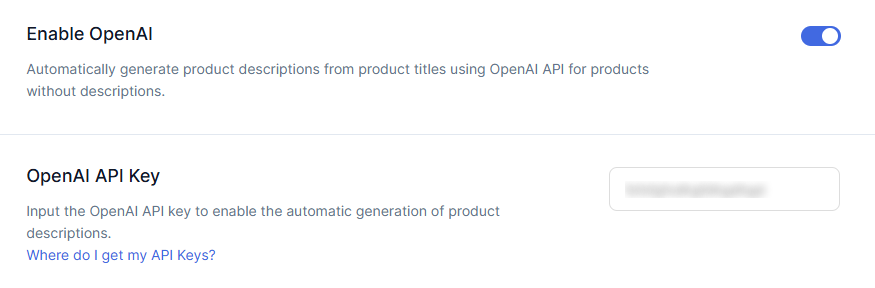
7. Enable OpenAI
Enable this option to automatically generate WooCommerce product descriptions from product titles using the OpenAI API for products that do not already have descriptions. Enter your OpenAI API key to activate this feature.
You can generate and manage your API keys from the OpenAI Platform API Keys page.
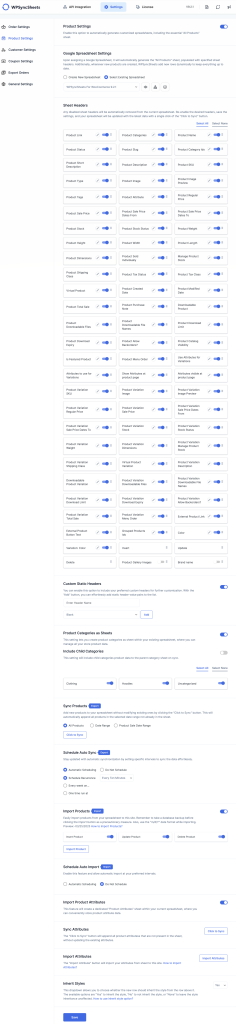
Product Settings
1. Create New Spreadsheet
- Select Create New Spreadsheet option from given list in select spreadsheet field.
- Enter the name of new spreadsheet.
- By default it creates All Products sheet in the spreadsheet.
- The sheet headers will automatically get sorted as per the selected option in Sheet Headers section. Select all button will select all the sheet headers. You can disable some of them manually. If you want to disable all the sheet headers just click on the Select none button.
- When you click the save button, the spreadsheet will get updated and you can also view it by clicking the View Spreadsheet.
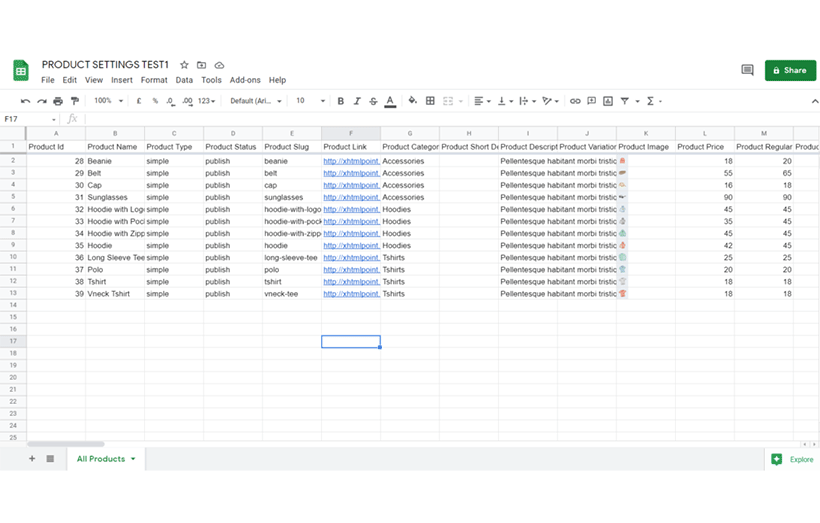
2. Updated Google Spreadsheet
After saving the above settings, the spreadsheet is shown below.
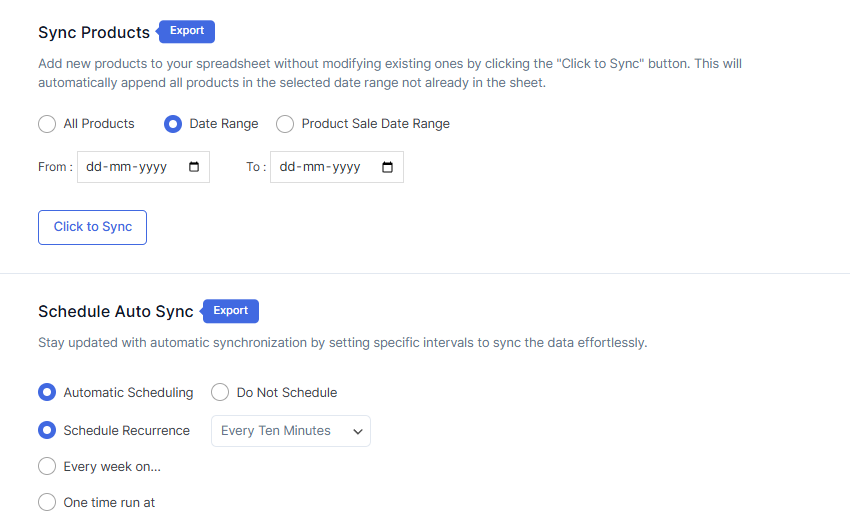
3. Sync Products
When the user clicks on the button called Click to Sync then it will synchronize/add existing WooCommerce All or Custom date range products within the selected spreadsheets All Products sheet as per the value of the Sync Range ( All / Custom ) button.If Sync Range ( All / Custom ) is enabled then all the existing WooCommerce products will be synchronized/added and if Sync Range ( All / Custom ) is disabled then the products within the date range (From date to To date ) will be synchronized/added to the selected spreadsheet All Products sheet.
Users can even schedule to sync all the products with Schedule Auto Sync settings. The user has to set the settings once and it will automatically sync all products at the scheduled time.
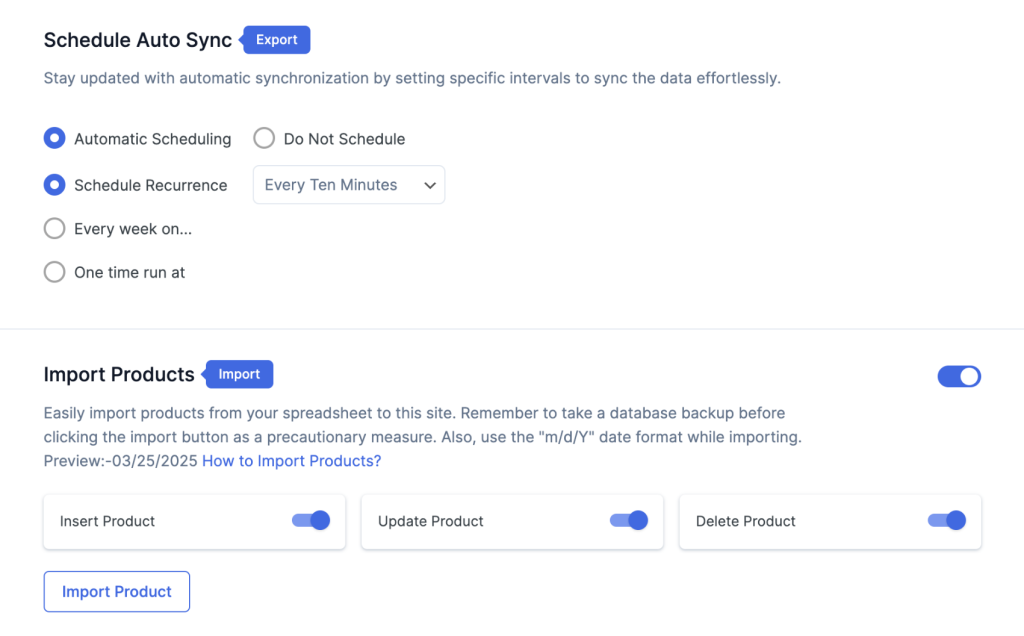
4. Import Products
Users can import the product with Insert, Update, Delete Product option. Follow this documentation for How to Import Products?
Users can also schedule the import with Schedule Auto Import.
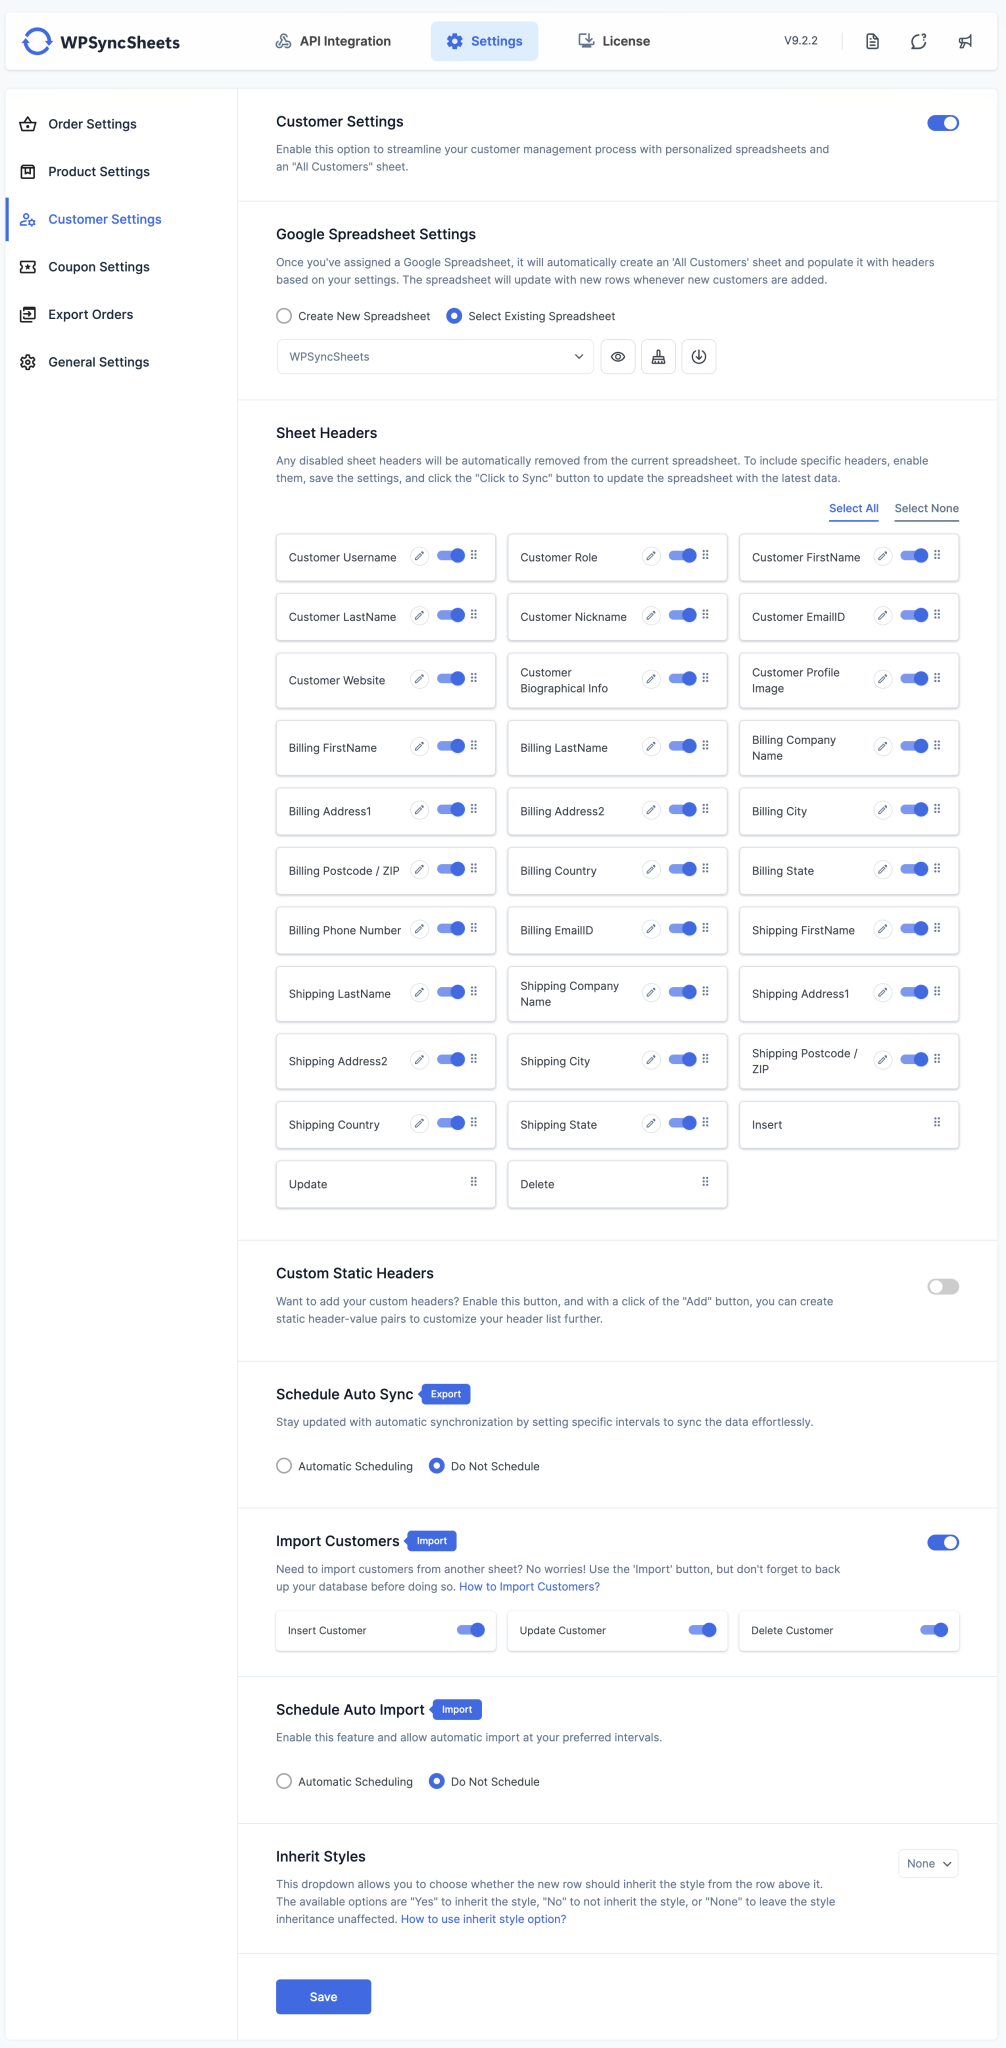
Customer Settings
1. Create New Spreadsheet
- Select Create New Spreadsheet option from given list in select spreadsheet field.
- Enter the name of new spreadsheet.
- By default it creates All Customers sheet in the spreadsheet.
- The sheet headers will automatically get sorted as per the selected option in Sheet Headers section. Select all button will select all the sheet headers. You can disable some of them manually. If you want to disable all the sheet headers just click on the Select none button.
- When you click the save button, the spreadsheet will get updated and you can also view it by clicking the View Spreadsheet.
2. Updated Google Spreadsheet
After saving the above settings, the spreadsheet is shown below.

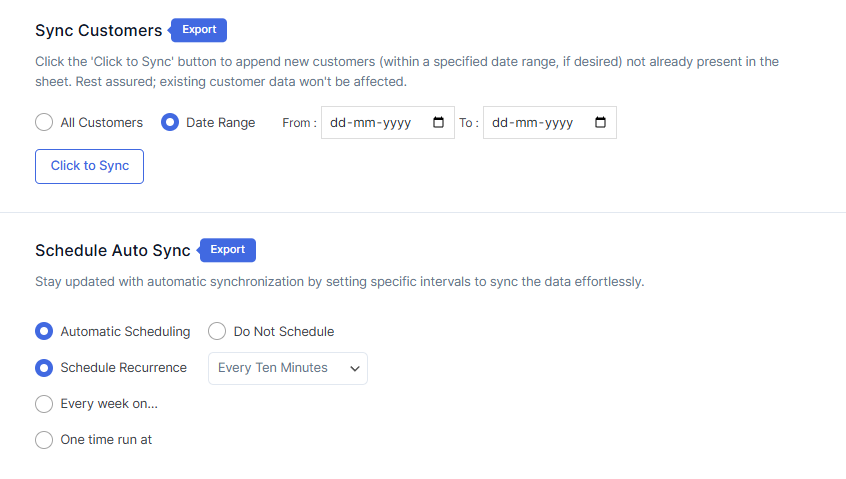
3. Sync Customers
When the user clicks on the button called Click to Sync then it will synchronize/add existing All or Custom date range customers within the selected spreadsheets All Customers sheet as per the value of the Sync Range ( All / Custom ) button.If Sync Range ( All / Custom ) is enabled then all the existing customers will be synchronized/added and if Sync Range ( All / Custom ) is disabled then the customers within the date range (From date to To date ) will be synchronized/added to the selected spreadsheet All Customers sheet.
Users can even schedule to sync all the customers with Schedule Auto Sync settings. The user has to set the settings once and it will automatically sync all customers at the scheduled time.
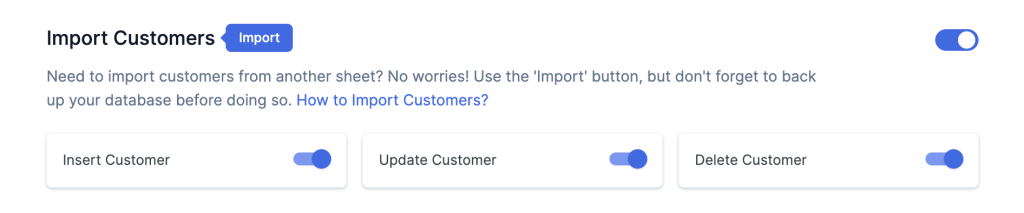
4. Import Customers
Users can import customers with Insert, Update, Delete Customer option. Follow this documentation for How to Import Customers?
Users can also schedule the import with Schedule Auto Import.
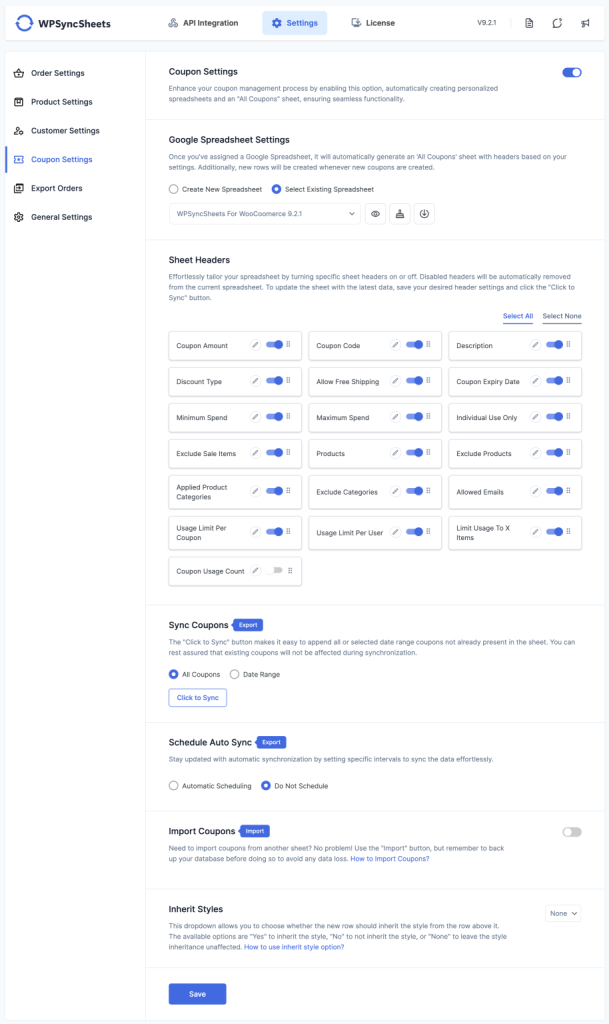
Coupon Settings
1. Create New Spreadsheet
- Select Create New Spreadsheet option from given list in select spreadsheet field.
- Enter the name of new spreadsheet.
- By default it creates All Coupons sheet in the spreadsheet.
- The sheet headers will automatically get sorted as per the selected option in Sheet Headers section. Select all button will select all the sheet headers. You can disable some of them manually. If you want to disable all the sheet headers just click on the Select none button.
- When you click the save button, the spreadsheet will get updated and you can also view it by clicking the View Spreadsheet.
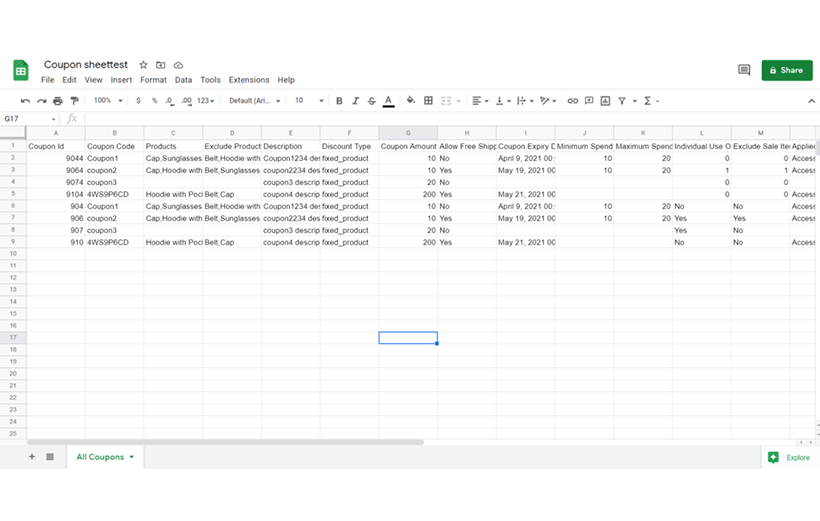
2. Updated Google Spreadsheet
After saving the above settings, the spreadsheet is shown below.
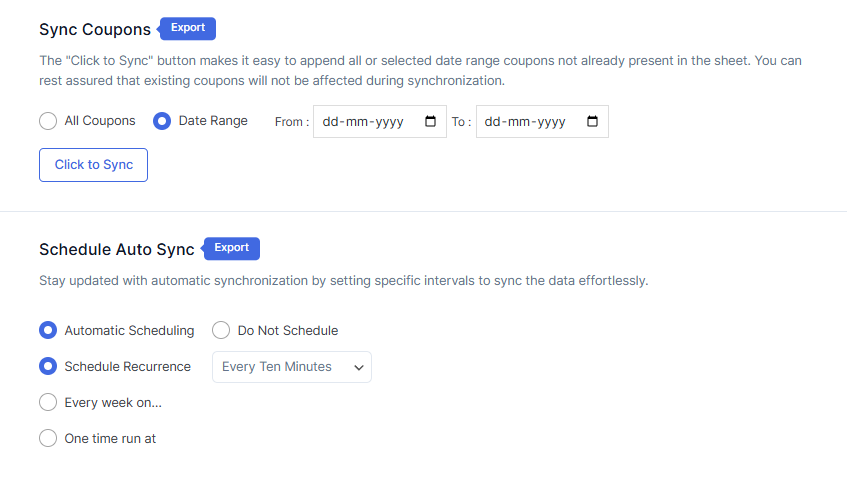
3. Sync Coupons
When the user clicks on the button called Click to Sync then it will synchronize/add existing All or Custom date range coupons within the selected spreadsheets All Coupons sheet as per the value of the Sync Range ( All / Custom ) button.If Sync Range ( All / Custom ) is enabled then all the existing coupons will be synchronized/added and if Sync Range ( All / Custom ) is disabled then the coupons within the date range (From date to To date ) will be synchronized/added to the selected spreadsheet All Coupons sheet.
Users can even schedule to sync all the coupons with Schedule Auto Sync settings. The user has to set the settings once and it will automatically sync all coupons at the scheduled time.
4. Import Coupons
Users can import coupons with Insert, Update, Delete Coupon option. Follow this documentation for How to Import Coupons?
Users can also schedule the import with Schedule Auto Import.

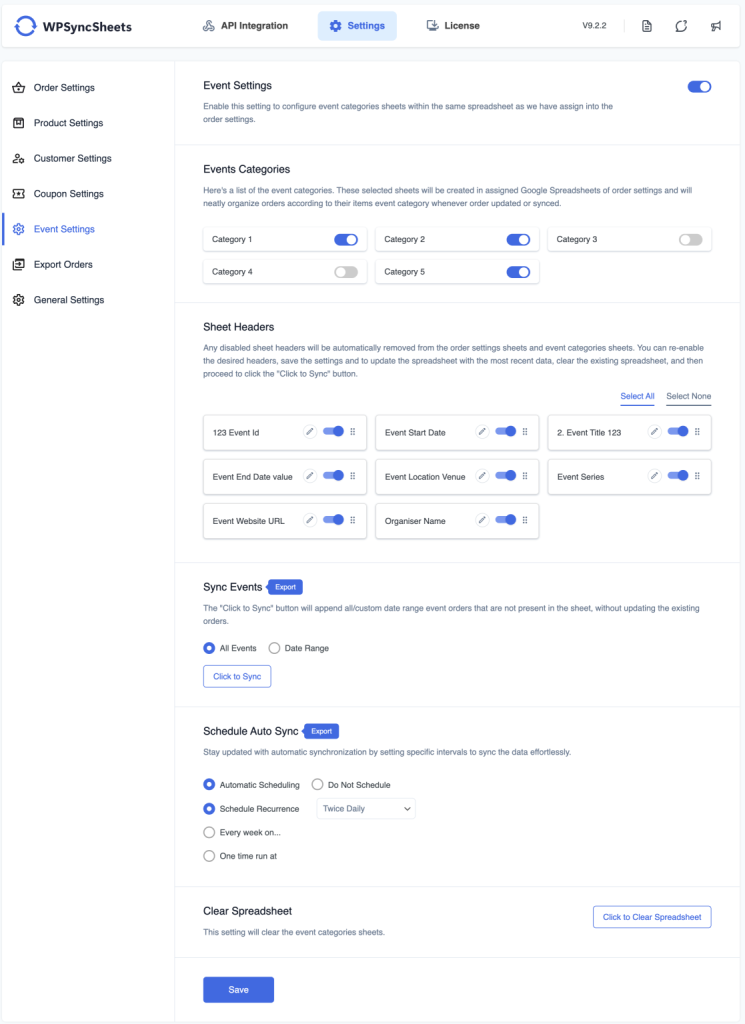
Event Settings
The event settings will only get the orders with event product data and write in a sheet as per product event category respectively.
1. Create Event Categories sheets
- In Event Categories, it shows all event categories each category indicates the different sheets in the spreadsheet of general settings. In case, if some of them are not useful, you can disable them too.
- The sheet headers will automatically get sorted as per the selected option in the Sheet Headers section with general setting headers. Select all button will select all the sheet headers. You can disable some of them manually. If you want to disable all the sheet headers just click on the Select none button.
- When you click the save button, the spreadsheet will get updated and you can also view it by clicking the View Spreadsheet.
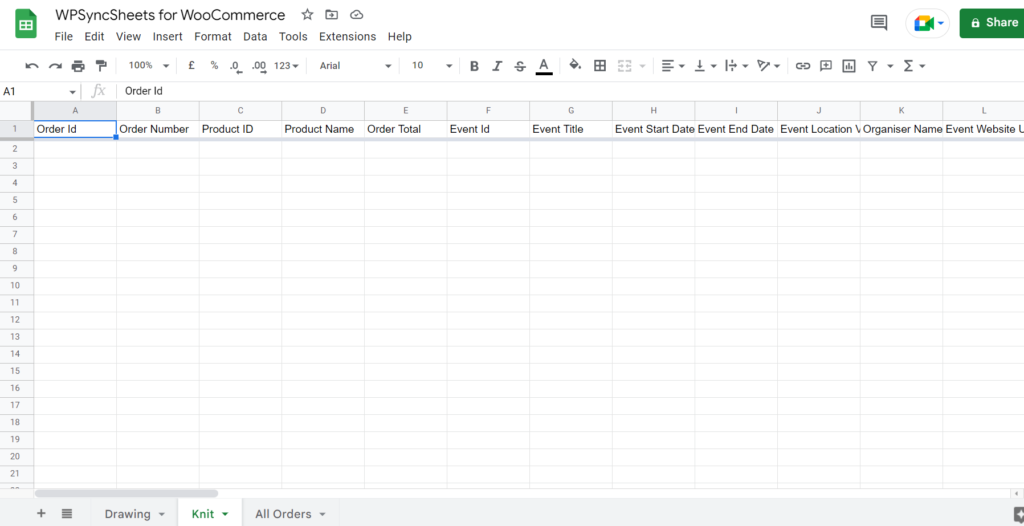
2. Updated Google Spreadsheet
After saving the above settings, the spreadsheet is shown below.
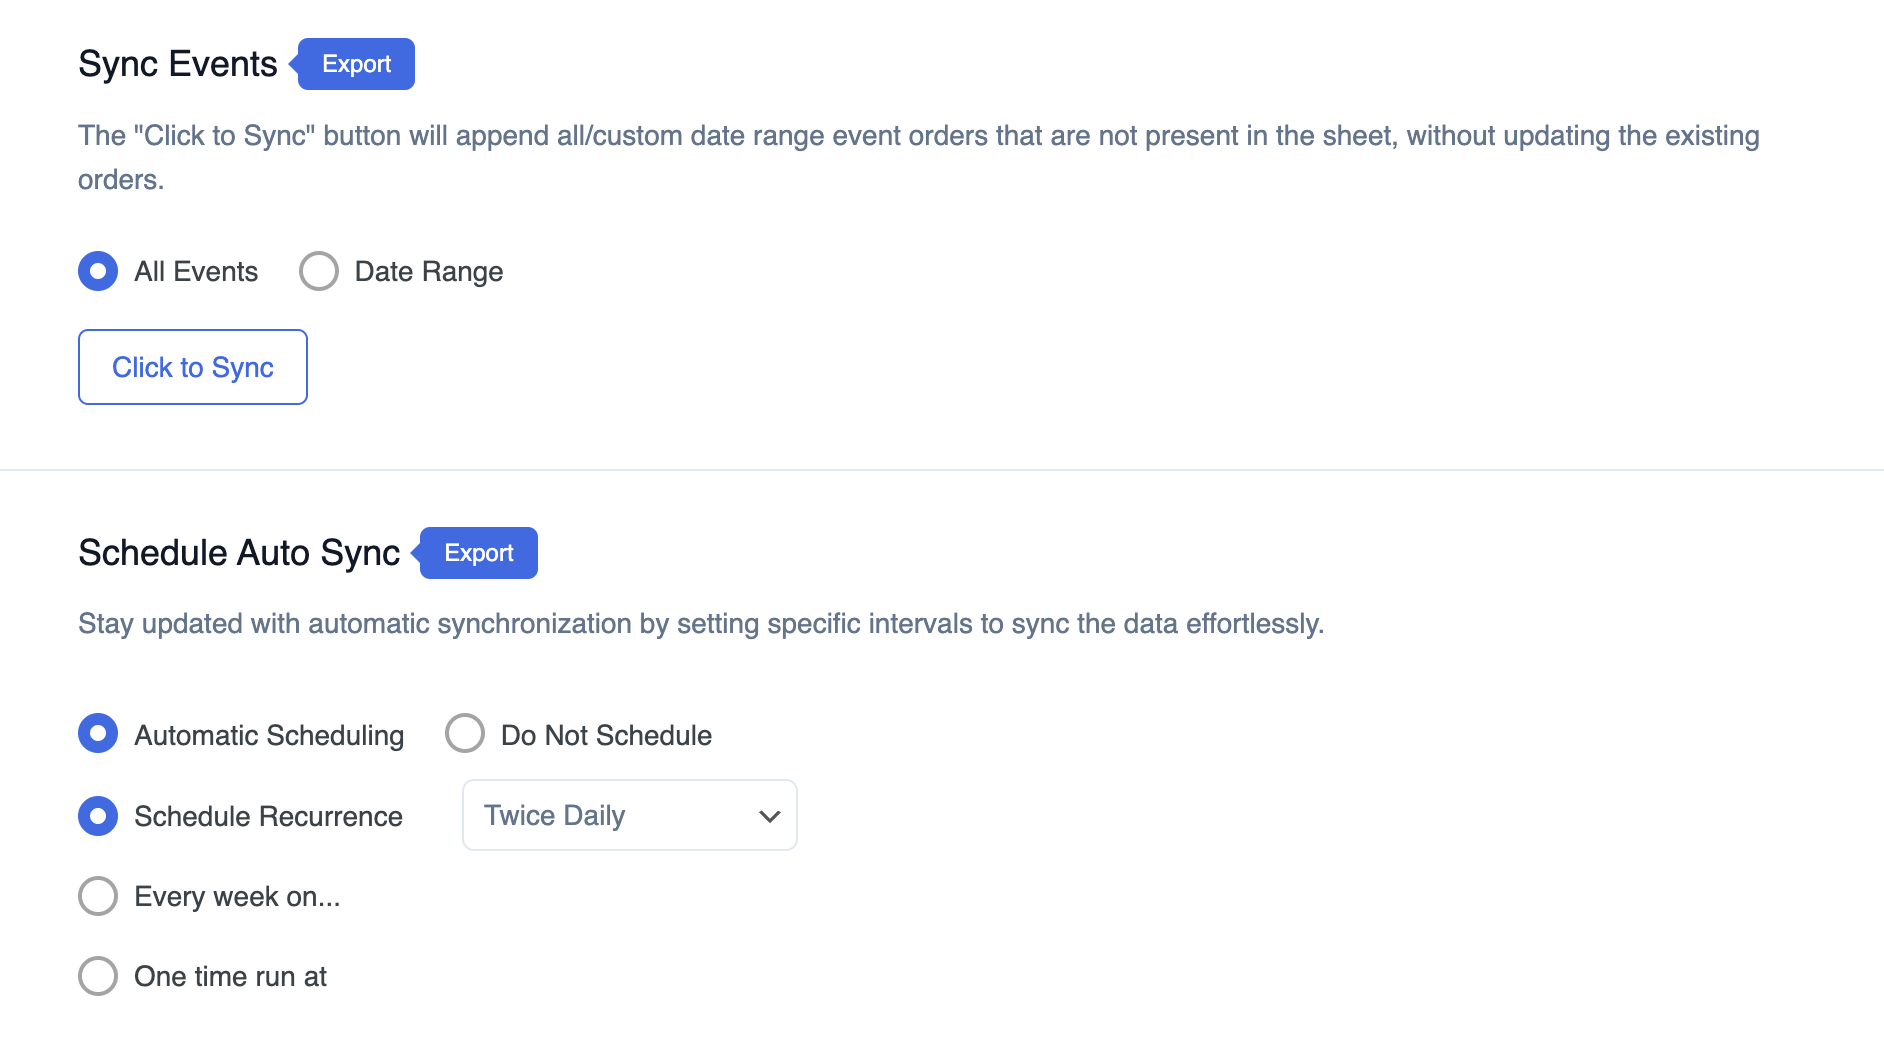
3. Sync Events
When the user clicks on the button called Click to Sync then it will synchronize/add existing WooCommerce All or Custom date range orders with event product data within the selected spreadsheet with a selected sheet as per the value of the Sync Range ( All / Custom ) button. If Sync Range ( All / Custom ) is enabled then all the existing WooCommerce orders will be synchronized/added and if Sync Range ( All / Custom ) is disabled then the orders within the date range (From date to To date ) will be synchronized/added to the selected spreadsheet.
Users can even schedule to sync all the event product orders with Schedule Auto Sync settings. The user has to set the settings once and it will automatically sync all the event product orders at the scheduled time.