Import WooCommerce Orders with WPSyncSheets for WooCommerce
If users want to update orders statuses, manage orders in bulk, or fix shipping and payment details, they need to import orders. It saves time, reduces minor errors, and avoids repetitive tasks within WooCommerce.
If you want to change the order status directly from Google Sheets, please click here to follow the step-by-step guide.
How to Import Orders?
There are two ways to import orders from Google Sheet to WooCommerce.
Order Wise
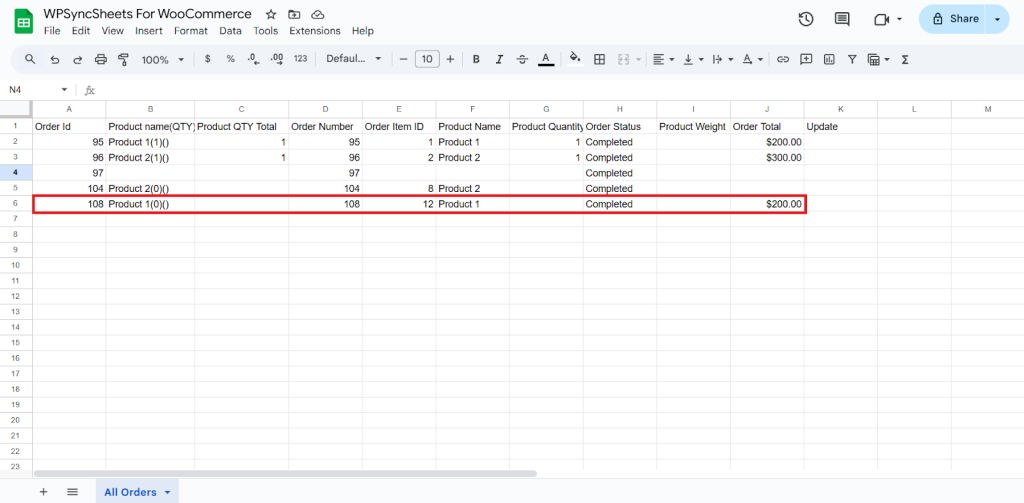
Kindly, make sure you have created a Google Sheet and choose the Order Wise option in the Manage Row Data section. Before we start the import orders process, export orders first.
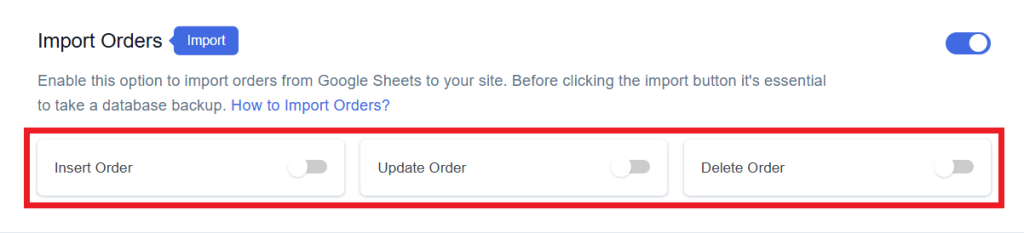
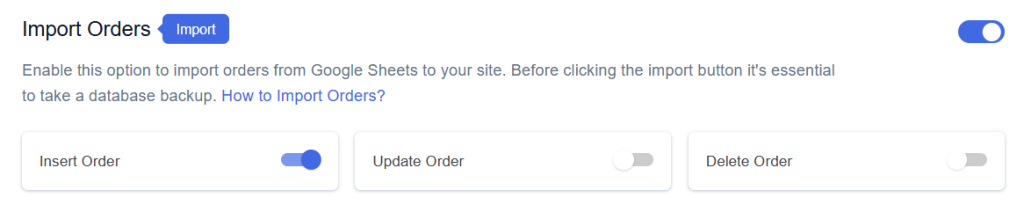
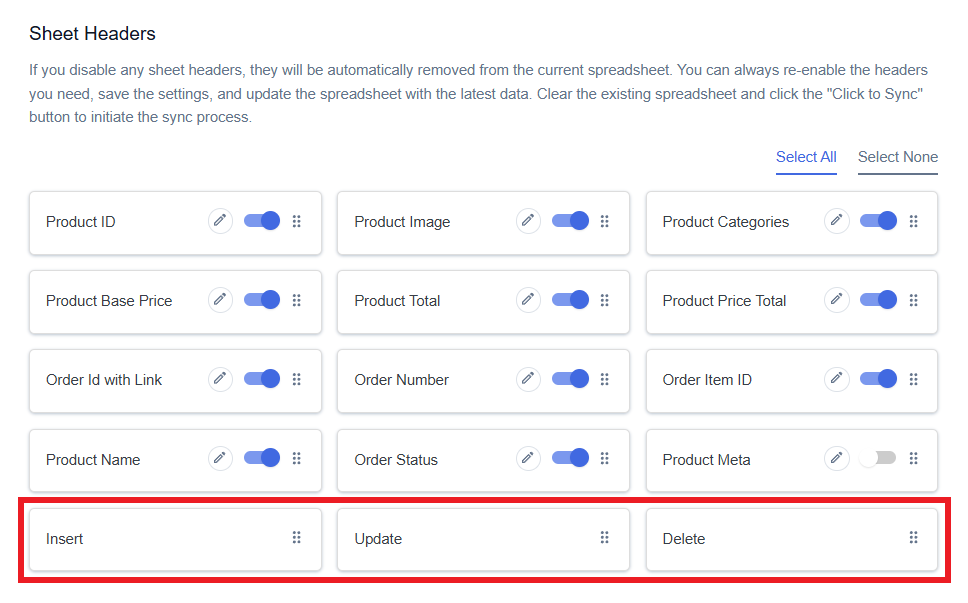
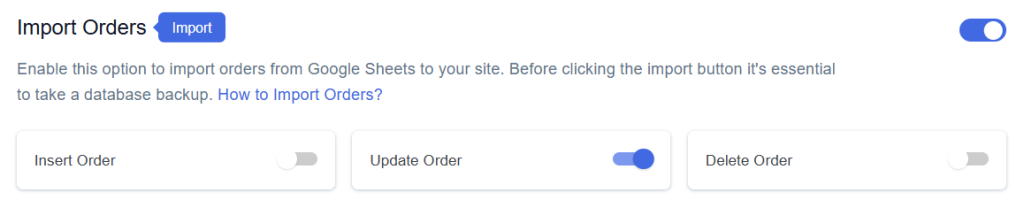
Step 1: Enable Import Orders
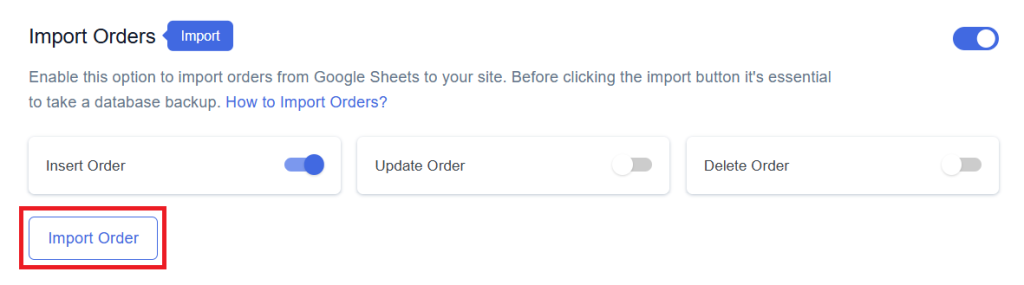
Go WPSyncSheets → Order Settings → Import Orders, after enabling the Import Orders you will see three options.
Step 2
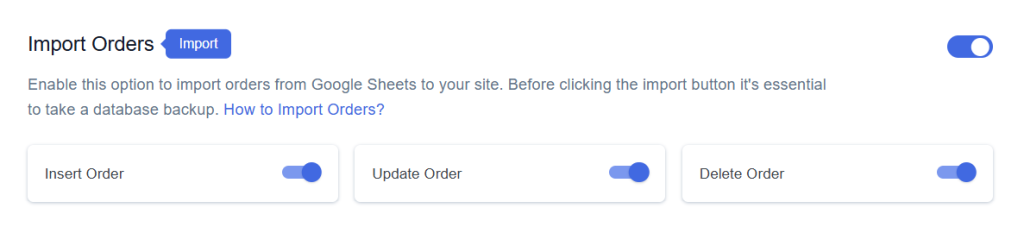
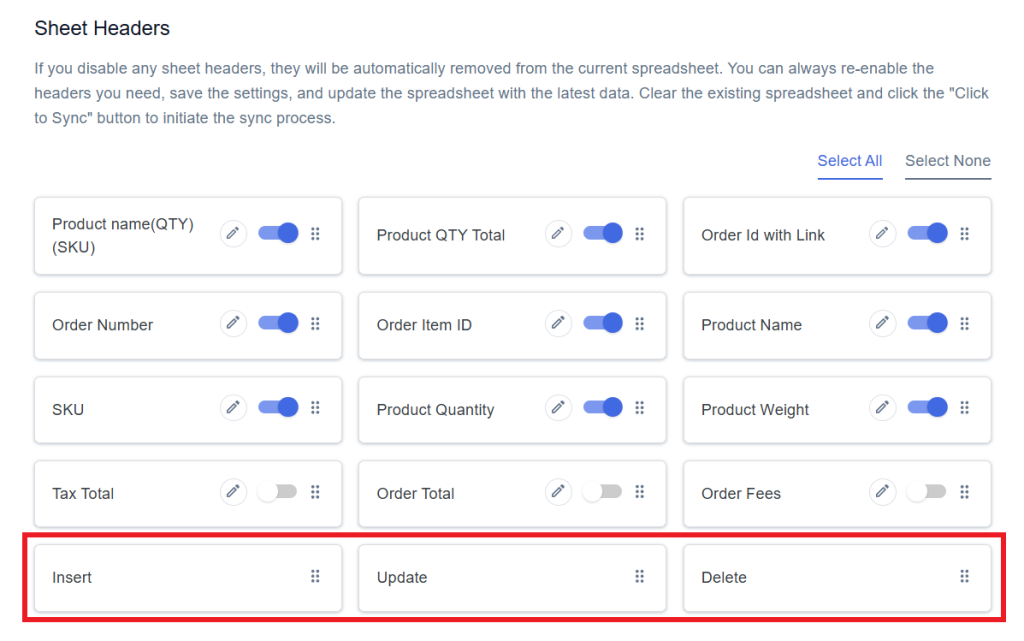
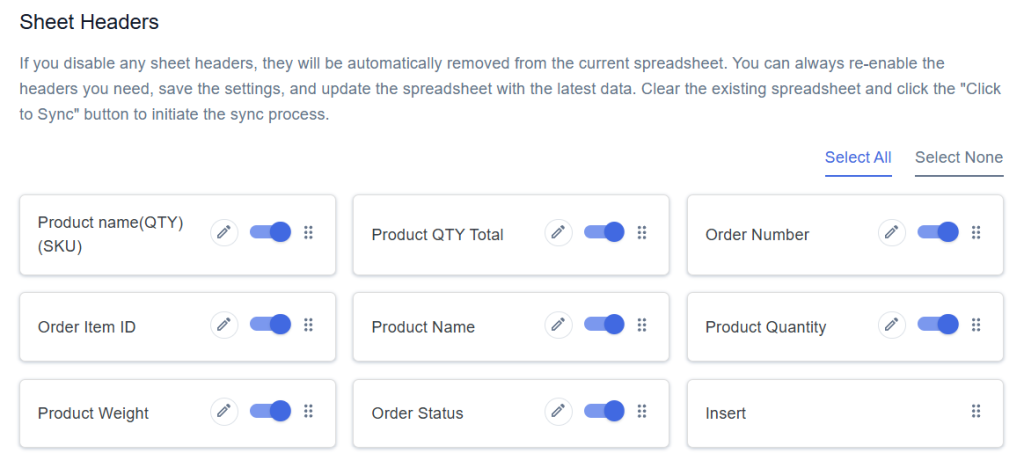
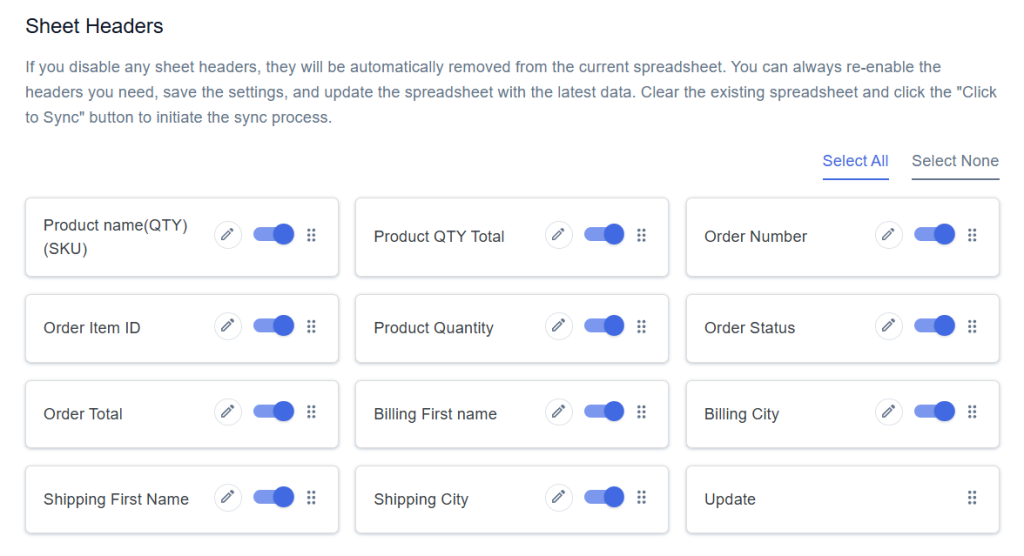
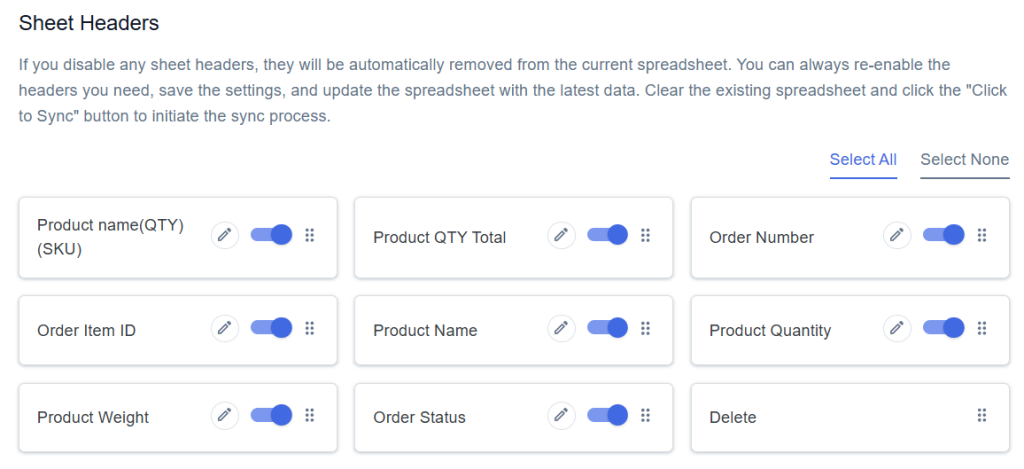
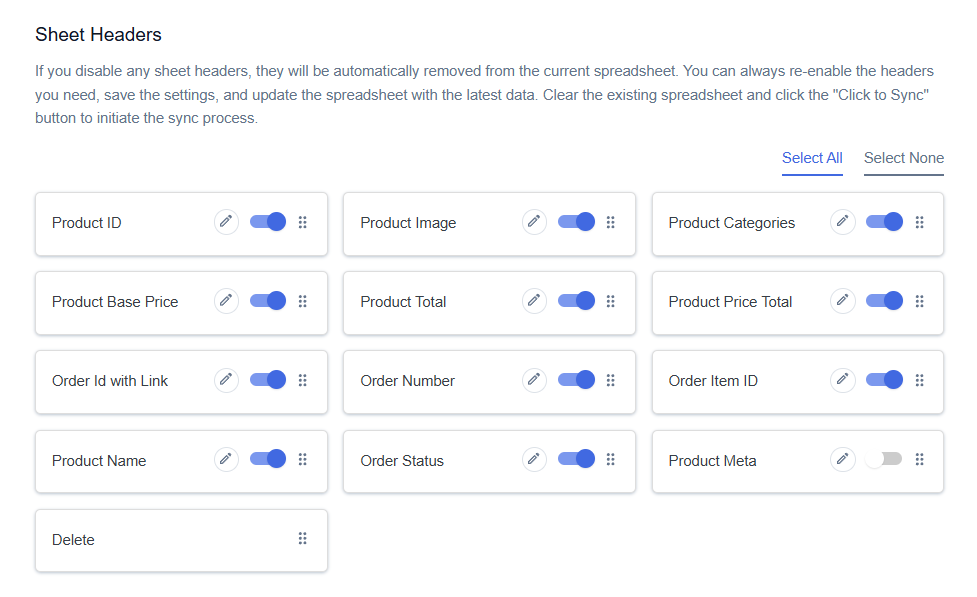
Enable/Disable the options insert/update/delete as per your requirement and Save Settings. Enabled options will be displayed in the Sheet headers.
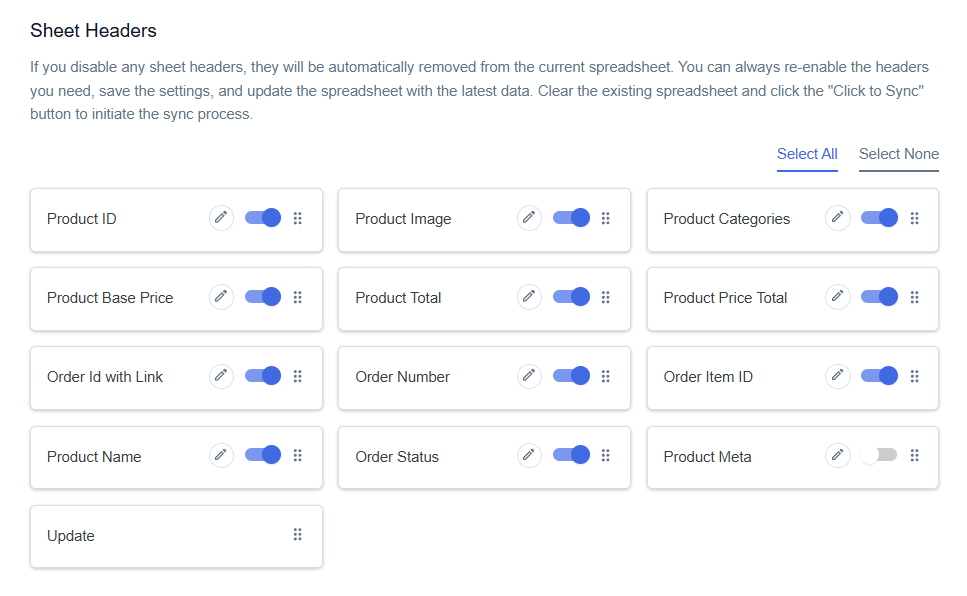
Step 3
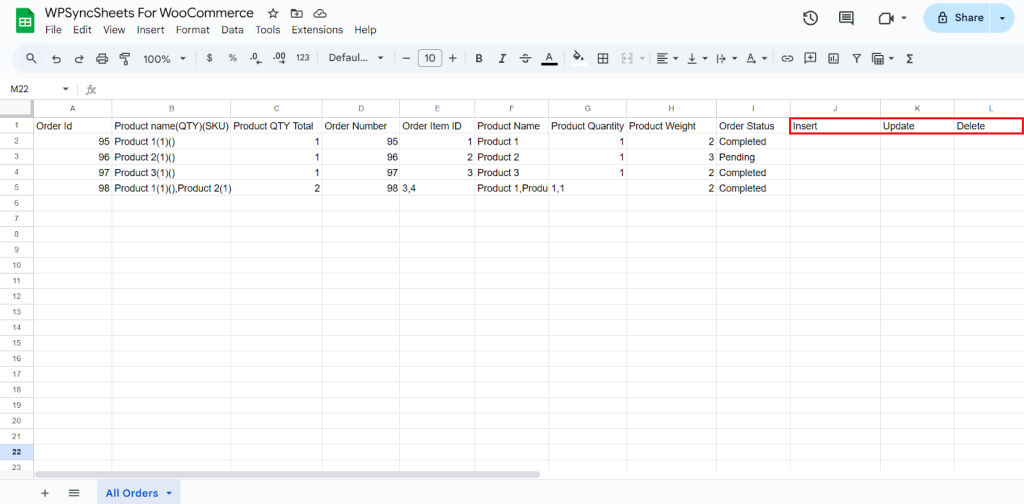
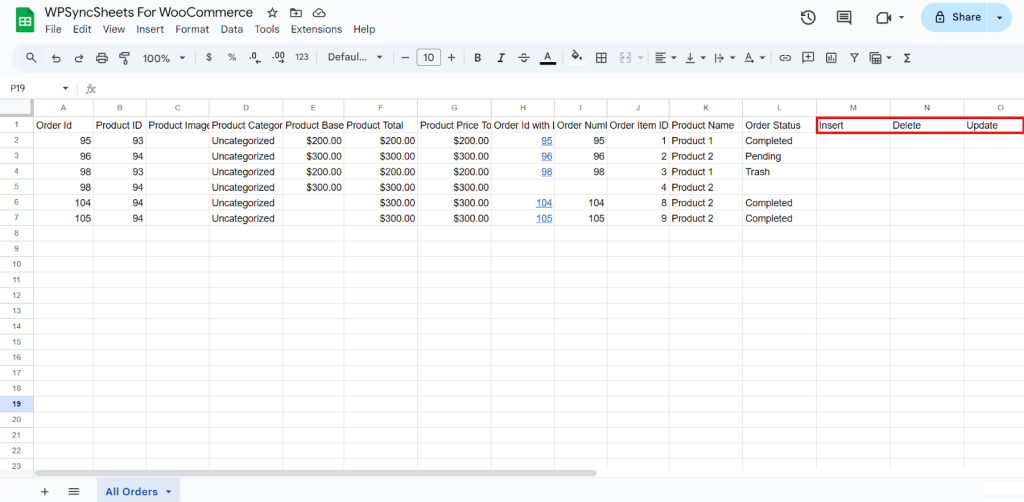
After that, in Google Spreadsheet Settings click on View Spreadsheet.

Original Spreadsheet
After save the settings, our plugin code will automatically add sheet headers respectively.
Insert Orders
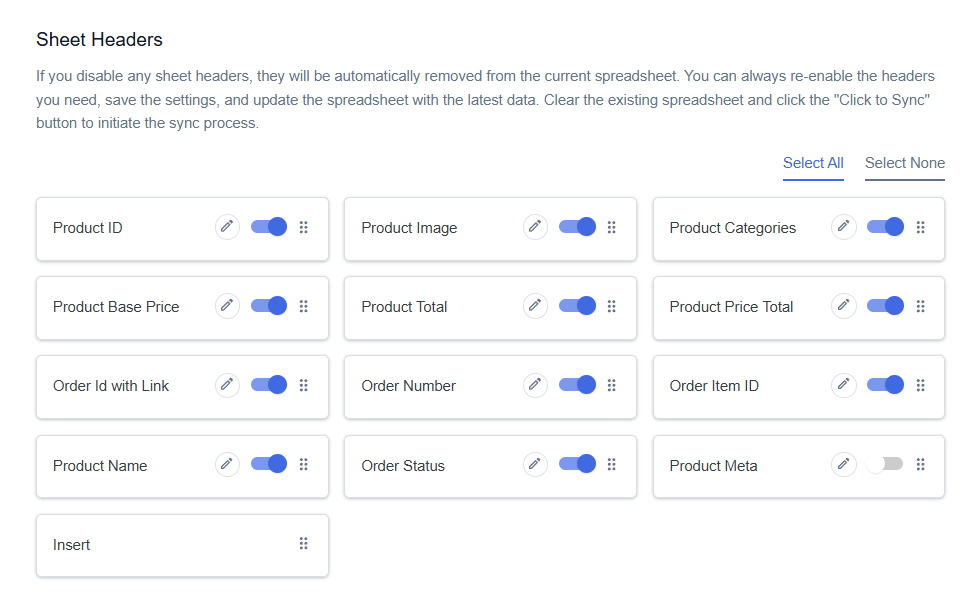
Step 1
Enable Insert to import your desired data.
Step 2
Enable/Disable the sheet headers as per your requirement and click on Save.
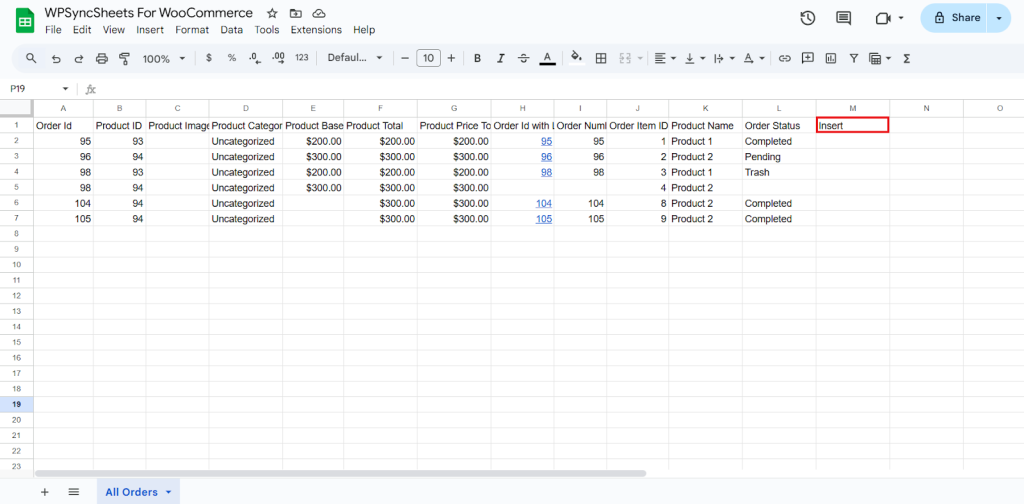
Step 3
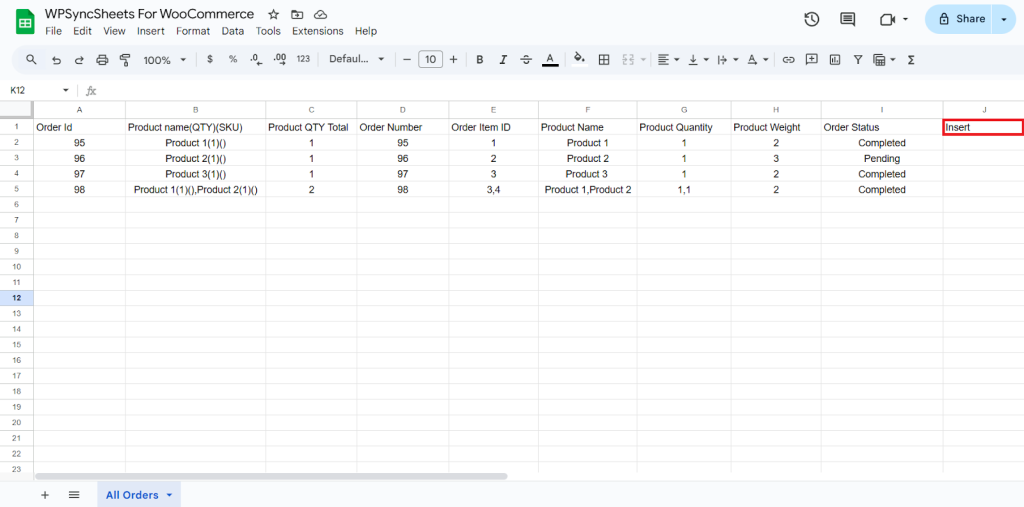
After you save the settings, you will have the “Insert” column in your connected Google Spreadsheet parallelly Import Order option in the settings page.
Step 4
If you add the data manually then make sure you have used the similar format as above row(s) or else you can copy the existing orders.
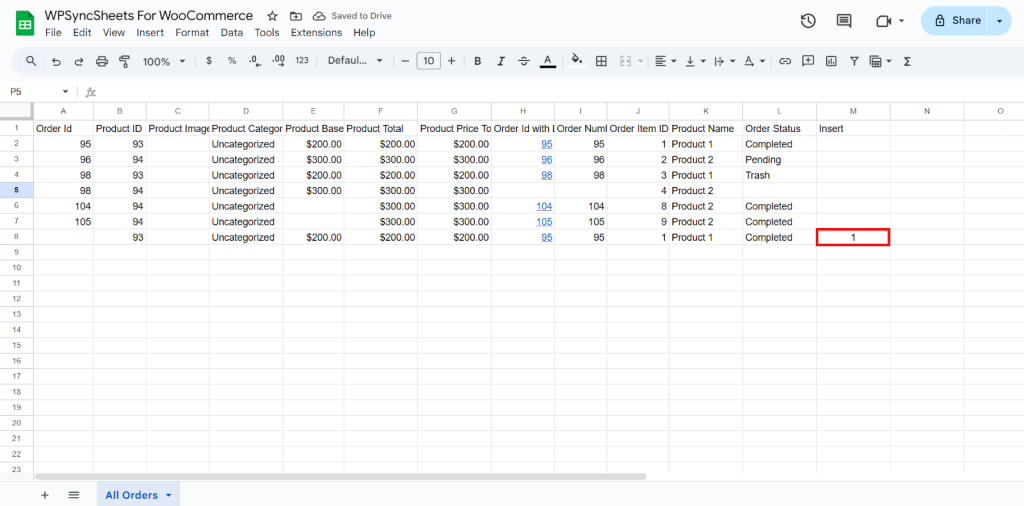
Leave the Order ID blank. Go to the Insert column and type “1” in the row you want to create a new order.
To add Products to an order:
- Enter data in the format Product name(QTY)(SKU) into the Product name(QTY)(SKU) column header cell of the order.
Example: Cap(3)(123)
To add multiple products in one order:
- Enter each product in the same format and separate them with commas , in the same row as the order data.
Example: Cap(3)(123), Belt(5)(456)
To add an additional discount to a single product:
- Use the format Product name(QTY)(SKU)(DISCOUNT)
Example: Cap(3)(123)(10)
If no discount applies:
- Leave the last brackets empty: Product name(QTY)(SKU)()
For Example:
Cap(3)(123)(10), Belt(5)(456) — Adds two products, Cap and Belt, with quantities 3 and 5, a special discount of 10 on Cap, and no discount on Belt.
- Product names must not contain parentheses except for qty/sku/discount.
- Do not include extra spaces inside the brackets.
- Quantity defaults to 1 if no value is provided.
Step 5
Click on the Import Order button.

Step 6
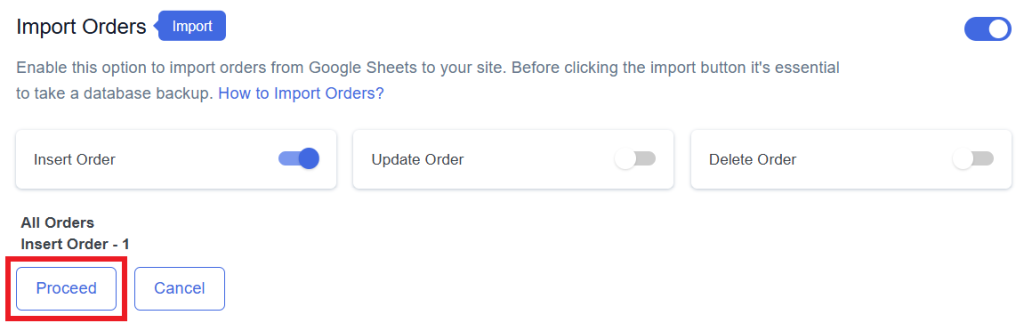
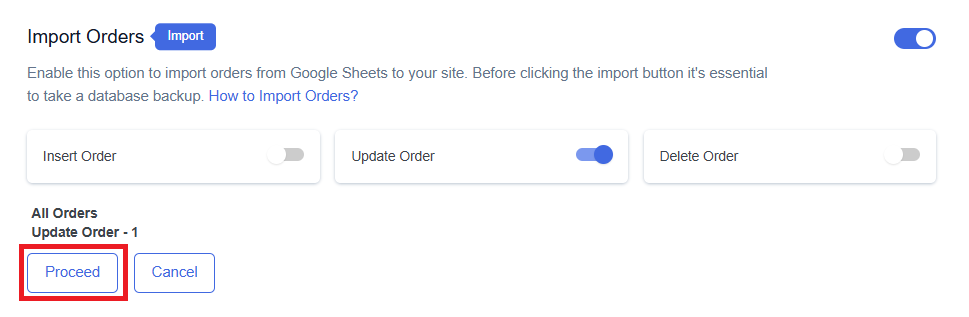
Now, you will have the Proceed option, click on it.

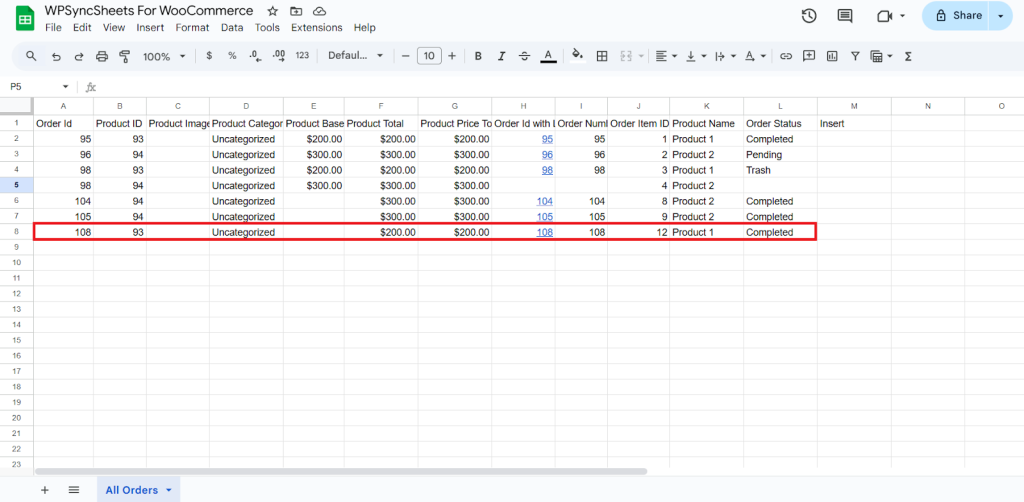
Final Spreadsheet
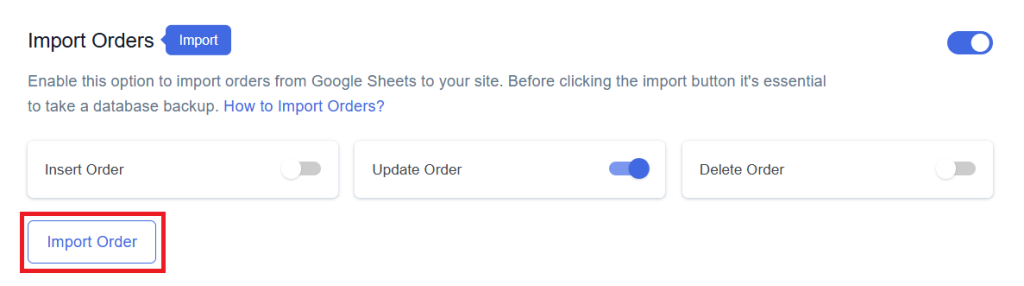
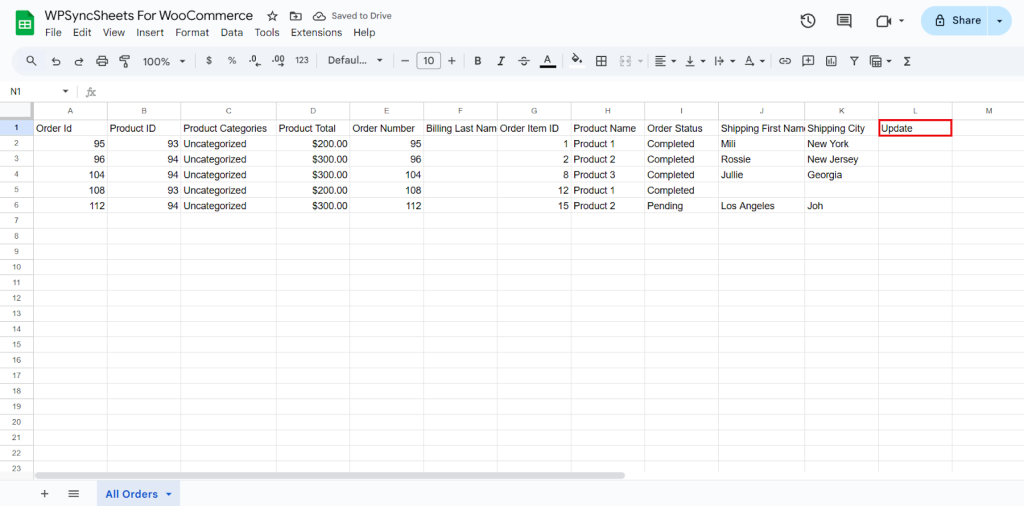
Update Orders
List of Order Fields for Update
Step 1
Enable Update to update your desired data.

Step 2
Enable/Disable the sheet headers as per your requirement and click on Save.
Step 3
After you save the settings, you will have the “Update” column in your connected Google Spreadsheet parallelly Import Order option in the settings page.
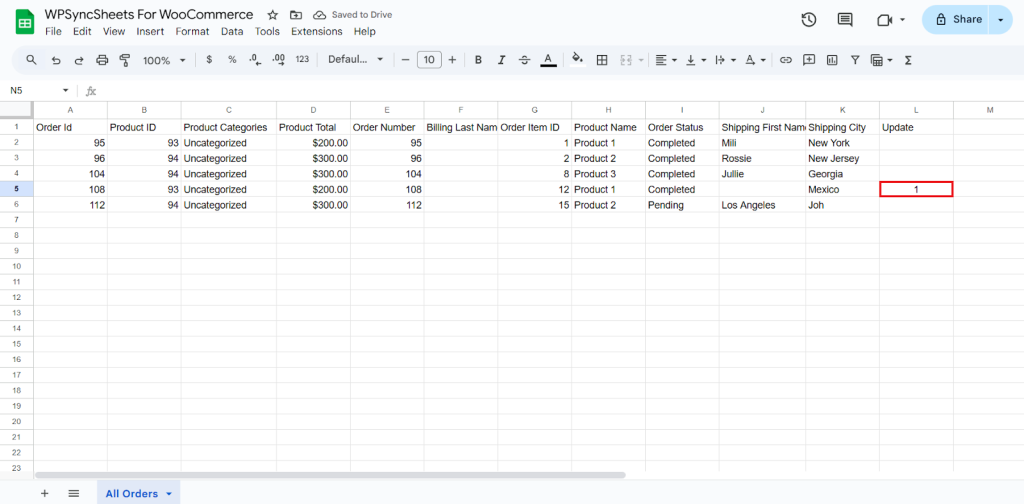
Step 4
Make the changes you want and in the Update column of that row, type “1”, to update a particular column.
Step 5
Click on the Import Order button.
Step 6
Now, you will have the Proceed option, click on it.

Final Spreadsheet
Delete Orders
Step 1
Enable Delete to delete your desired data.

Step 2
Enable/Disable the sheet headers as per your requirement and click on Save.
Step 3
After you save the settings, you will have the “Delete” column in your connected Google Spreadsheet parallelly Import Order option in the settings page.
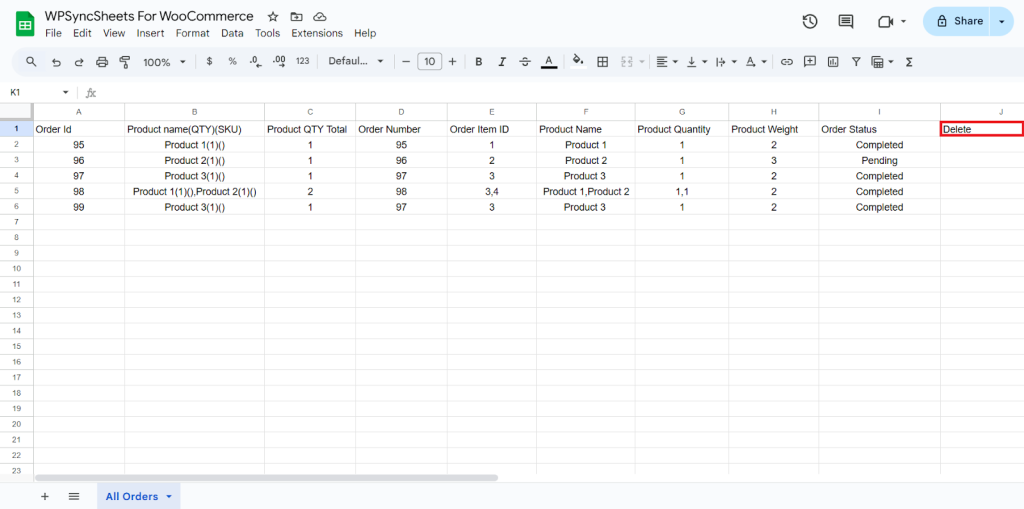
Step 4
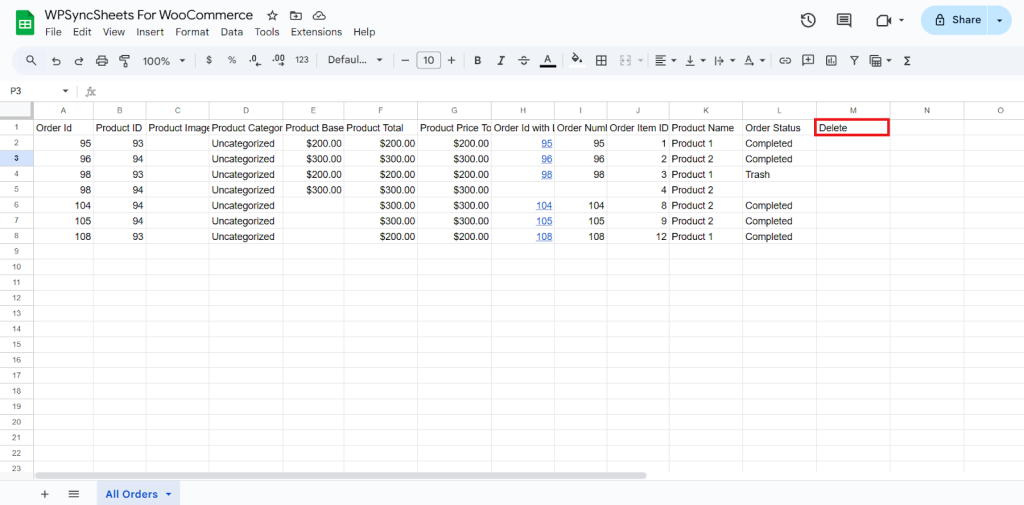
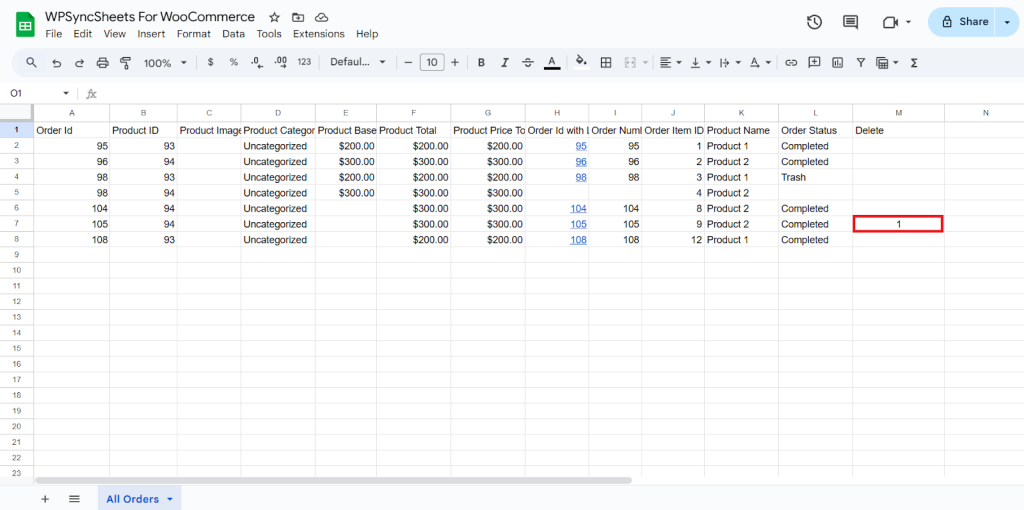
In the Delete column of that row, type “1”, to delete a particular column.
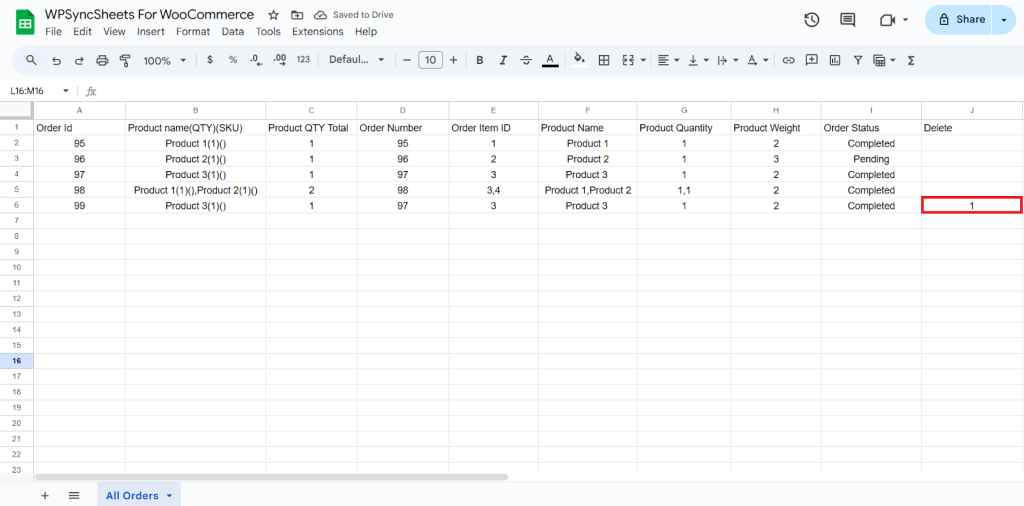
Step 5
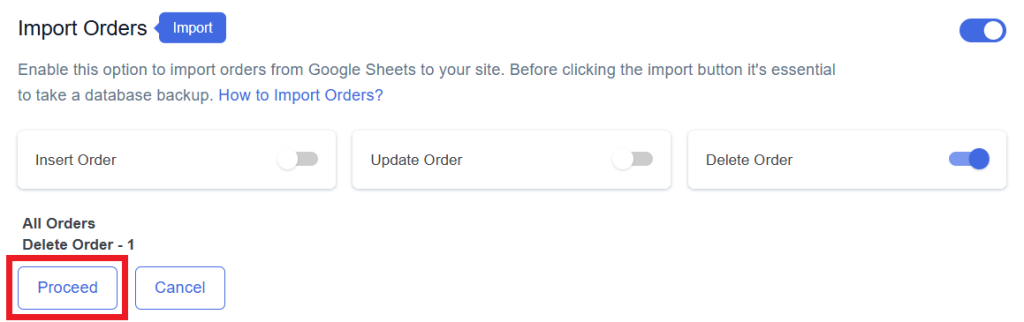
Click on the Import Order button.
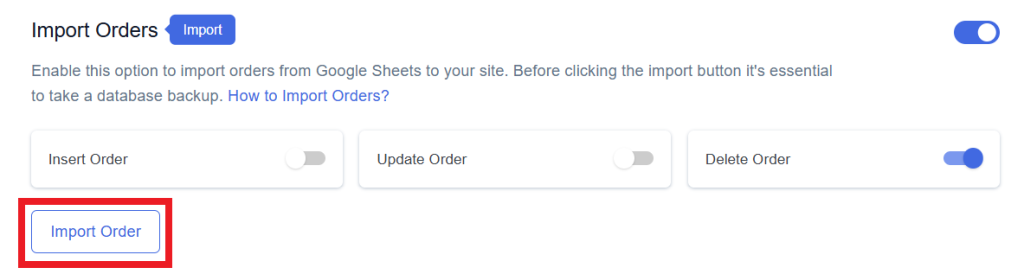
Step 6
Now, you will have the Proceed option, click on it.

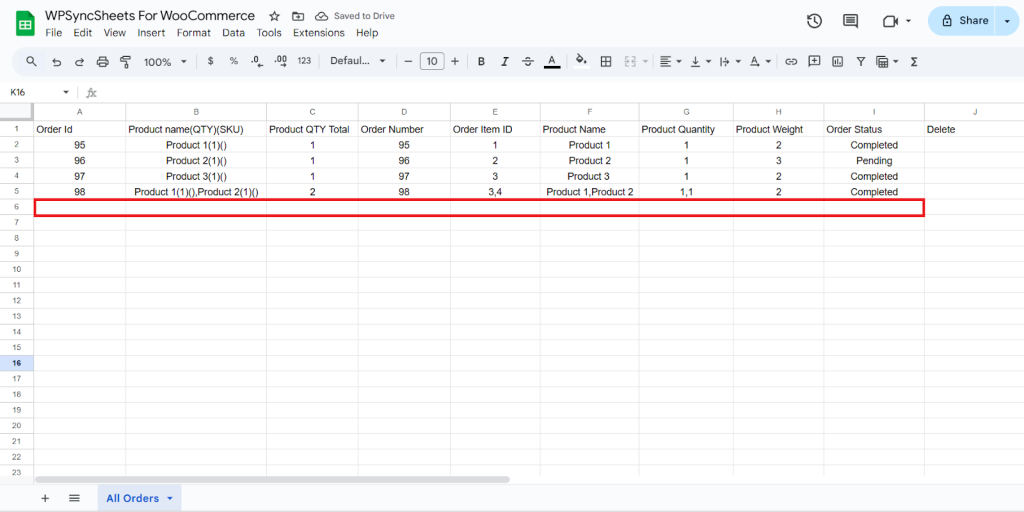
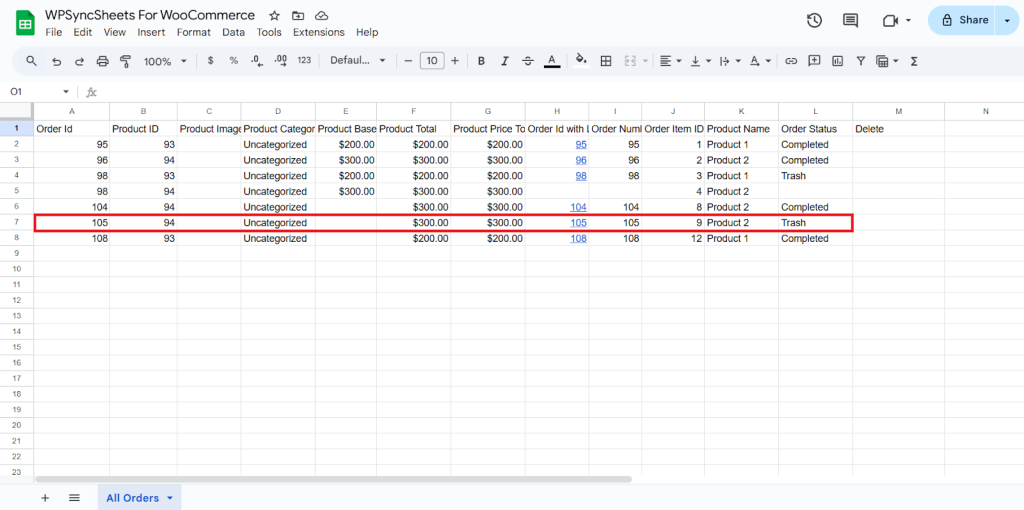
Final Spreadsheet
Kindly, make sure you have created a Google Sheet and choose the Product Wise option in the Manage Row Data section. Before we start the import orders process, export orders first.
Product Wise
Step 1
Find and enable the Import Orders option and after enabling the Import Orders you will see three options.

Step 2
Enable/Disable the options insert/update/delete as per your requirement and Save Settings. Enabled options will be displayed in the Sheet headers.

Step 3
After that, in Google Spreadsheet Settings click on View Spreadsheet.

Original Spreadsheet
After save the settings, our plugin code will automatically add sheet headers respectively.
Insert Orders
Step 1
Enable Insert to import your desired data.

Step 2
Enable/Disable the sheet headers as per your requirement and click on Save.
Step 3
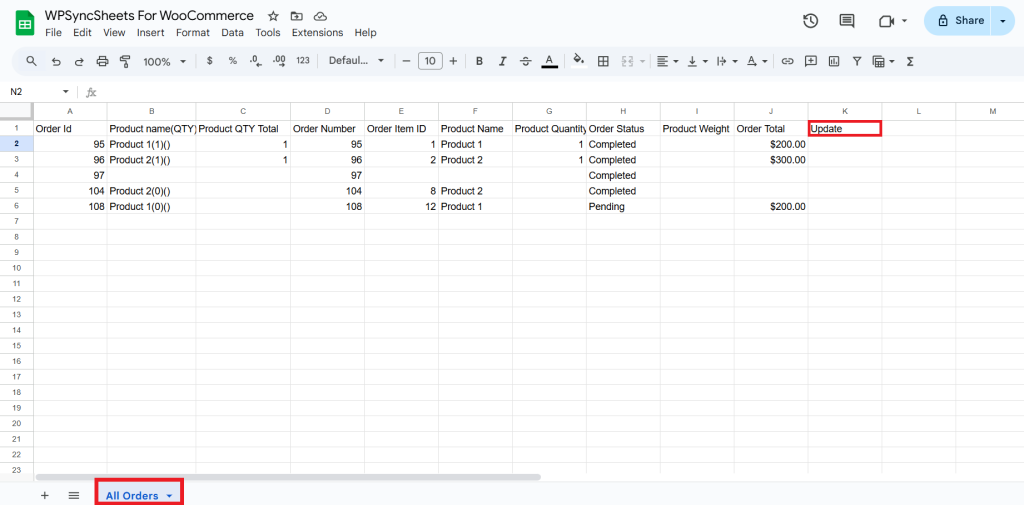
After you save the settings, you will have the “Insert” column in your connected Google Spreadsheet parallelly Import Order option in the settings page.
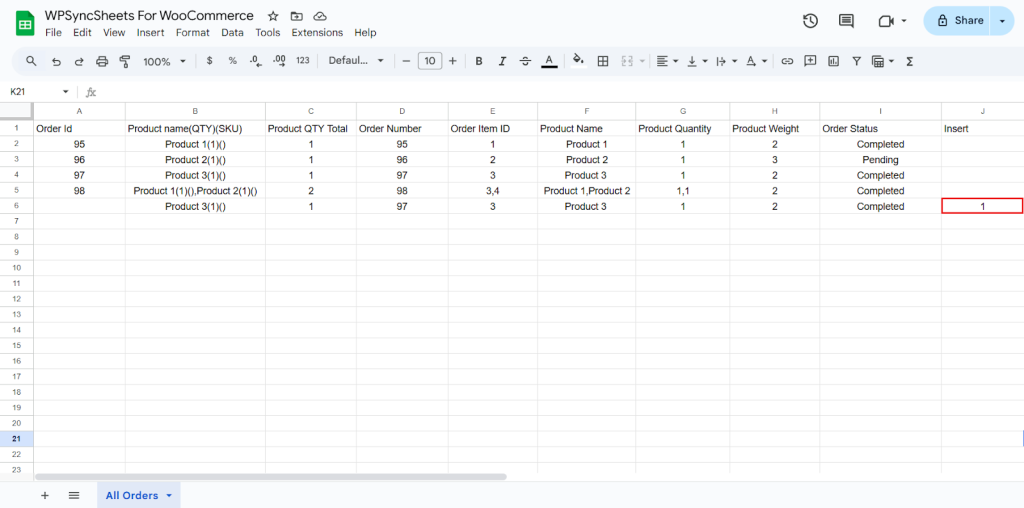
Step 5
Now,
- If you want to add 1 product in one order, create one new row, leave the Order ID column empty, and set Insert = 1.
- If you want to add multiple products in one order, create multiple rows (one row per product) and leave the Order ID column empty for all rows:
- Set Insert = 1 for the first product row
- Set Insert = 2 for the remaining product rows
👉 This ensures that all products are added under one single order instead of creating separate orders.
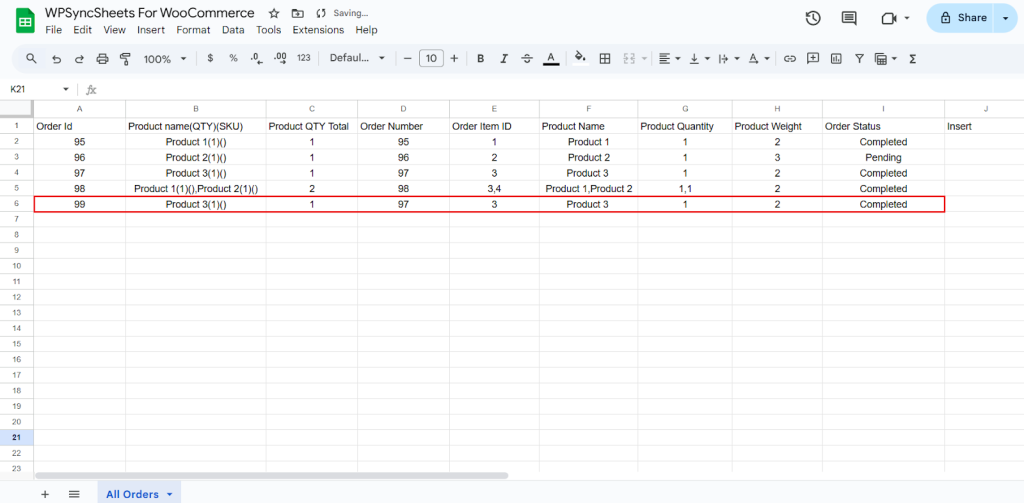
Step 6
Click on the Import Order button.
Step 7
Now, you will have the Proceed option, click on it.
Final Spreadsheet
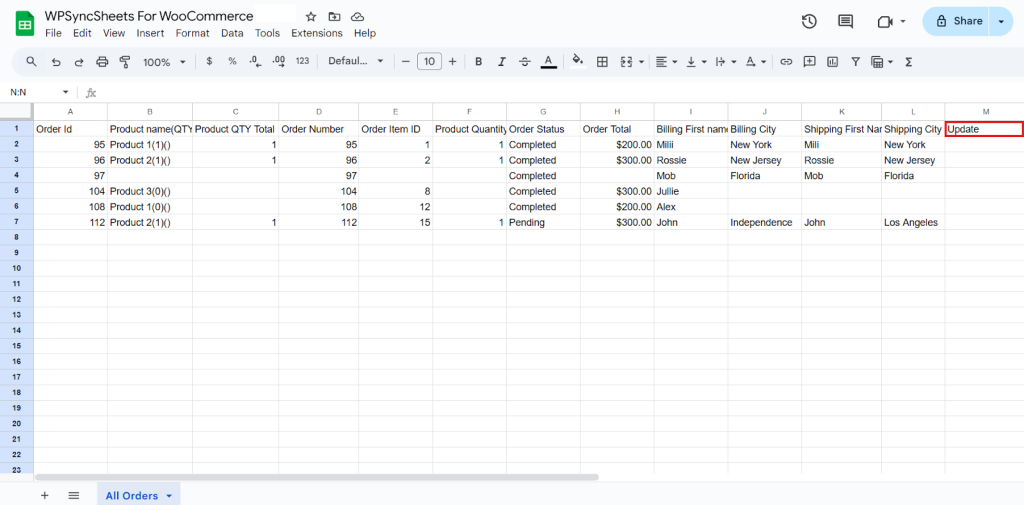
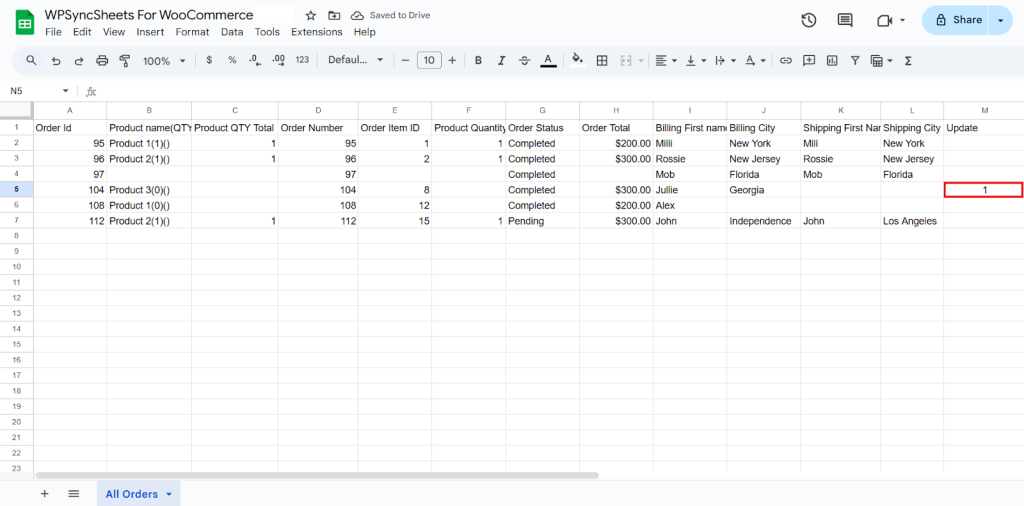
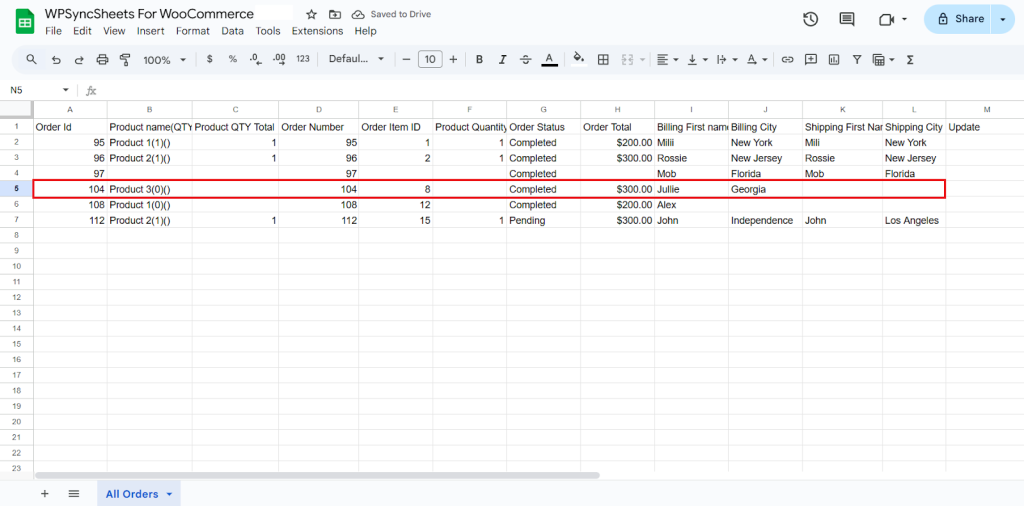
Update Orders
Step 1
Enable Update to update your desired data.
Step 2
Enable/Disable the sheet headers as per your requirement and click on Save.
Step 3
After you save the settings, you will have the “Update” column in your connected Google Spreadsheet parallelly Import Order option in the settings page.
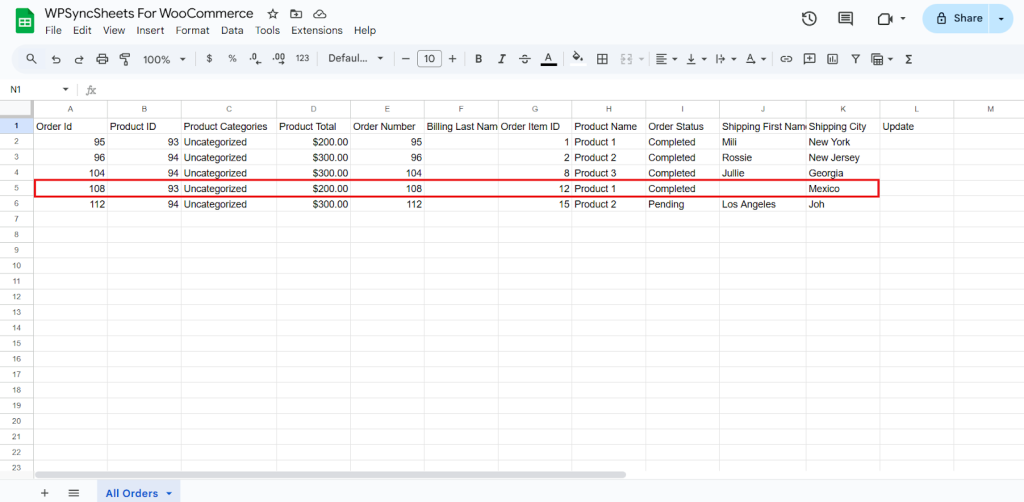
Shipping City → Not Provided
Step 4
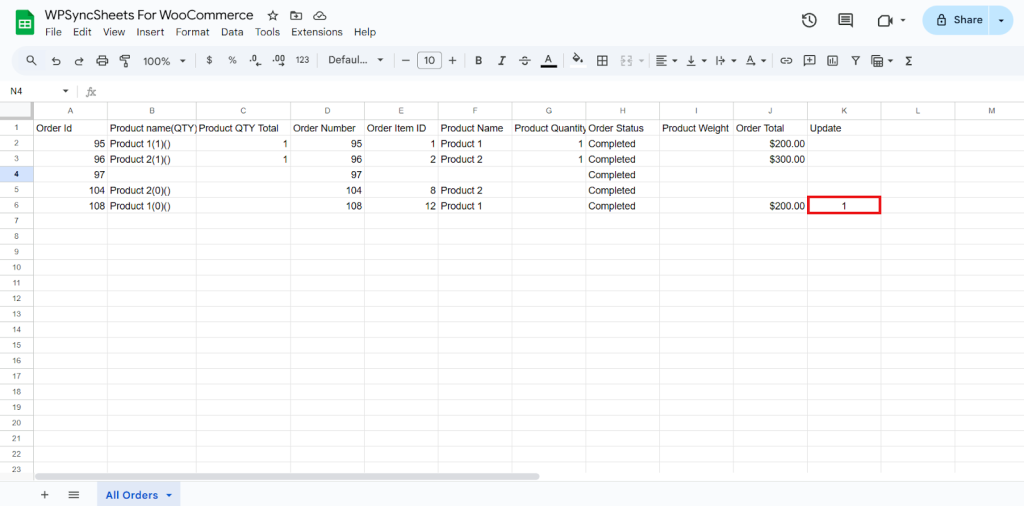
To update a specific row, make the necessary changes and enter ‘1‘ in the ‘Update‘ column of that row.
Shipping City → Mexico
Step 5
Click on the Import Order button.

Step 6
Now, you will have the Proceed option, click on it.
Final Spreadsheet
Delete Orders
Step 1
Enable Delete to delete your desired data.

Step 2
Enable/Disable the sheet headers as per your requirement and click on Save.
Step 3
After you save the settings, you will have the “Delete” column in your connected Google Spreadsheet, parallelly Import Order option in the settings page.
Step 4
In the Delete column of that row, type “1”, to delete a particular column.
Our plugin will not delete the entire order from the WooCommerce but it will change the order status to trash.
Step 5
Click on the Import Order button.

Step 6
Now, you will have the Proceed option, click on it.
Final Spreadsheet
How to change order status from Google Sheet?
Step 1
Open your connected Google Sheet
Step 2
Go to the “All Orders” tab
Step 3
Locate the order you want to update by checking the Order Id column.
Step 4
In the row of that order, find the column named Order Status.
Step 5
Change the status value in that column to one of the supported WooCommerce statuses:
- pending
- processing
- on-hold
- completed
- cancelled
- refunded
- failed
Step 6
Add “1” in Update column.
Order Status : Pending → Completed
Step 7
Click on the Import Order button.
Step 8
Now, you will have the Proceed option, click on it.
Final Spreadsheet