How to Import Variation Products?
Kindly make sure you have created the attribute as you want to assign to a respective product.
Step 1
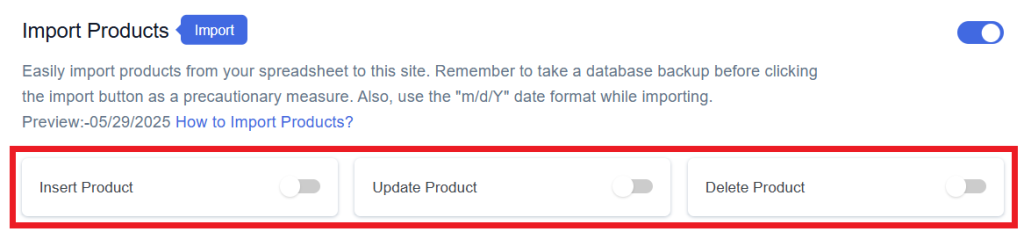
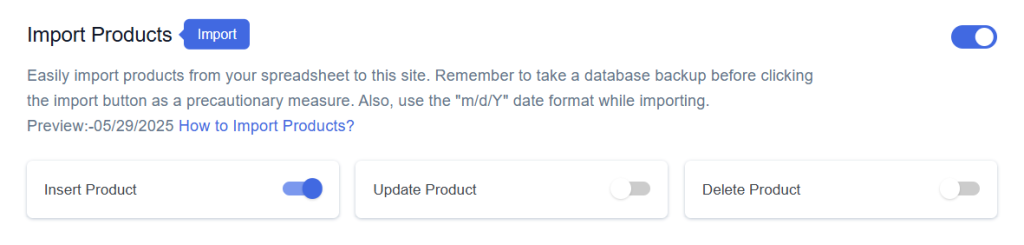
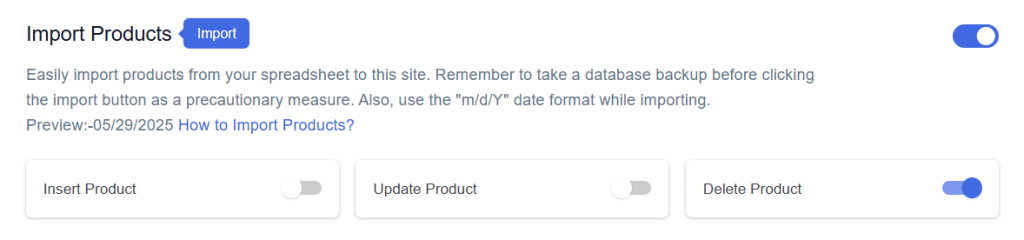
Find and enable the Import Products option and after enabling the Import Products you will see three options.
Step 2
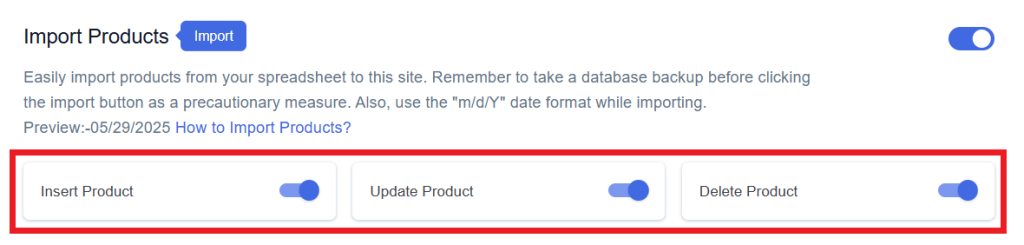
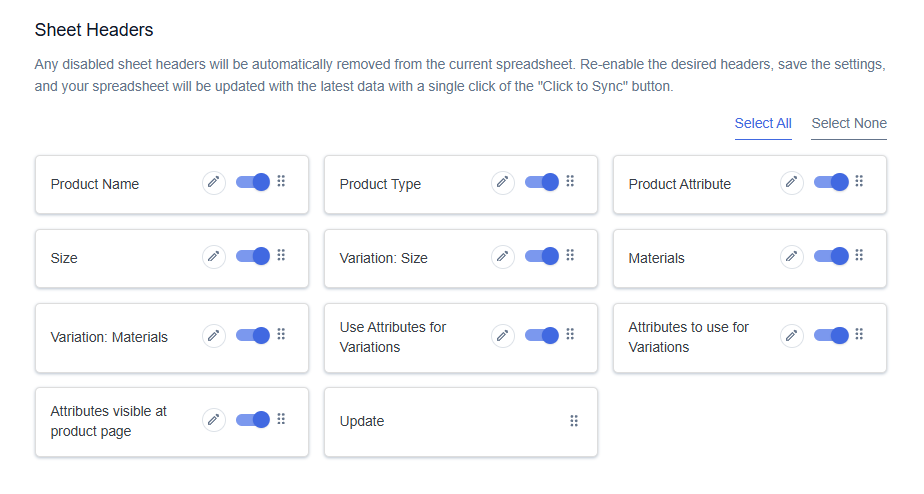
Enable/Disable the options insert/update/delete as per your requirement and Save Settings. Enabled options will be displayed in the Sheet headers.

Step 3
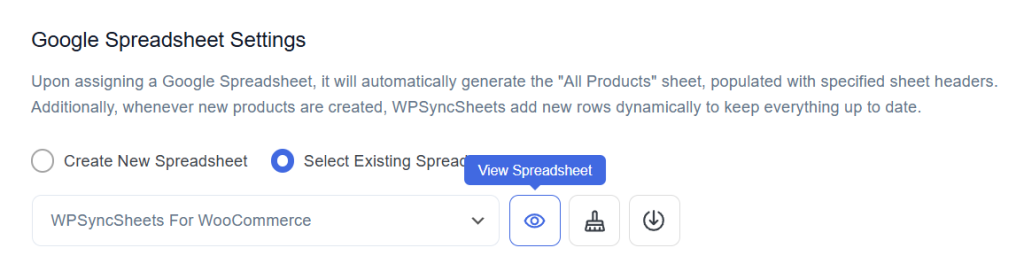
After that, in Google Spreadsheet Settings click on View Spreadsheet.
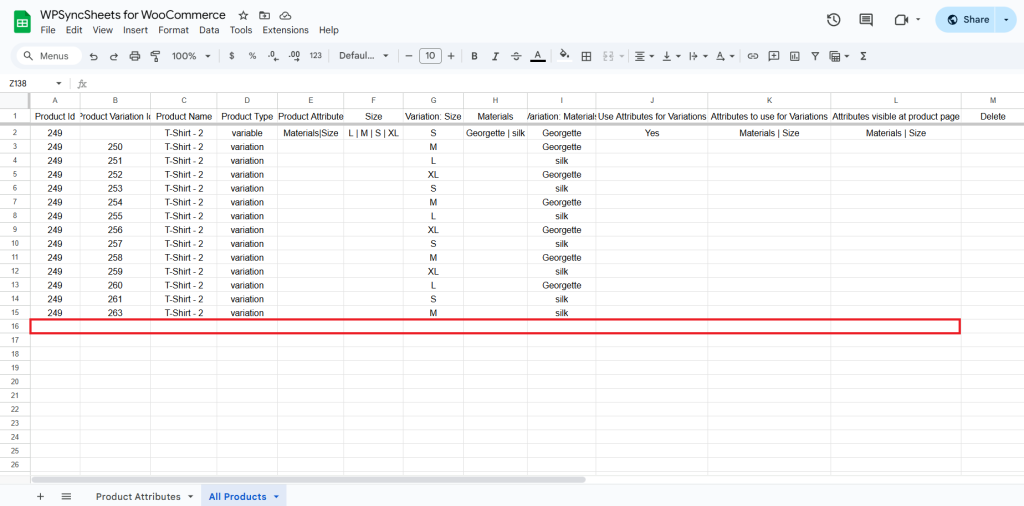
Original Spreadsheet
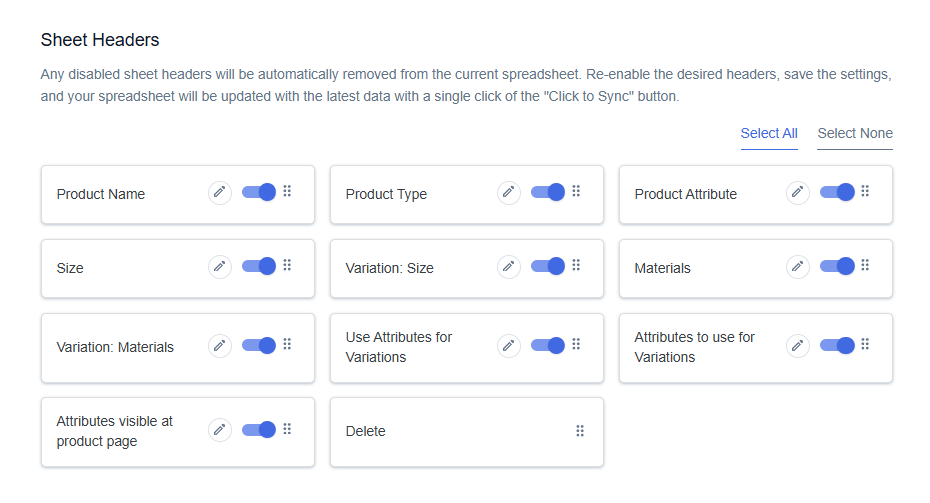
After save the settings, our plugin code will automatically add sheet headers respectively.

Insert Products
Step 1
Enable Insert to import your desired data.
Step 2
Enable/Disable the sheet headers as per your requirement and click on Save.

Step 3
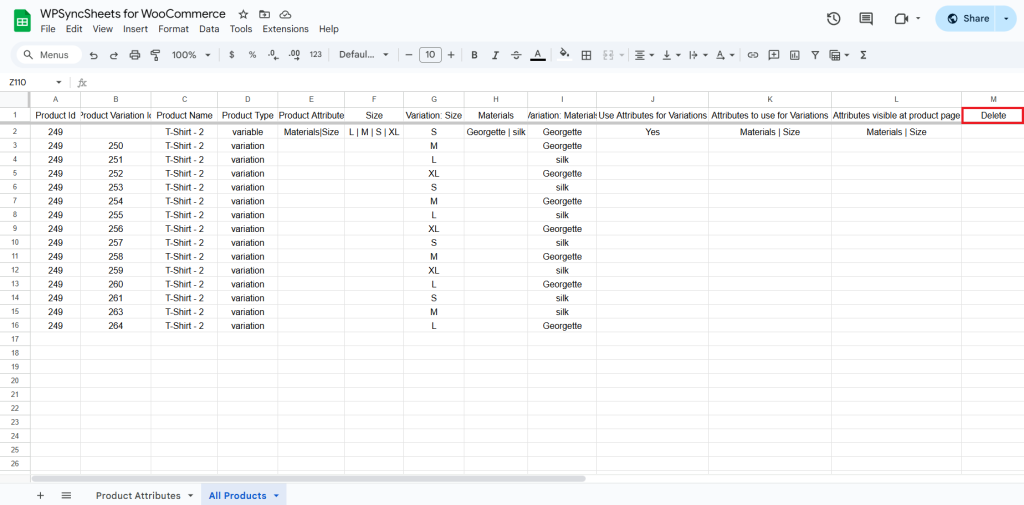
After you save the settings, you will have the “Insert” column in your connected Google Spreadsheet parallelly Import Product option in the settings page.
Step 4
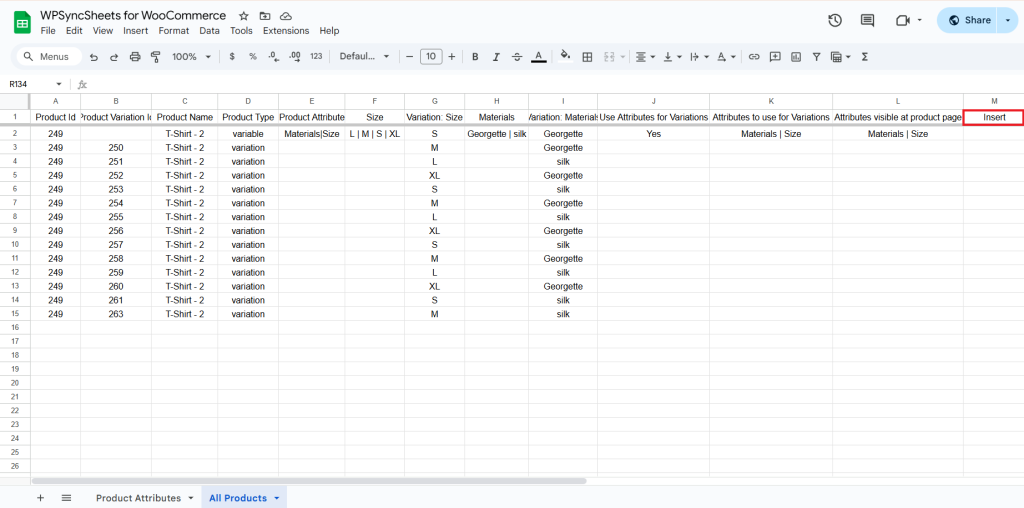
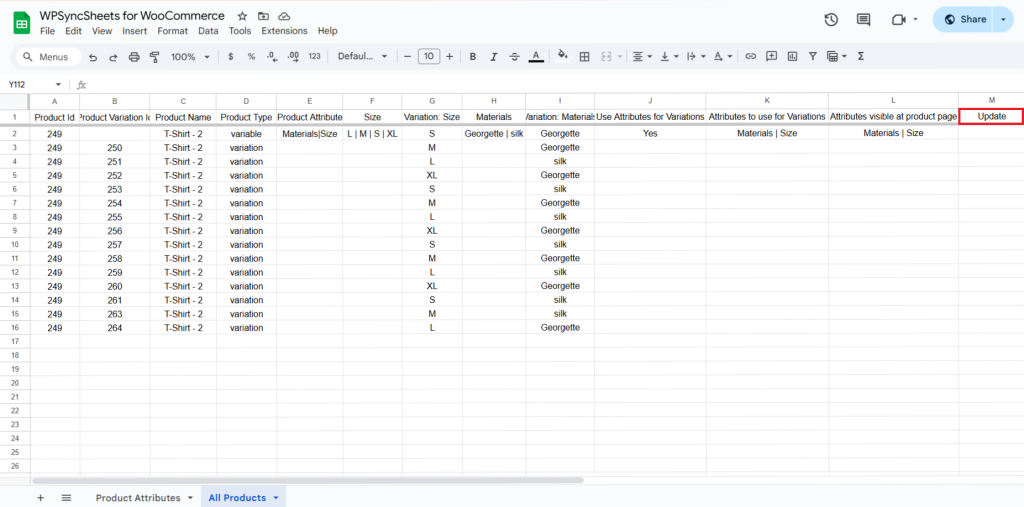
Add variation in existing products.
It counts every variation as a separate product. To add a new product, fill the required details like product name, product type, variation: size, variation: color etc.
Do not leave the Product ID empty. If you’re creating a variation, make sure to use the same Product ID as the main (variable) product. This is important because the variation will fetch details from that main product.
- Leave the Product variation ID blank.
- In the attribute column (e.g., Size, Color, Material, etc.),
add the values you want to use—separated by the | symbol.- Example: L | M | S | XL, this means the product will have 4 sizes: L,M,S,XL.
- Only the values listed in these attribute columns will be accepted in the corresponding variation columns.
- For example, if the “Size” attribute column has values like L | M | S | XL , and you enter Variation: Size → L, it will be accepted.
- But if you enter a value not present in the “Size” column (e.g., 2XL), it will not be imported.
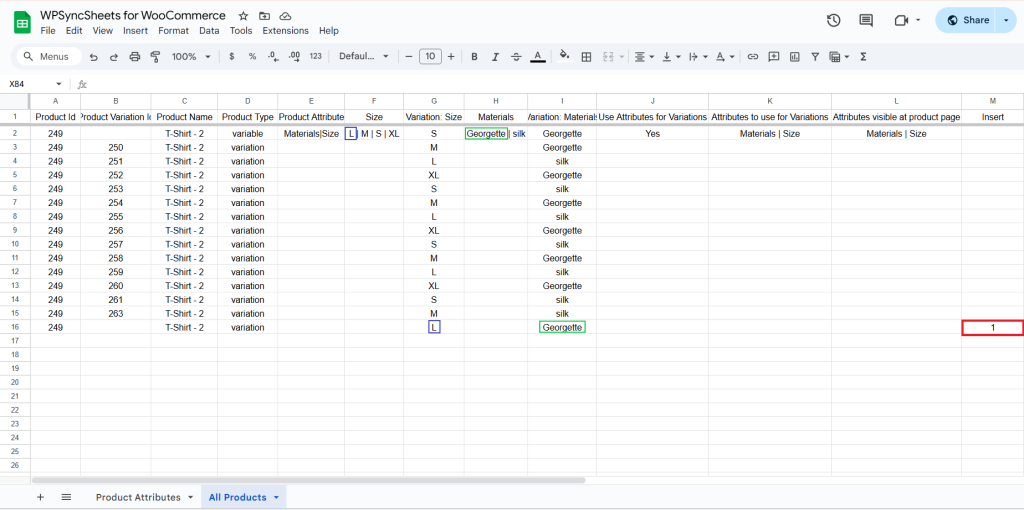
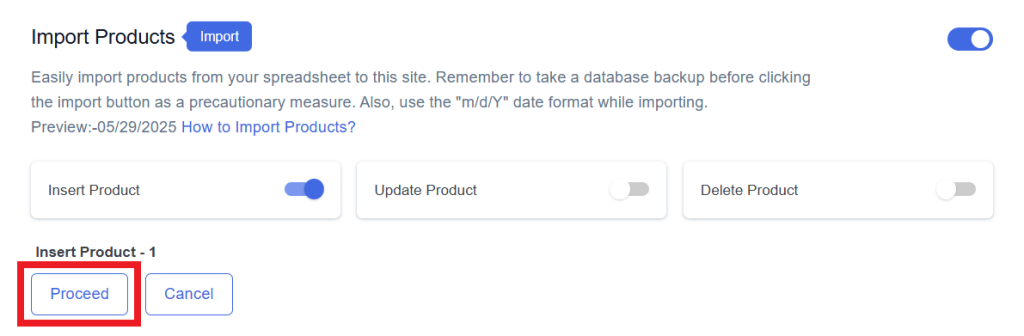
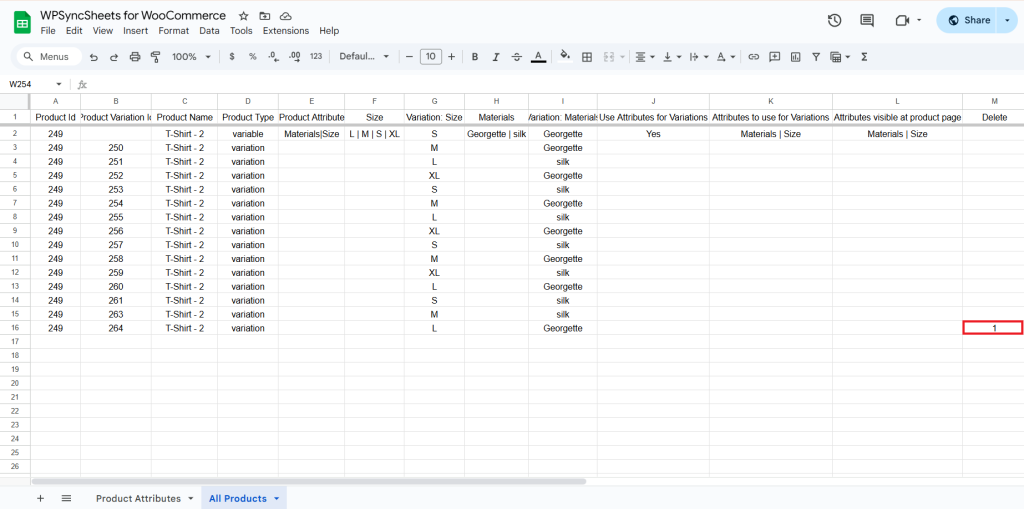
Go to the Insert column and type “1” in the row you want to create a new product.
Step 5
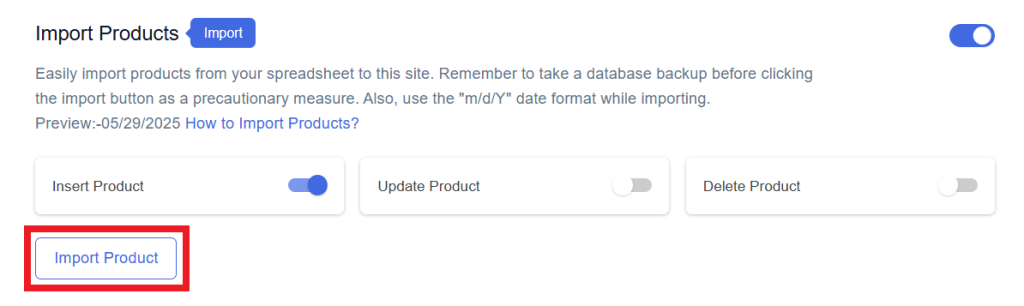
Click on the Import Product button.
Step 6
Now, you will have the Proceed option, click on it.
Final Spreadsheet

Update Products
Step 1
Enable Update to update your desired data.
Step 2
Enable/Disable the sheet headers as per your requirement and click on Save.
Step 3
After you save the settings, you will have the “Update” column in your connected Google Spreadsheet parallelly Import Product option in the settings page.
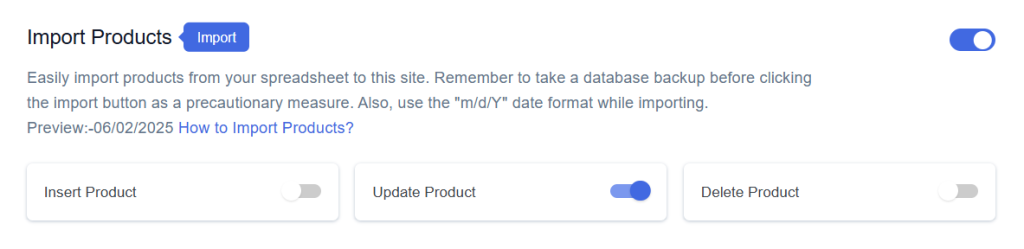
Step 4
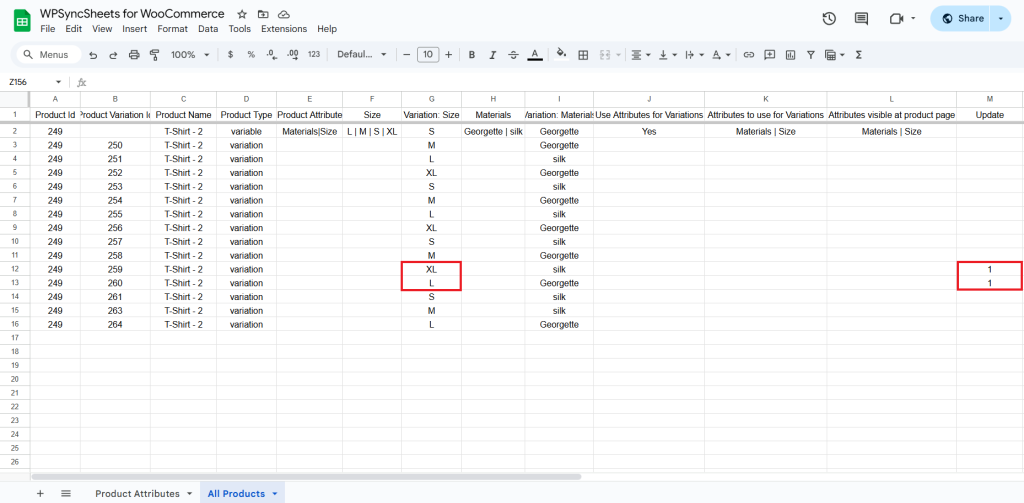
Make the changes you want and in the Update column of that row, type “1”, to update a particular column.
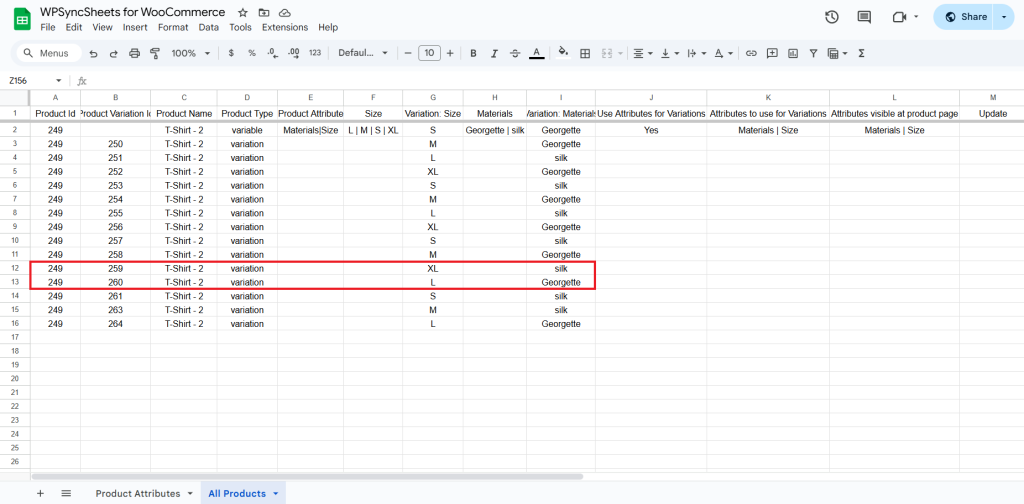
259: Variation: size – L → XL
260: Variation: size – XL → L
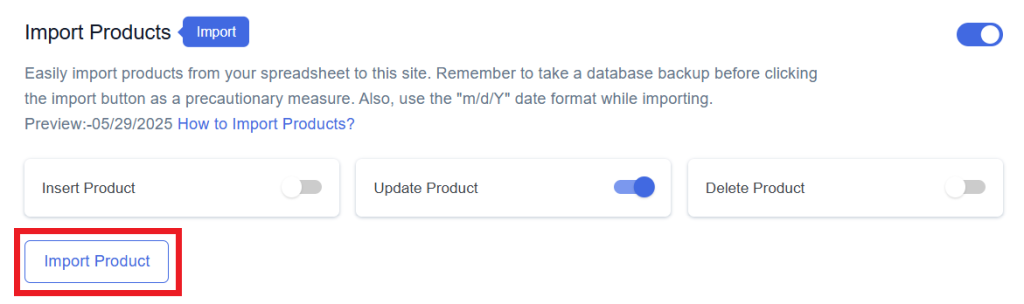
Step 5
Click on the Import Product button.
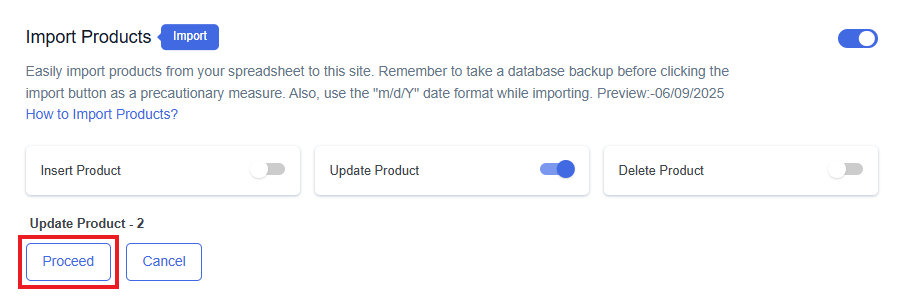
Step 6
Now, you will have the Proceed option, click on it.
Final Spreadsheet
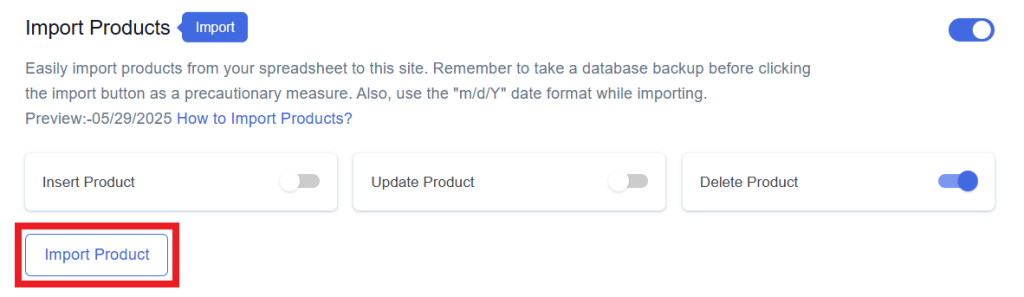
Delete Products
Step 1
Enable Delete to delete your desired data.
Step 2
Enable/Disable the sheet headers as per your requirement and click on Save.
Step 3
After you save the settings, you will have the “Delete” column in your connected Google Spreadsheet parallelly Import Product option in the settings page.
Step 4
In the Delete column of that row, type “1”, to delete a particular row.
Step 5
Click on the Import Product button.
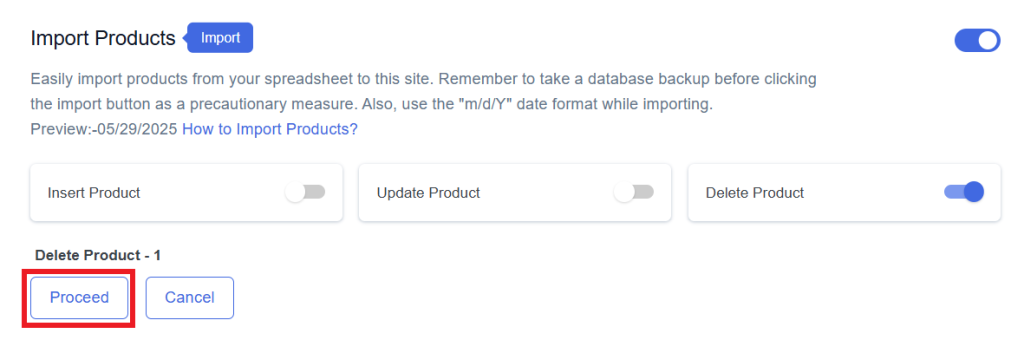
Step 6
Now, you will have the Proceed option, click on it.
Final Spreadsheet