Import WooCommerce Products with WPSyncSheets For WooCommerce plugin
If users want to add new products in bulk, update prices, descriptions, or stock levels, they need to import products. It saves time, reduces manual errors, and avoids repetitive products edits within WooCommerce.
There are 4 types of Import Products in WooCommerce.
How to Import Simple Products?
Step 1
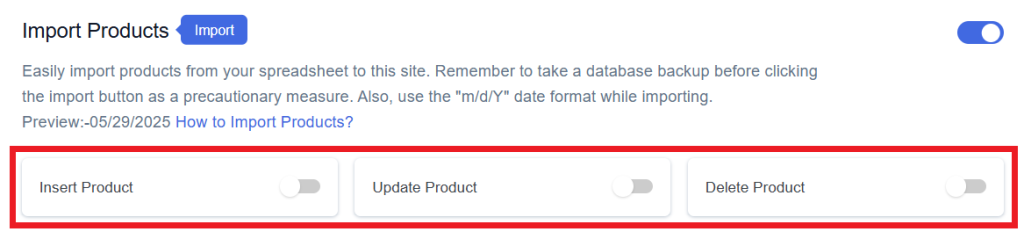
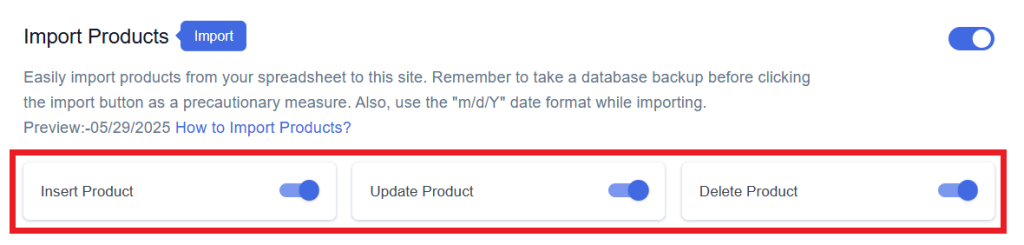
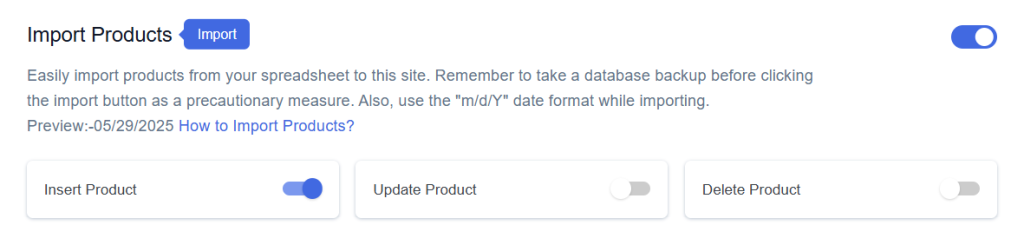
Find and enable the Import Products option and after enabling the Import Products you will see three options.
Step 2
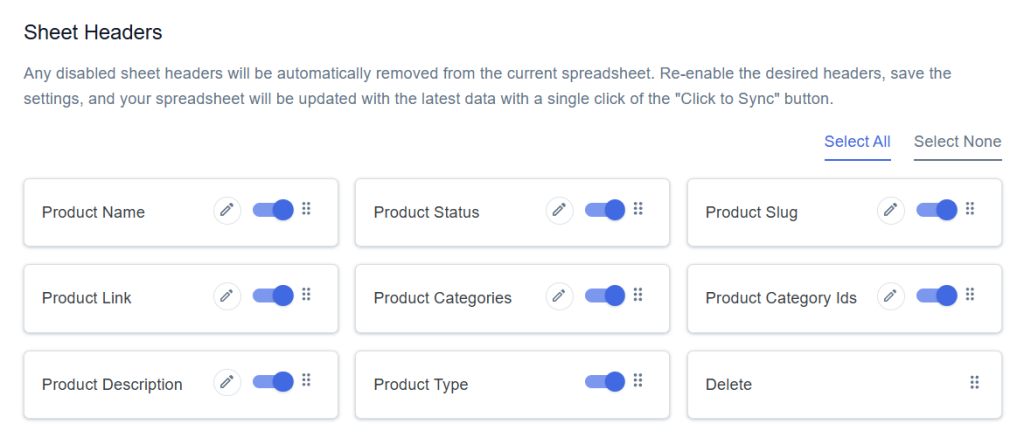
Enable/Disable the options insert/update/delete as per your requirement and Save Settings. Enabled options will be displayed in the Sheet headers.
Step 3
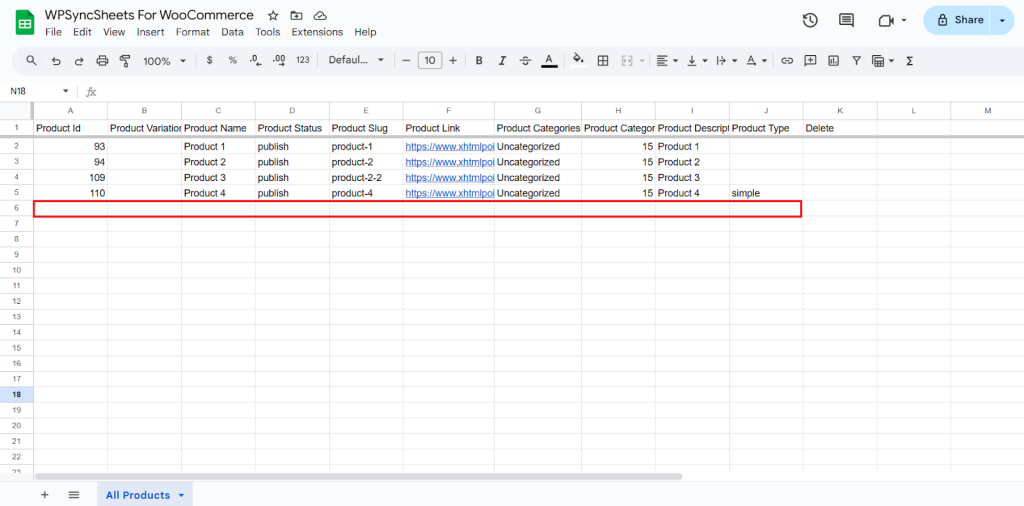
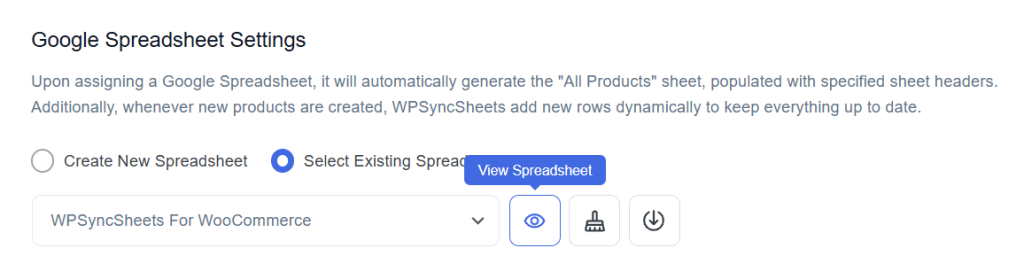
After that, in Google Spreadsheet Settings click on View Spreadsheet.
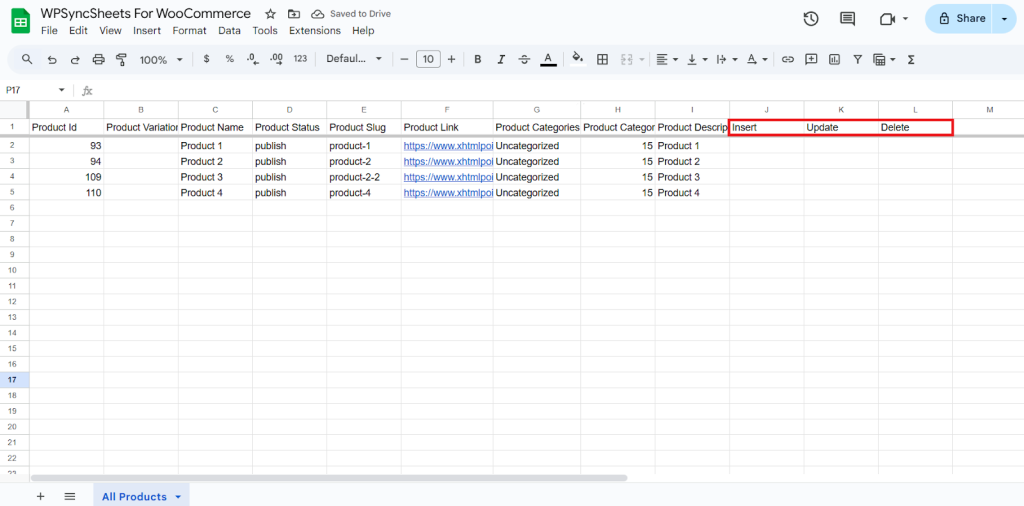
Original Spreadsheet
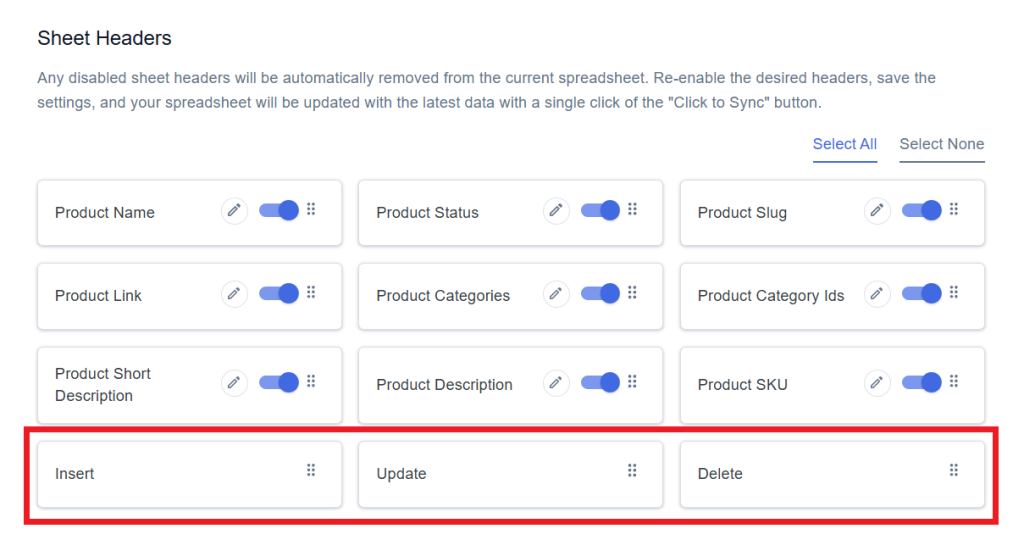
After save the settings, our plugin code will automatically add sheet headers respectively.
Insert Products
Step 1
Enable Insert to add your desired product in a new row.
Step 2
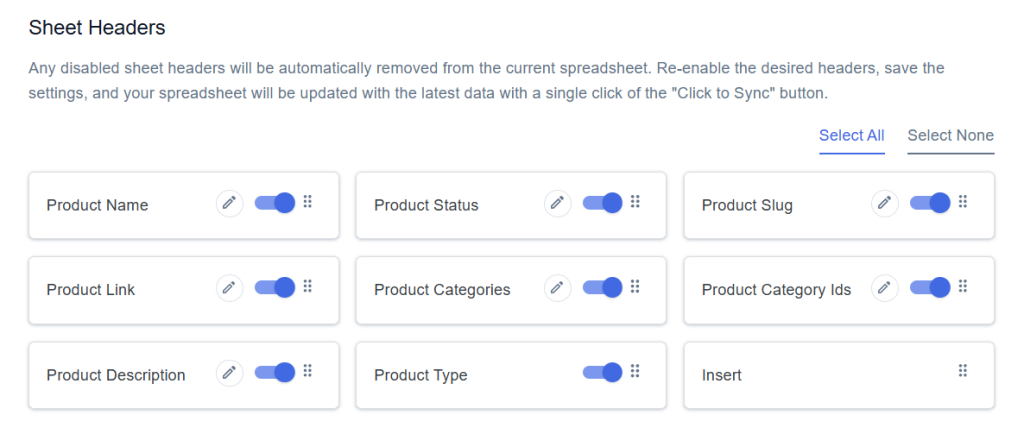
Enable/Disable the sheet headers as per your requirement and click on Save.
Step 3
After you save the settings, you will have the “Insert” column in your connected Google Spreadsheet parallelly Import Product option in the settings page.
Step 4
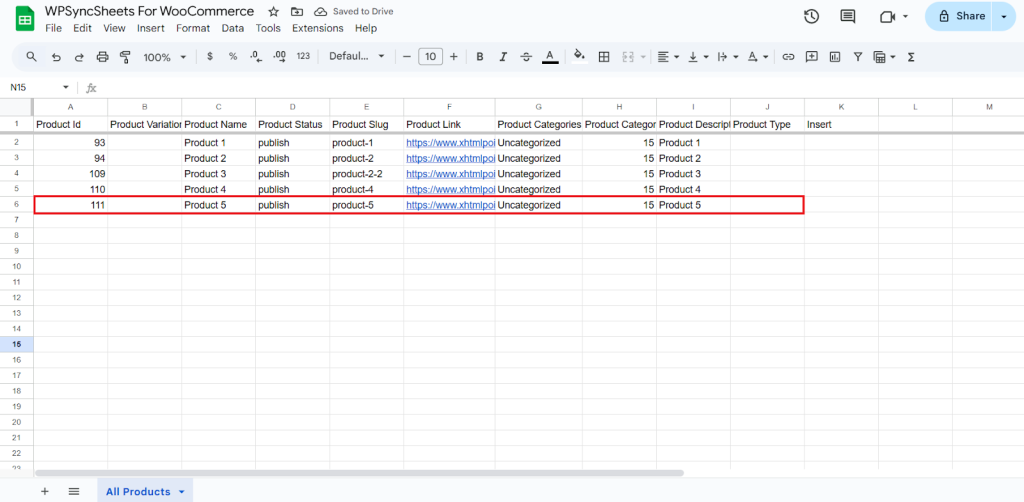
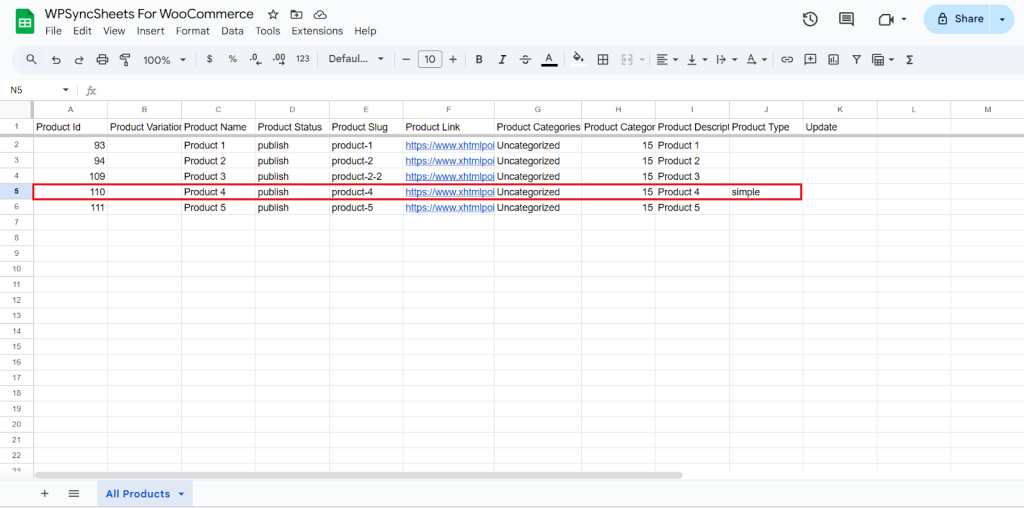
- If you add the data manually then make sure you have used the similar format as above row(s) or else you can copy the existing products.
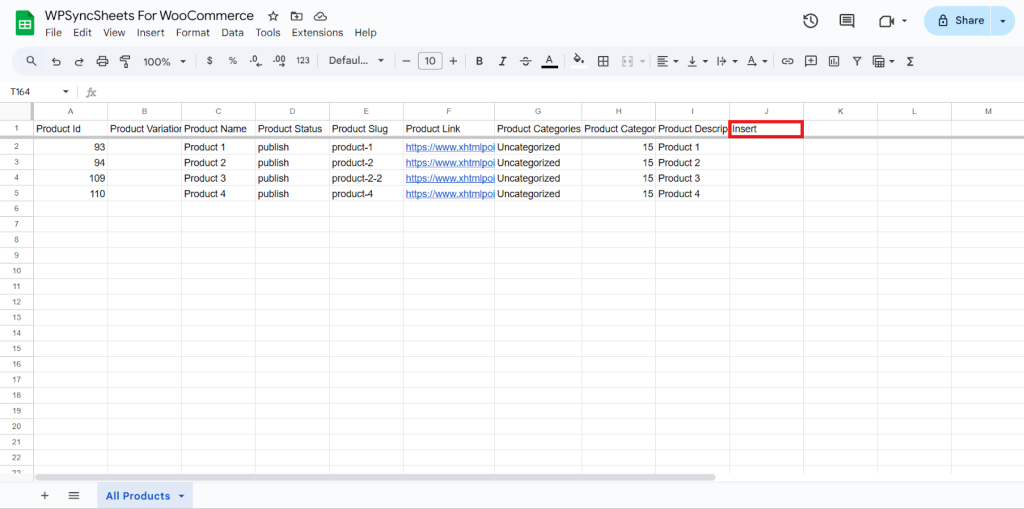
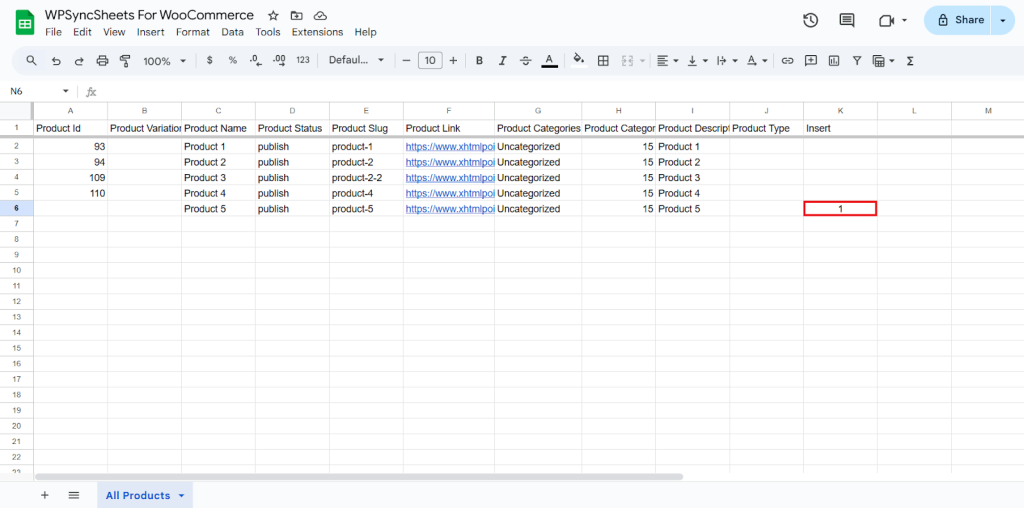
- Leave the Product ID blank. Go to the Insert column and type “1” in the row you want to create a new product.
Fill the Details:
- Product ID: Leave this blank.
- Product Variation ID: Leave it blank.
- Product Name: Enter the product’s name exactly as you want it to appear on your WooCommerce store.
- Product Status: Depends on your post status (e.g., Draft or Published or Pending or Scheduled or Private)
- Product Slug: Enter the URL-friendly version of your product name.
- Product Link: This will be generated automatically.
- Product Categories: Assigns categories to the product.
- Product Category ID: Enter the numeric ID of the category.
- Product Description: Provides a short description of the product.
- Product Type: Defines the product’s type in WooCommerce. (e.g. simple. variable, grouped, external)
Step 5
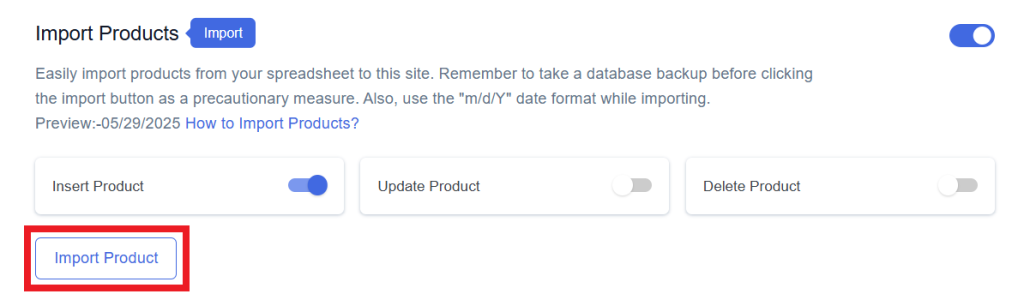
Click on the Import Product button.
Step 6
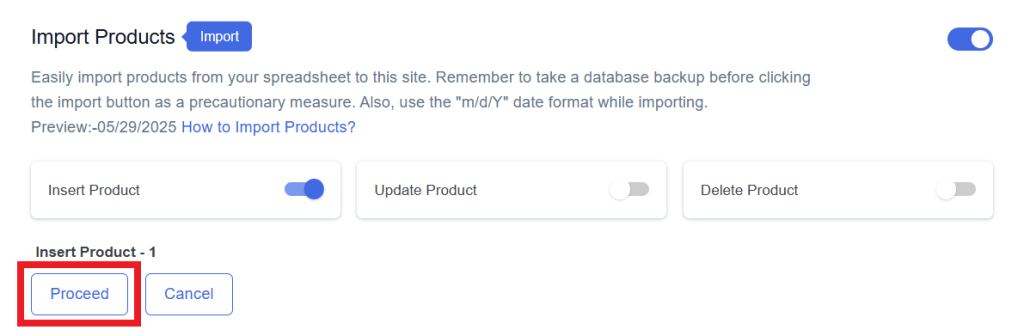
Now, you will have the Proceed option, click on it.
Final Spreadsheet
Update Products
Step 1
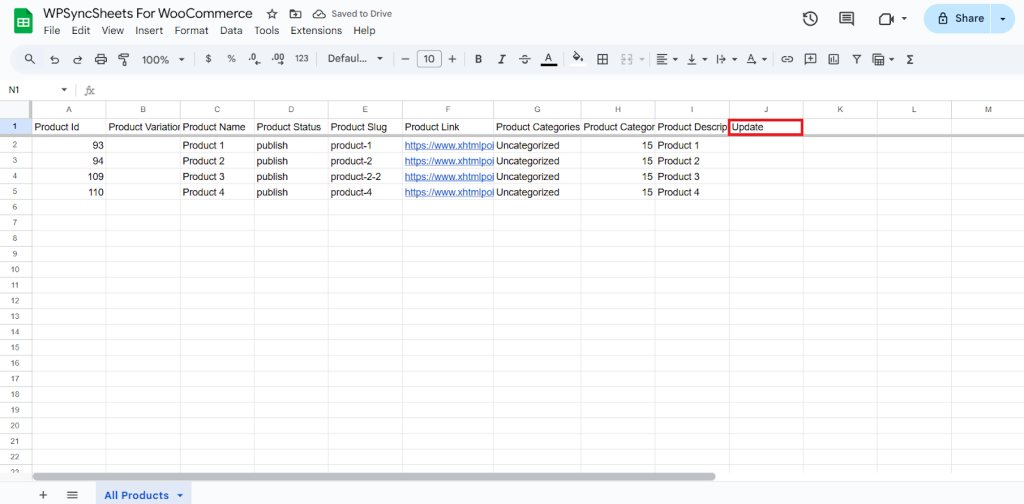
Enable Update to update your existing product.

Step 2
Enable/Disable the sheet headers as per your requirement and click on Save.

Step 3
After you save the settings, you will have the “Update” column in your connected Google Spreadsheet parallelly Import Product option in the settings page.
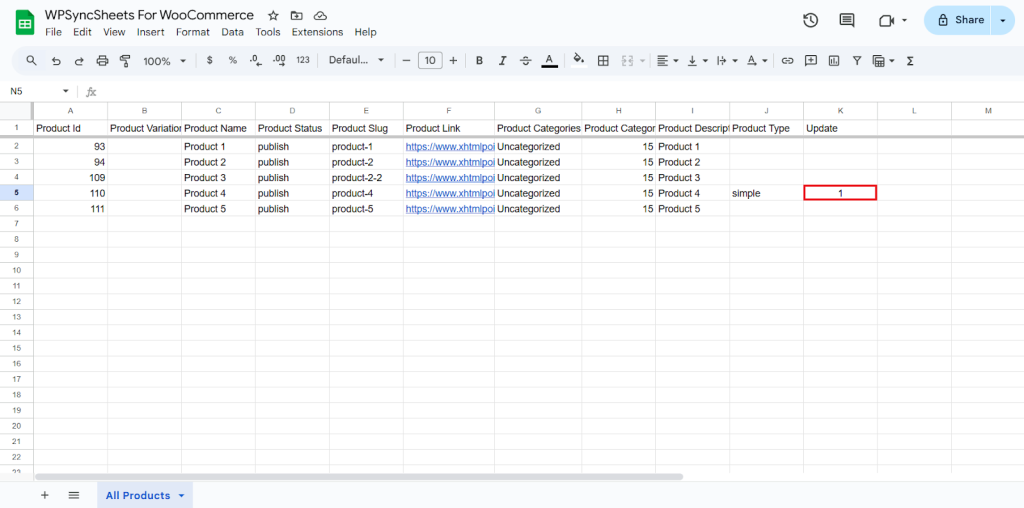
Step 4
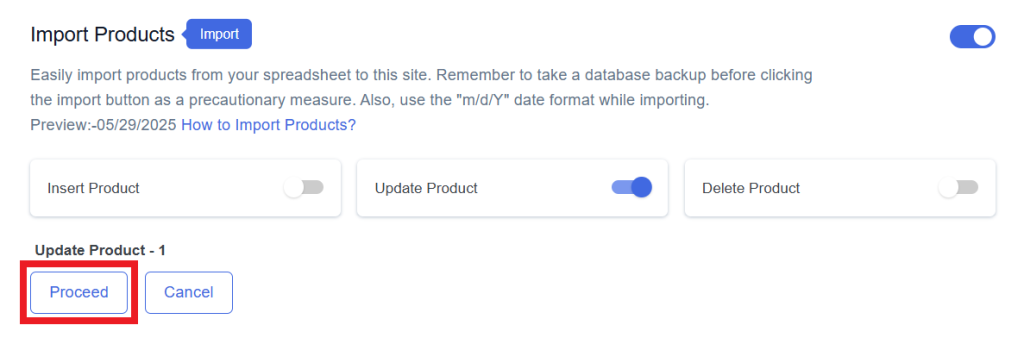
Make the changes you want and in the Update column of that row, type “1”, to update a particular product.
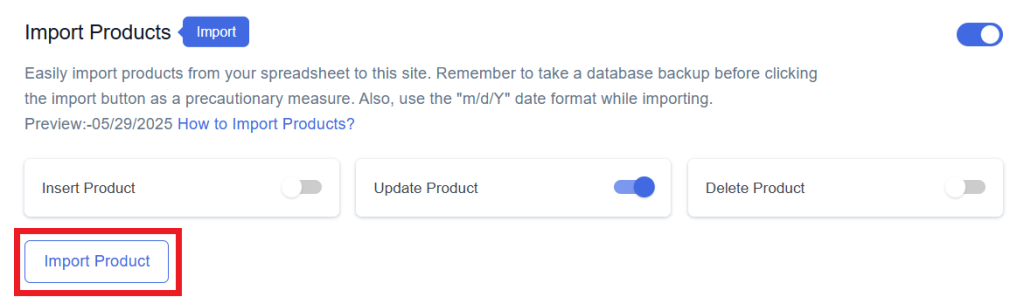
Step 5
Click on the Import Product button.
Step 6
Now, you will have the Proceed option, click on it.
Final Spreadsheet
Delete Products
Step 1
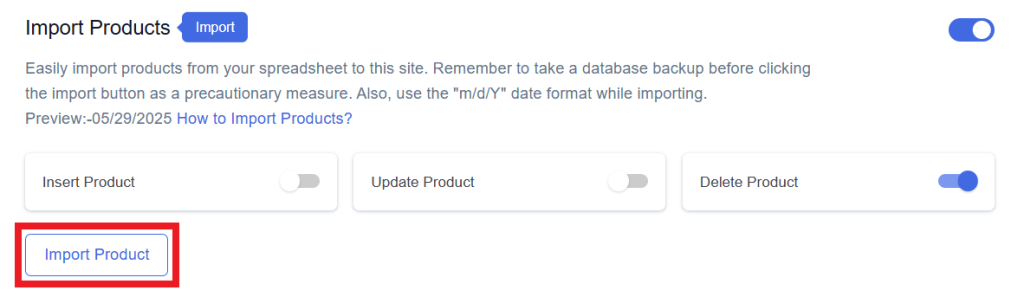
Enable Delete to delete your desired product.
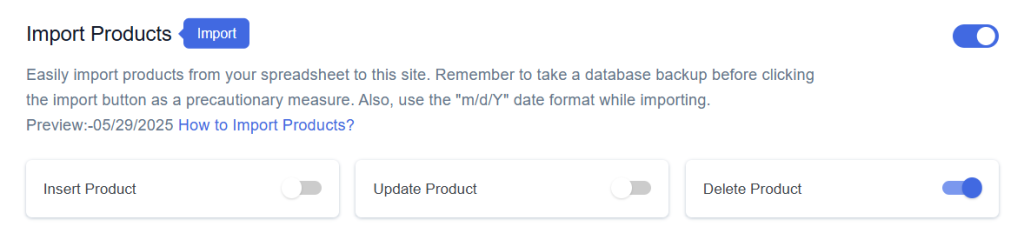
Step 2
Enable/Disable the sheet headers as per your requirement and click on Save.
Step 3
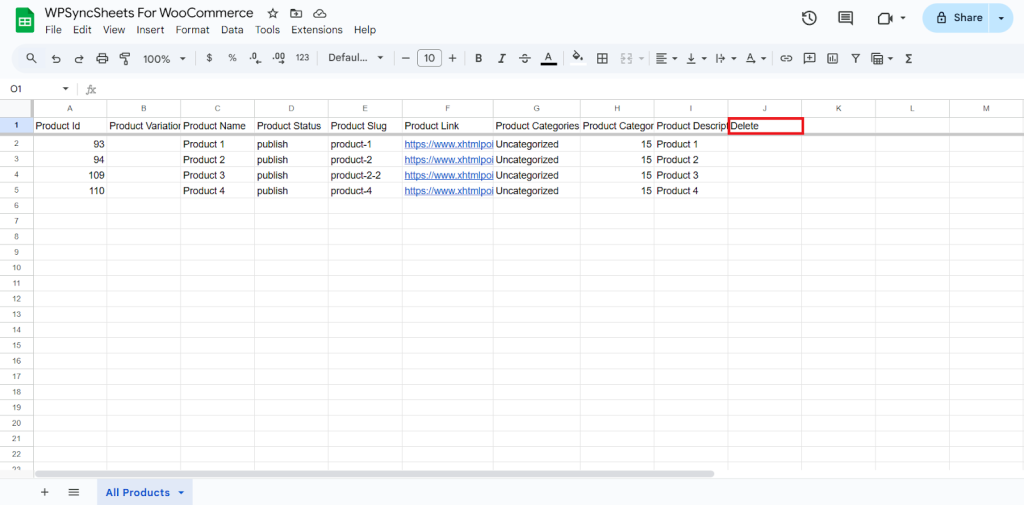
After you save the settings, you will have the “Delete” column in your connected Google Spreadsheet parallelly Import Product option in the settings page.
Step 4
In the Delete column of that row, type “1”, to delete a particular column.
Step 5
Click on the Import Product button.
Step 6
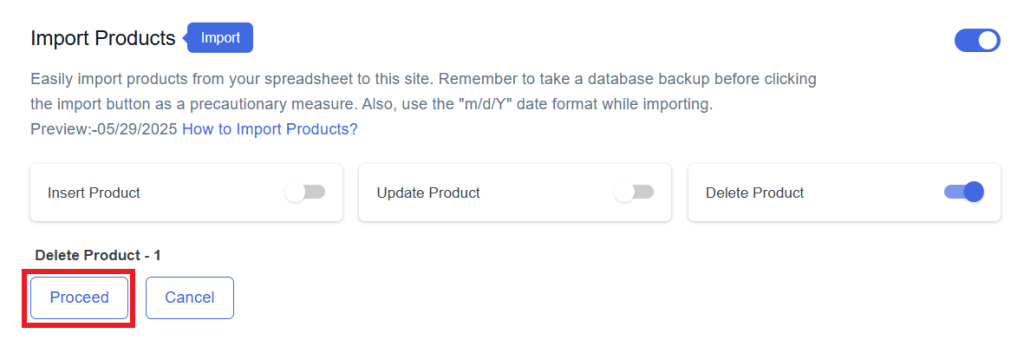
Now, you will have the Proceed option, click on it.
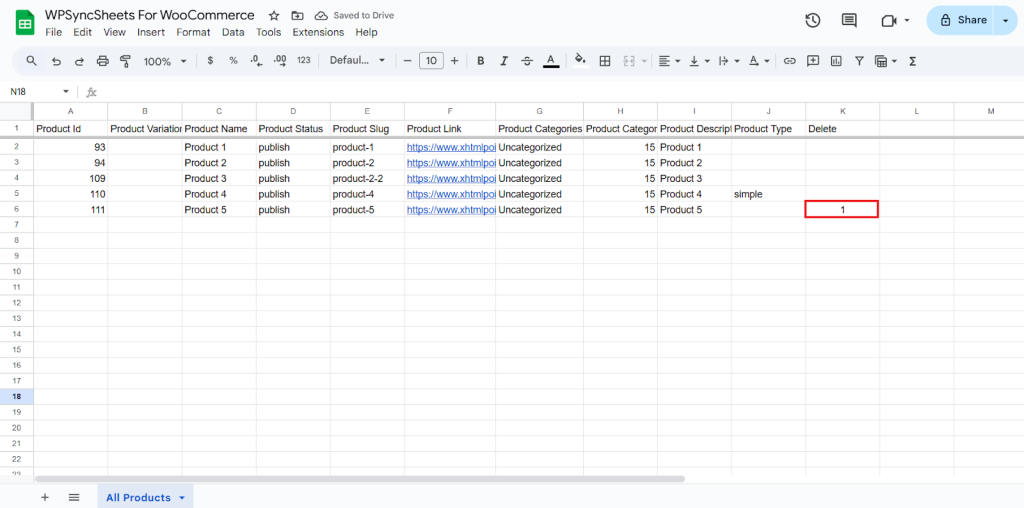
Final Spreadsheet