Import WooCommerce Product Categories with WPSyncSheets For WooCommerce plugin
If users want to add or update WooCommerce product categories in bulk, they can easily import all category details from Google Sheets to WooCommerce. This simplifies managing large catalogs, saves time, and ensures category information stays accurate and organized. Importing categories also helps maintain a well-structured store for better product navigation and management.
How to Import Categories?
Step 1
Find and enable the Import\Export Product Categories and Save the page.

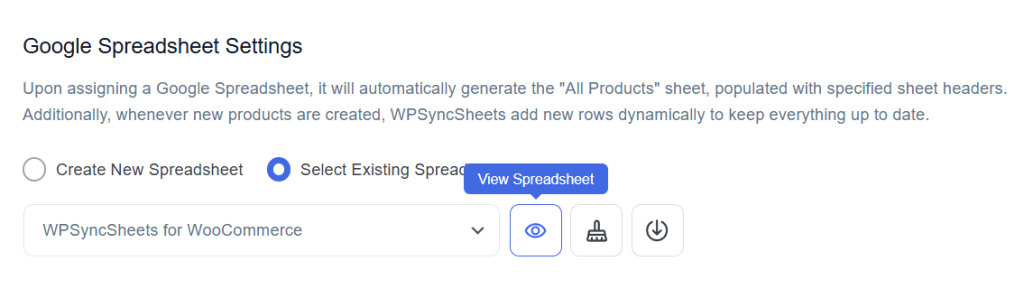
Step 2
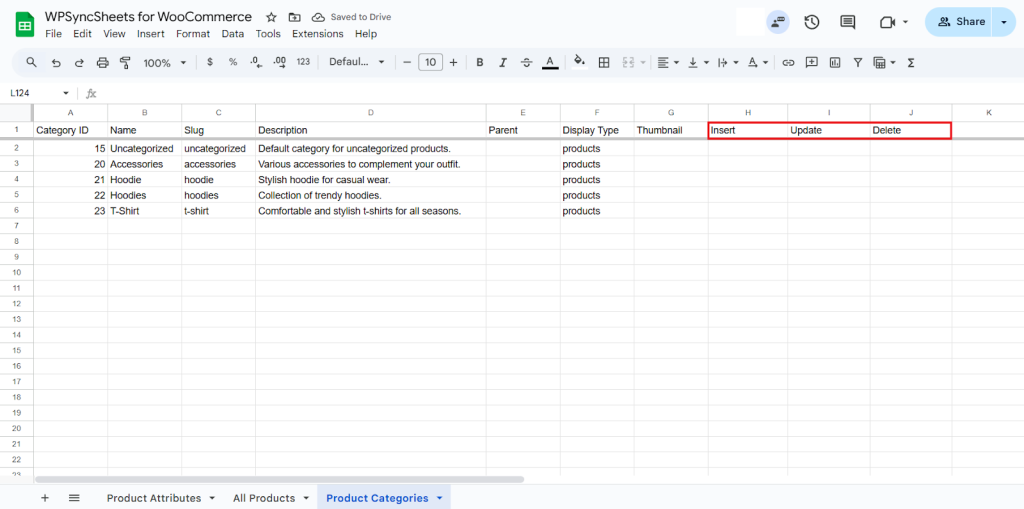
Now click on the View Spreadsheet, and you can see the insert, update, and delete column in the Google Sheet.
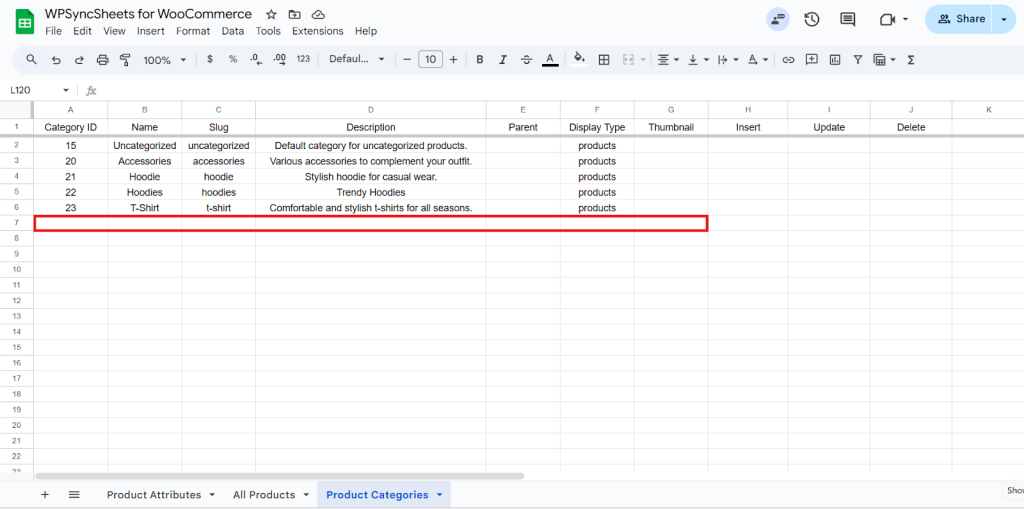
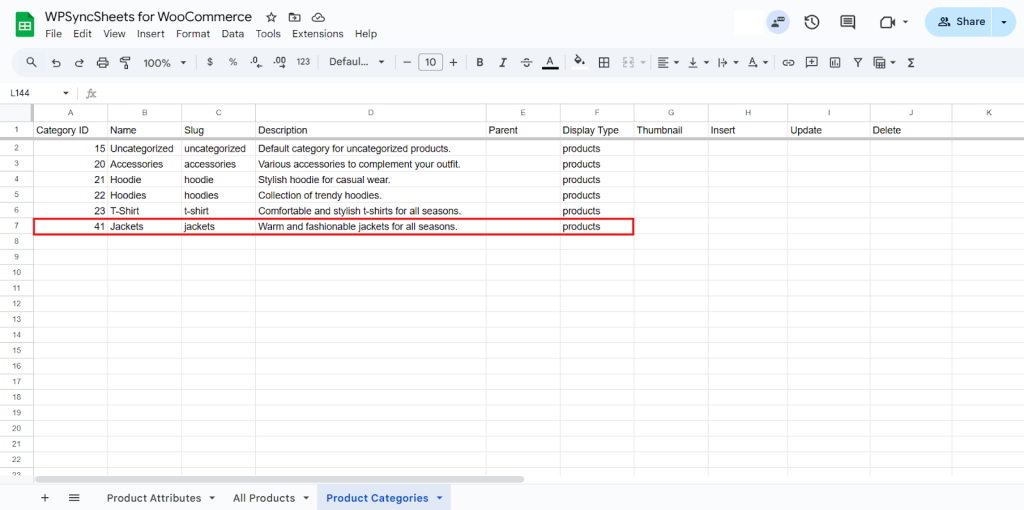
Original Spreadsheet
Insert Categories
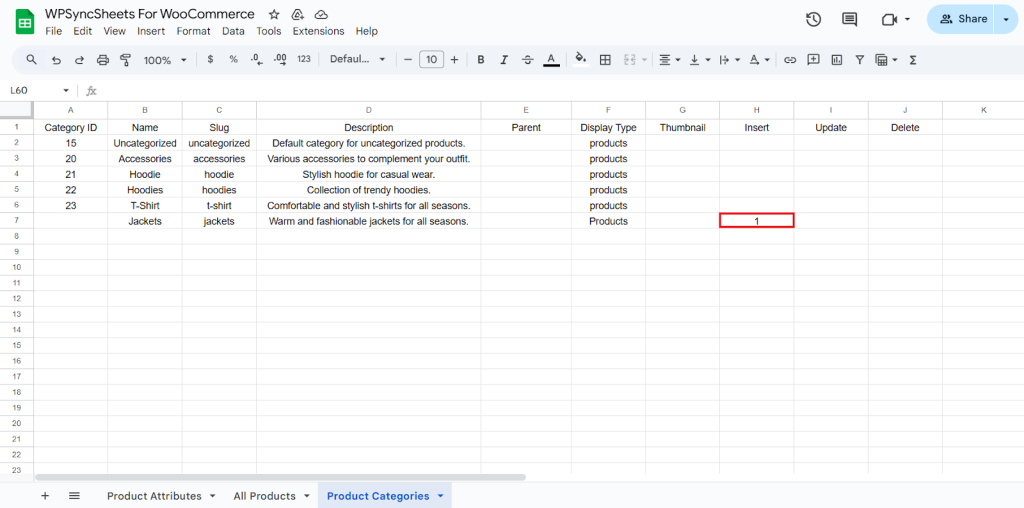
Step 1
To insert new categories, fill the required column. Leave the Category ID blank. Go to the Insert column and type “1” in the row you want to create a new category
Fill the Details:
- Name: Enter the category name exactly as you want it to appear in your store.
- Set the Display Type as “products” or “subcategories” or “Both“.
- Parent Category: Specify the parent category if this is a subcategory; leave blank if none.
- Description: Add a description for the category.
- Thumbnail: Add the URL of the category image if you want to display one.
- Slug: Enter a URL-friendly version of the category name
Step 2
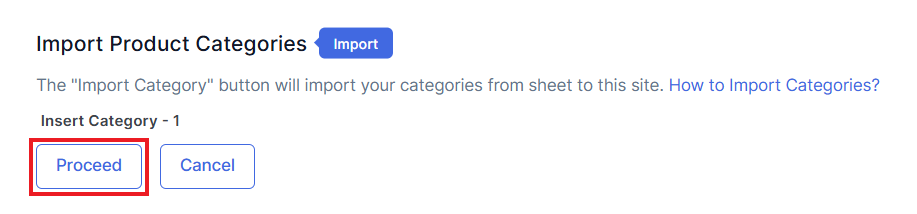
Click on Import Product Categories

Step 3
Click on Proceed.
Final Spreadsheet
Update Categories
Step 1
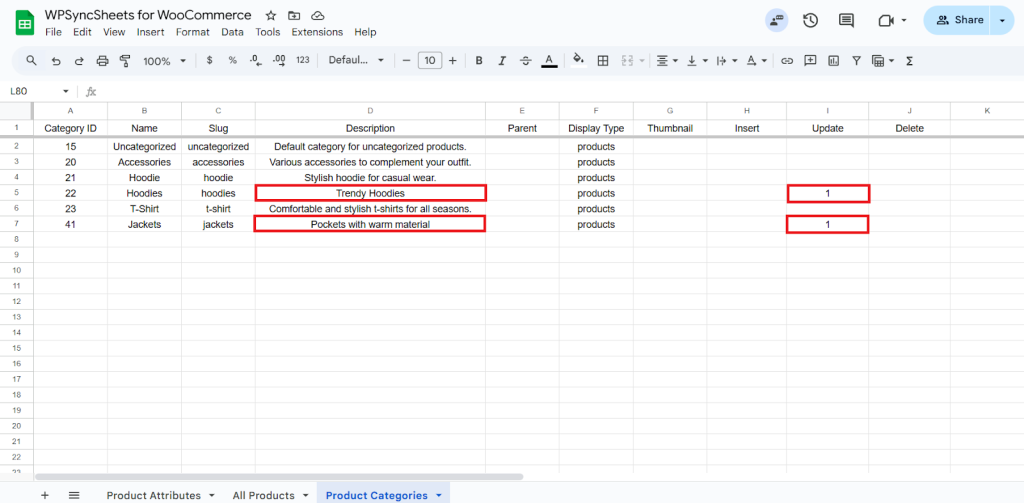
To update an existing row, modify or add data in that row, and type ‘1‘ in the Update column.
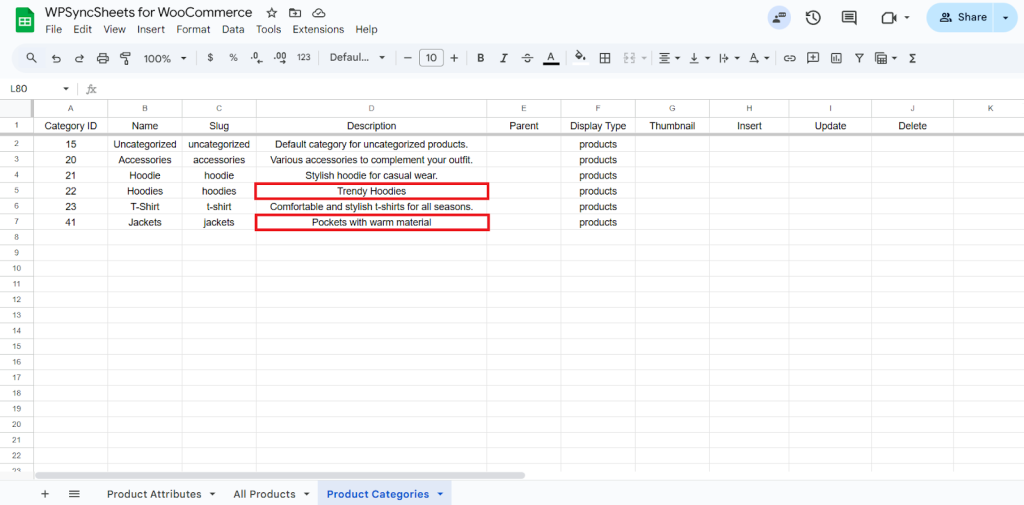
Before → Description: Warm and fashionable jackets for all season
After → Description: Pockets with warm material
Before → Description: Collection of trendy hoodies
After → Description: Trendy Hoodies
Step 2
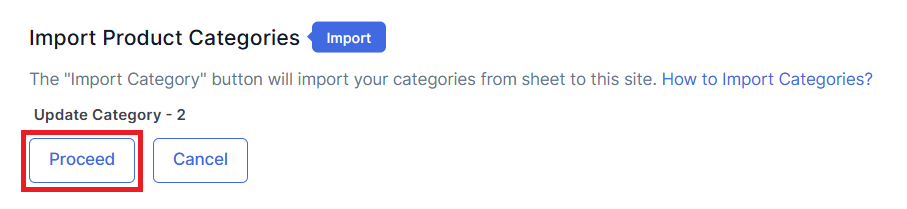
Click on Import Categories.

Step 3
Click on Proceed.
Final Spreadsheet
Delete Categories
Step 1
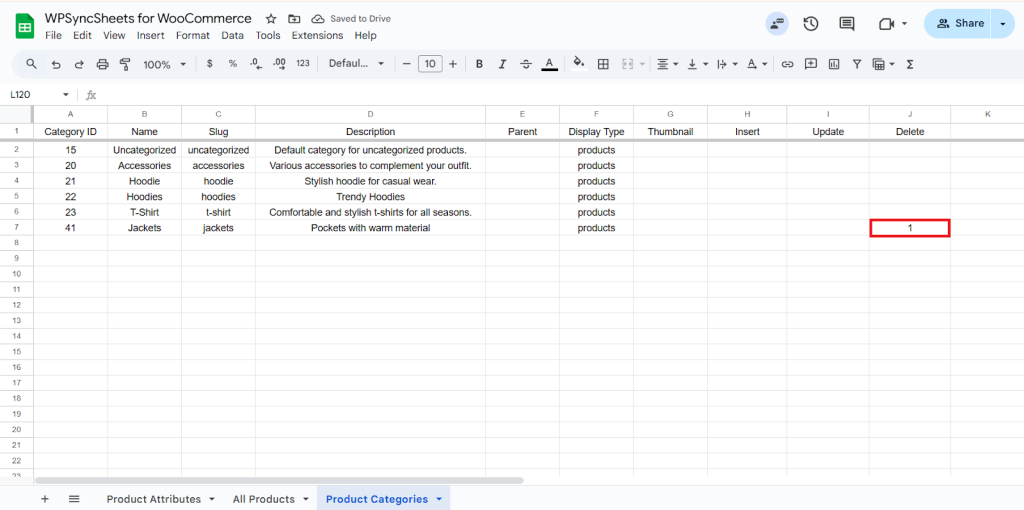
To delete a particular column, type “1” in the Delete column.
Step 2
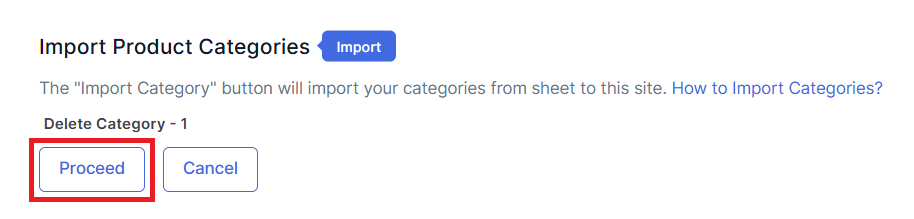
Click on Import Categories.

Step 3
Click on Proceed.
Final Spreadsheet