Import WooCommerce Product Attributes with WPSyncSheets For WooCommerce plugin
With the WPSyncSheets plugin, you can add, update, or delete WooCommerce products and their attributes directly from Google Sheets.
This makes it easy to manage product attributes in bulk and keep your product data organized.
This guide explains how to import WooCommerce products with attributes using Google Sheets.
How to Import Attributes in WooCommerce Product?
Before You Start
Before importing product with attributes, make sure the attributes already exist in WooCommerce.
Go to:
WooCommerce → Products → Attributes
Create the attributes you want to use.
Example attributes:
- Size
- Color
- Material
These attribute names can be added as column headers in the Sheet Headers section
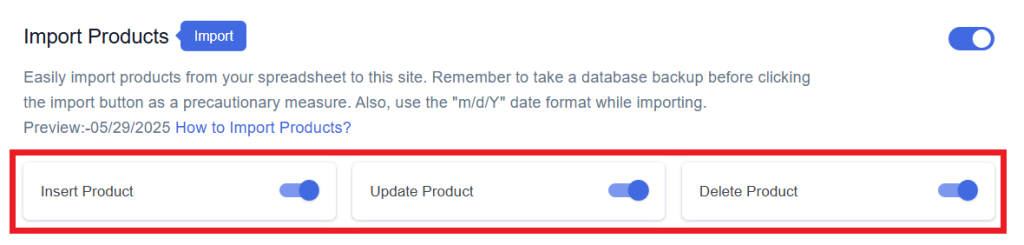
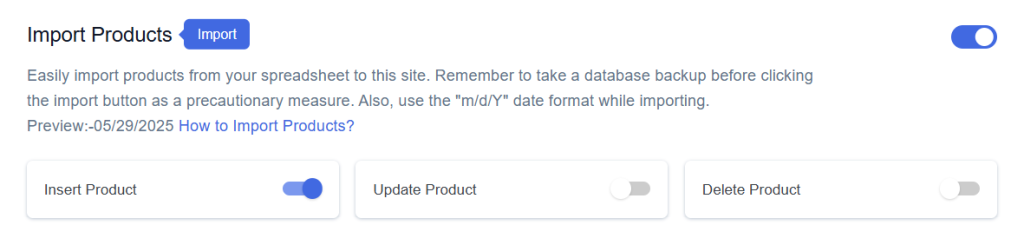
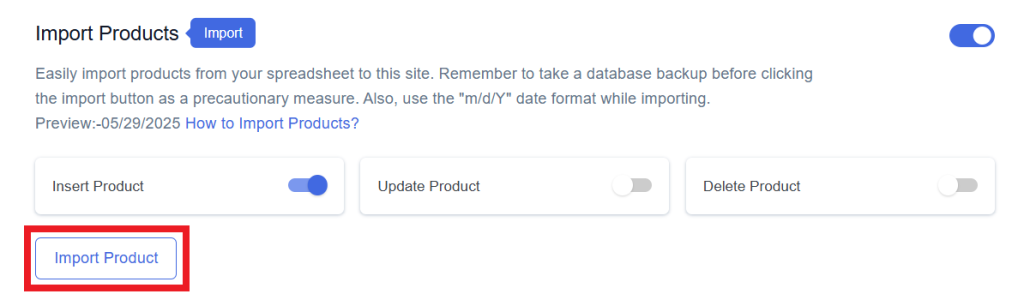
Step 1: Enable Product Import
- Go to the Import Products option in the plugin settings.
- Enable Import Products.
You will see three options:
- Insert – Add new products
- Update – Update existing products
- Delete – Remove products
Enable the options you need and click Save Settings.
Enabled options will automatically appear as sheet headers in the Google Spreadsheet.
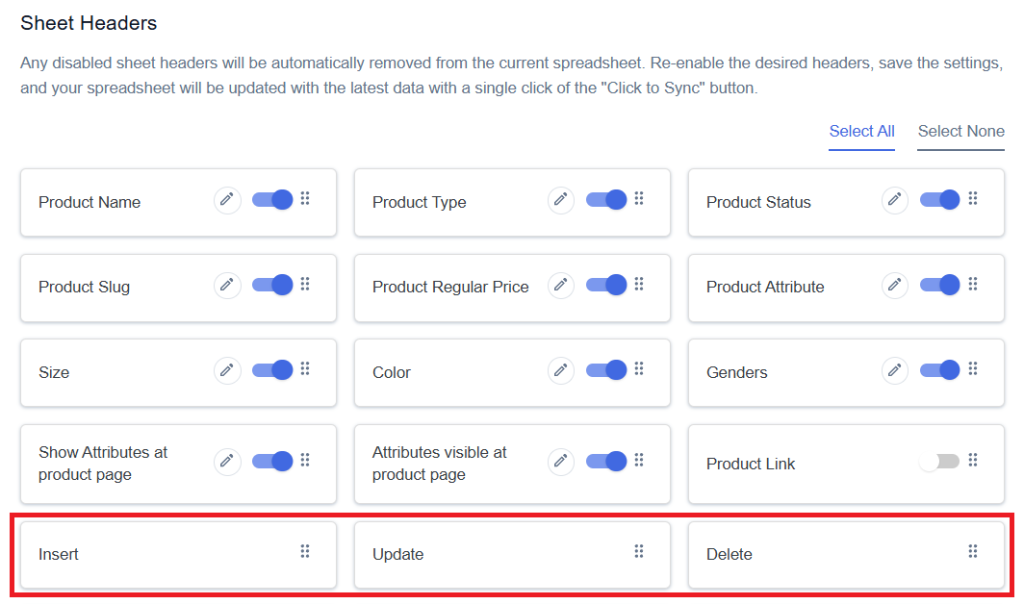
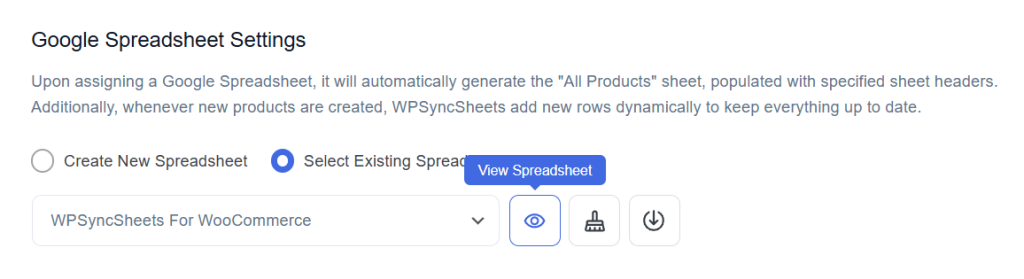
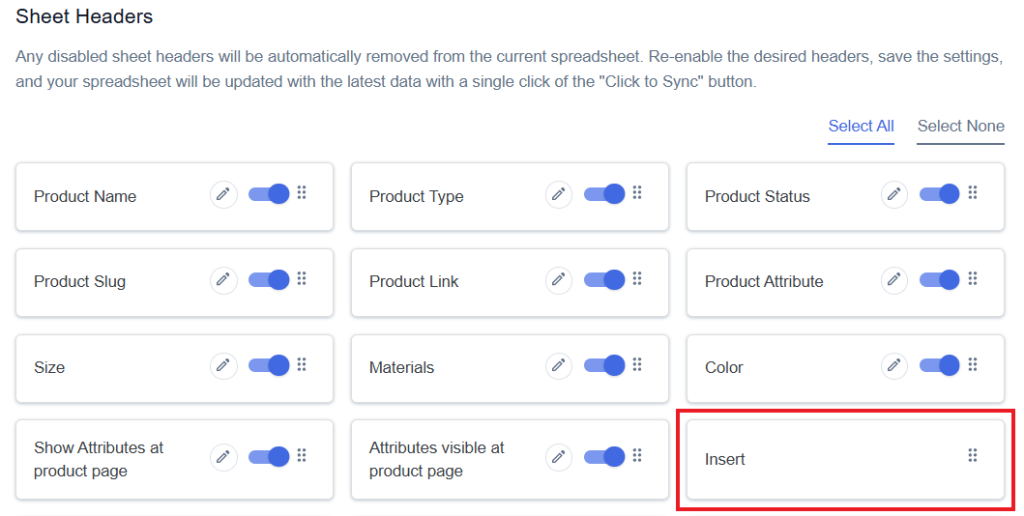
Step 2: Open the Google Spreadsheet
After that, in Google Spreadsheet Settings click on View Spreadsheet.
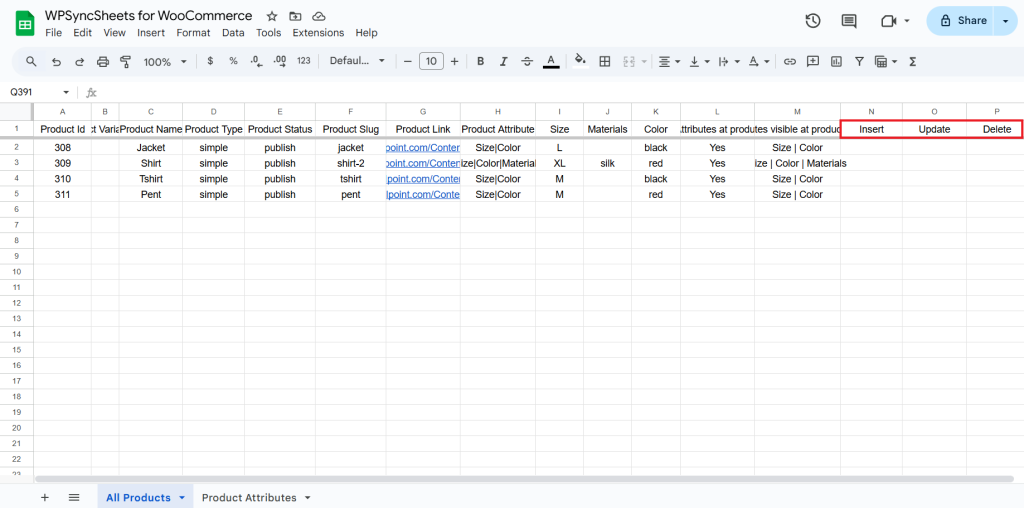
Original Spreadsheet
After saving the settings, the plugin will automatically add the selected sheet headers to the spreadsheet.
Insert Products
Step 1
Enable Insert to add your desired product in a new row.
Step 2
Enable/Disable the sheet headers as per your requirement and click on Save.
Step 3
After you save the settings, you will have the“Insert” column in your connected Google Spreadsheet parallelly Import Product option in the settings page.
Step 4
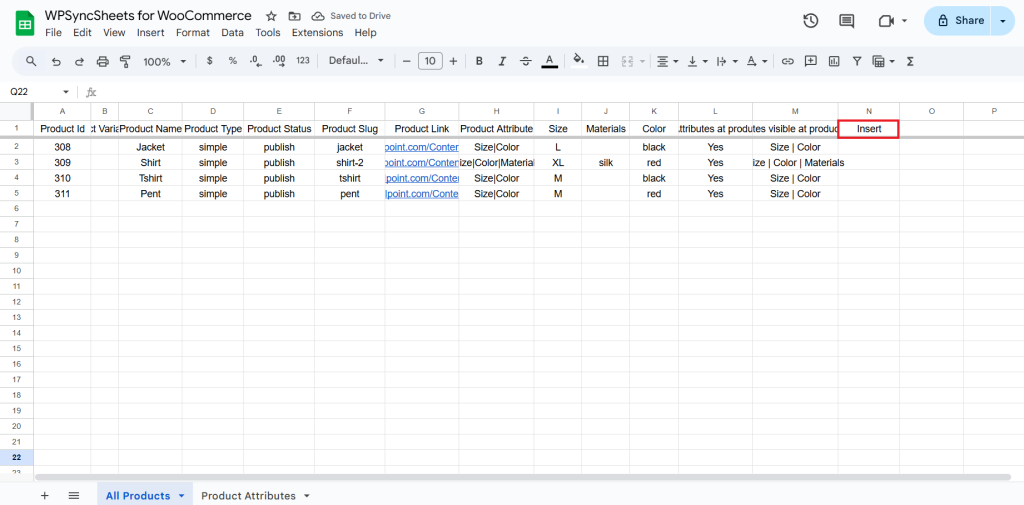
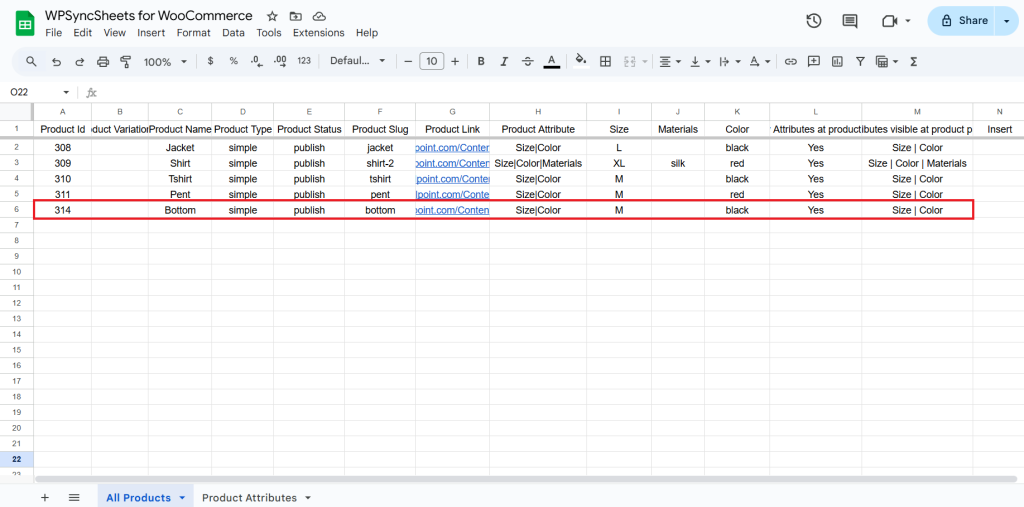
Add your product details in a new row in the spreadsheet.
- Product ID must be left blank for new products
- Product Name is mandatory.
- Set Product Status as publish.
How to Add Product Attributes
To add attributes to a product, you only need to enter attribute values in their respective columns in the spreadsheet.
If an attribute column contains a value, that attribute and its value will automatically be assigned to the product.
Steps:
- Make sure the attribute already exists in WooCommerce → Products → Attributes.
- Ensure the spreadsheet has a column with the same name as the attribute.
- Enter the attribute value (term) in that column for the product.
If the column contains a value, the plugin will assign that attribute and value to the product.
Note: If the attribute column is empty, that attribute will not be added to the product.
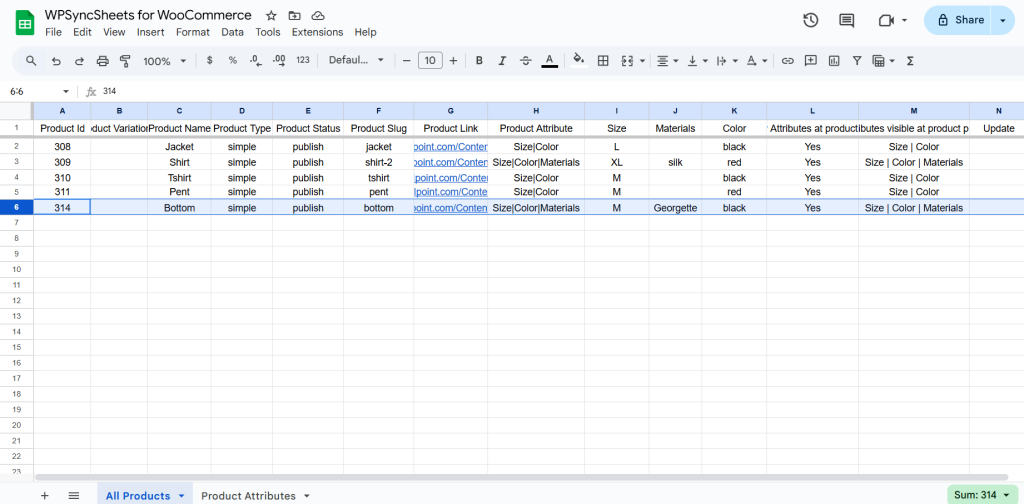
Example: Product Attributes in Google Sheet
Below is a simple example of how your Google Sheet should look when importing a product with attributes.
| Product Name | Product Status | Product Attribute | Size | Color | Material | Show Attribute on Product Page | Attributes Visible at Product Page | Use Attributes for Variations | Attributes to use for Variations | Insert |
|---|---|---|---|---|---|---|---|---|---|---|
| Silk Shirt | publish | Size | Color | Material | L | Red | Silk | Yes | Size | Color | Yes | Size | 1 |
- Attribute Columns
Each attribute must have its own column in the sheet.
Example columns:
- Size
- Color
- Material
- Attribute Values
Add the values for each attribute in their respective columns.
Example:
| Size | Color | Material |
|---|---|---|
| L | Red | Silk |
These values will be added as product attributes in WooCommerce.
- Show Attribute on Product Page
Type: Yes => to display the attributes on the product page.
Or
Type: No => to hide them.
- Attributes Visible at Product Page
Write the attributes you want to display on the product page.
Example:
Size | Color
- Using Attributes for Variations
If your product uses attributes for variations (for example: Size or Color), make sure the following settings are configured correctly.
Set: Use Attributes for Variations = Yes
Then specify which attributes should be used for variation creation.
Example:
- Attributes to use for Variations
Size
This tells the plugin to create product variations based on the Size attribute.
- Variation Attribute Columns
The spreadsheet may also contain columns that start with- Variation:
Example headers:
- Variation: Size
- Variation: Color
These columns are used to define variation attribute values.
Example:
| Variation: Size | Variation: Color |
|---|---|
| L | Red |
If values are added in the main product row, they can also be used as the default attribute values for the product.
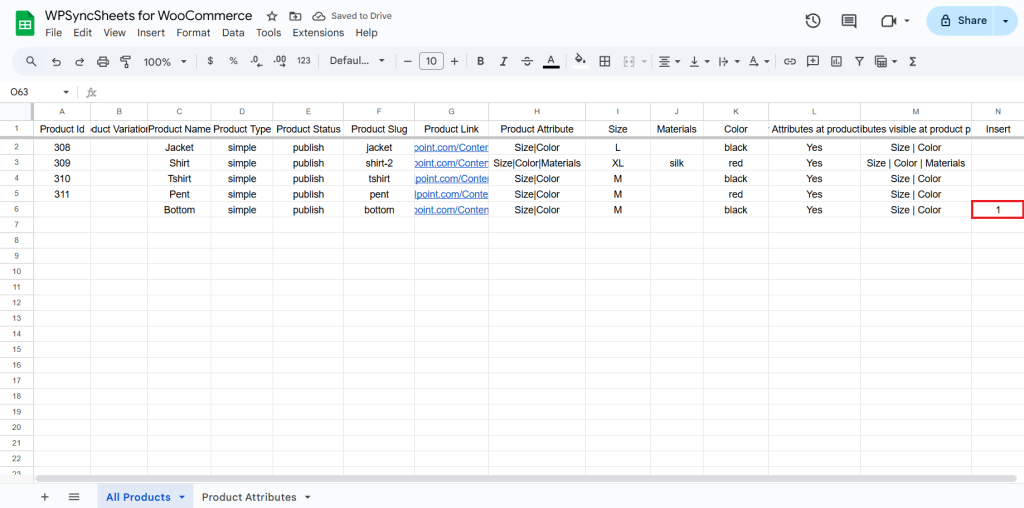
- Insert Column
Type: 1
in the Insert column to insert the product.
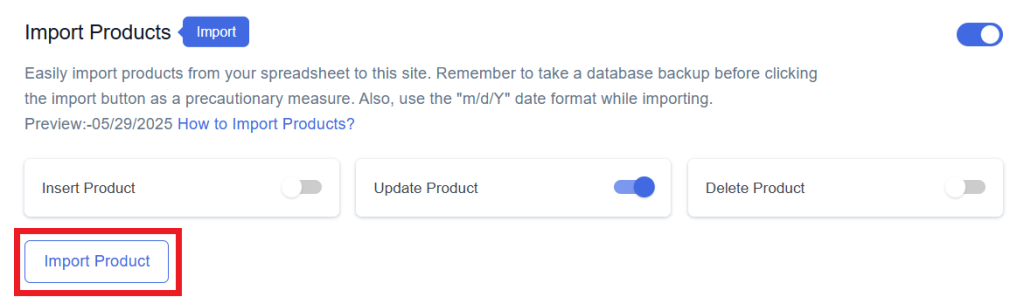
Step 5
Click on the Import Product button.
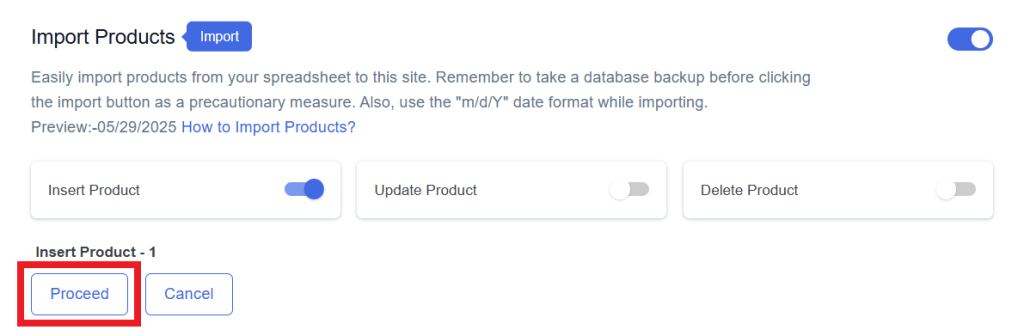
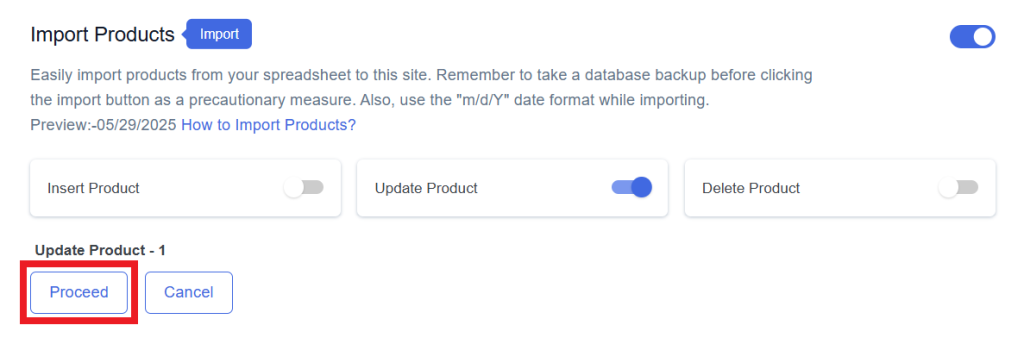
Step 6
Now, you will have the Proceed option, click on it.
Final Spreadsheet
Update Products
Step 1
Enable Update to update your existing product.

Step 2
Enable/Disable the sheet headers as per your requirement and click on Save.

Step 3
After you save the settings, you will have the “Update” column in your connected Google Spreadsheet parallelly Import Product option in the settings page.
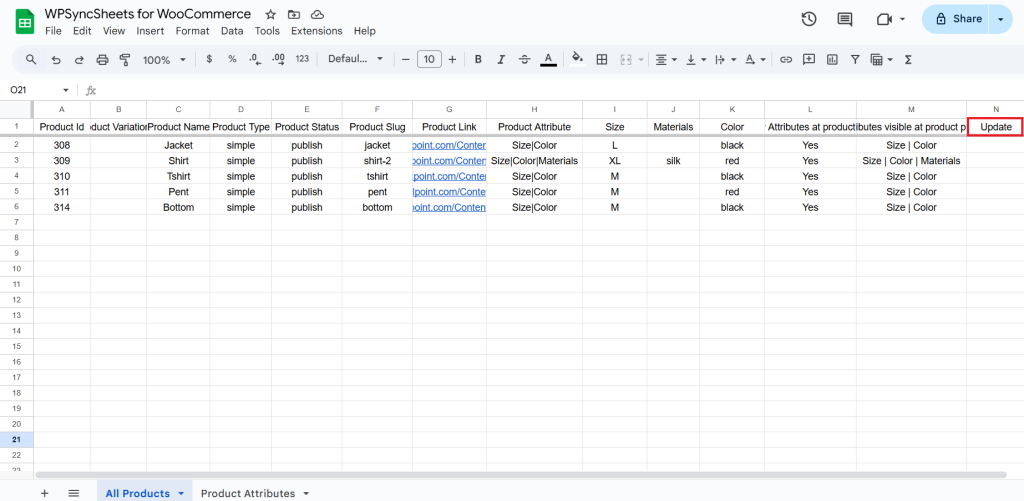
Step 4
Make the changes you want and in the Update column of that row, type “1”, to update a particular product.

Step 5
Click on the Import Product button.
Step 6
Now, you will have the Proceed option, click on it.
Final Spreadsheet
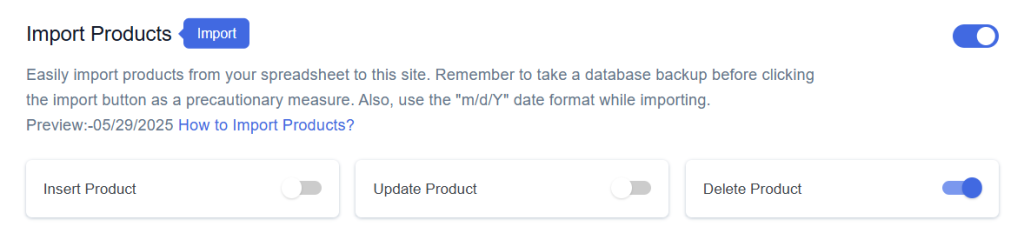
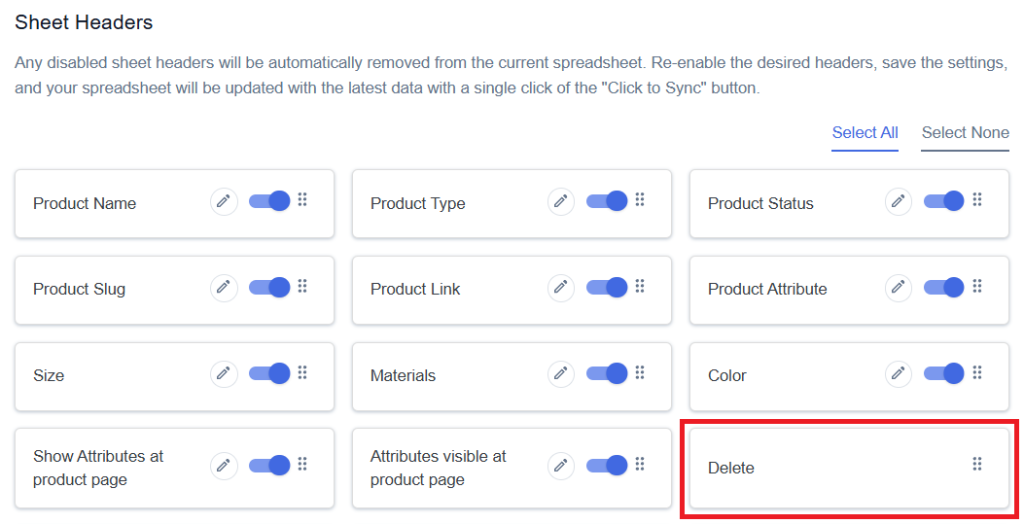
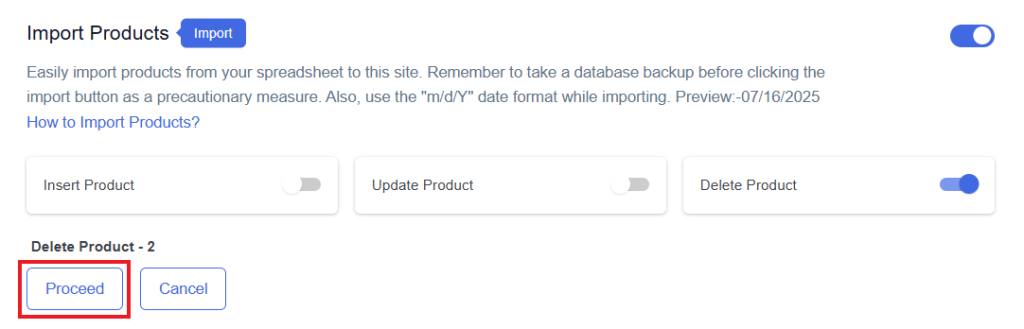
Delete Products
Step 1
Enable Delete to delete your desired product.
Step 2
Enable/Disable the sheet headers as per your requirement and click on Save.
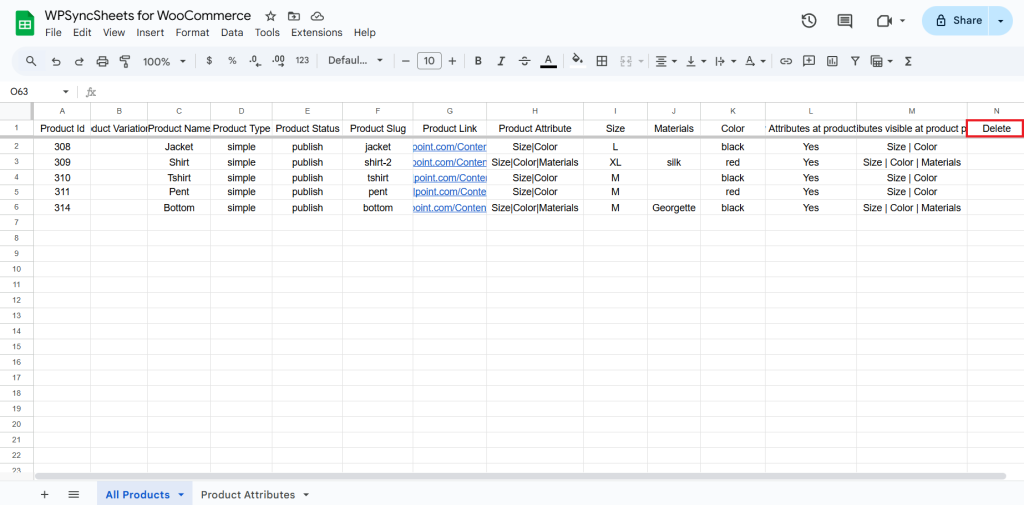
Step 3
After you save the settings, you will have the “Delete” column in your connected Google Spreadsheet parallelly Import Product option in the settings page.
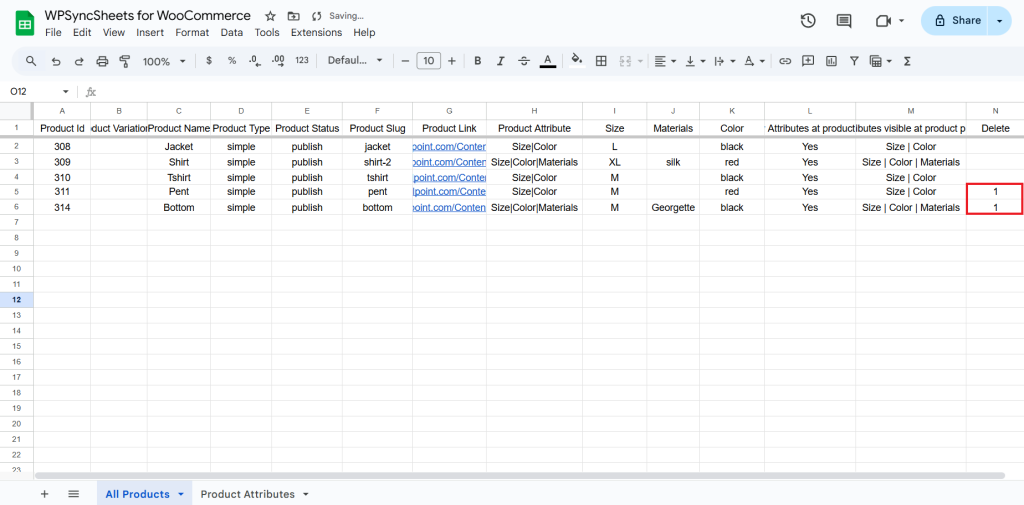
Step 4
In the Delete column of that row, type “1”, to delete a particular column.
Step 5
Click on the Import Product button.
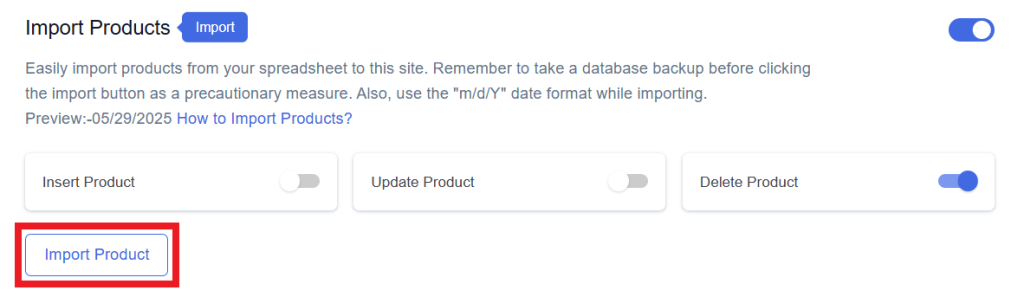
Step 6
Now, you will have the Proceed option, click on it.
Final Spreadsheet


