Export WooCommerce Orders with WPSyncSheets For WooCommerce plugin
If users want to export data, they can easily transfer all their WooCommerce bulk information into Google Sheets and access real-time data directly from their store. Additionally, exporting keeps records up to date, which can be helpful in future to the users.
How to Export Orders?
In case you haven’t installed and activated the plugin yet, go to the Setup Guide and follow the steps.
Step 1: Enable Order Settings
Navigate to Settings > Order Settings and enable the Order Settings option.

Step 2: Choose New or Existing Google Spreadsheet
This section will give you two options:
- Create New Spreadsheet
- Select Existing Spreadsheet
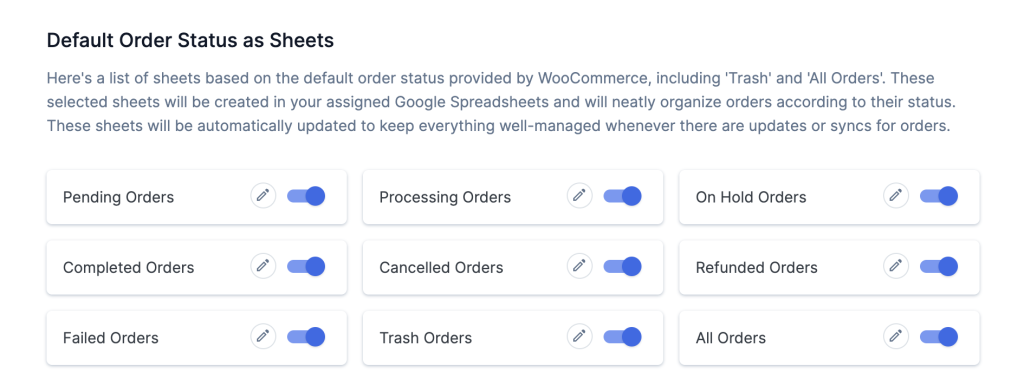
Step 3: Select Default Order Status
Enable/Disable default order status(s) that will create sheet(s) respectively within your Google Spreadsheet.
Check our our default sheet headers list.
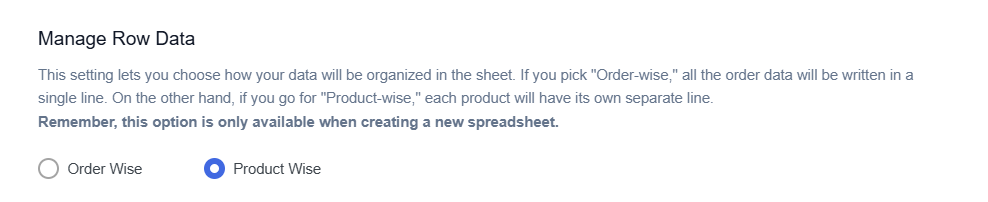
Step 4: Choose Export Type – Order Wise or Product Wise
Select the option according to your requirement about how you want to export your data within the sheet :
- If you want all the order data in a single line then select Order Wise.
- If you want all your products in a separate lines then select Product Wise.
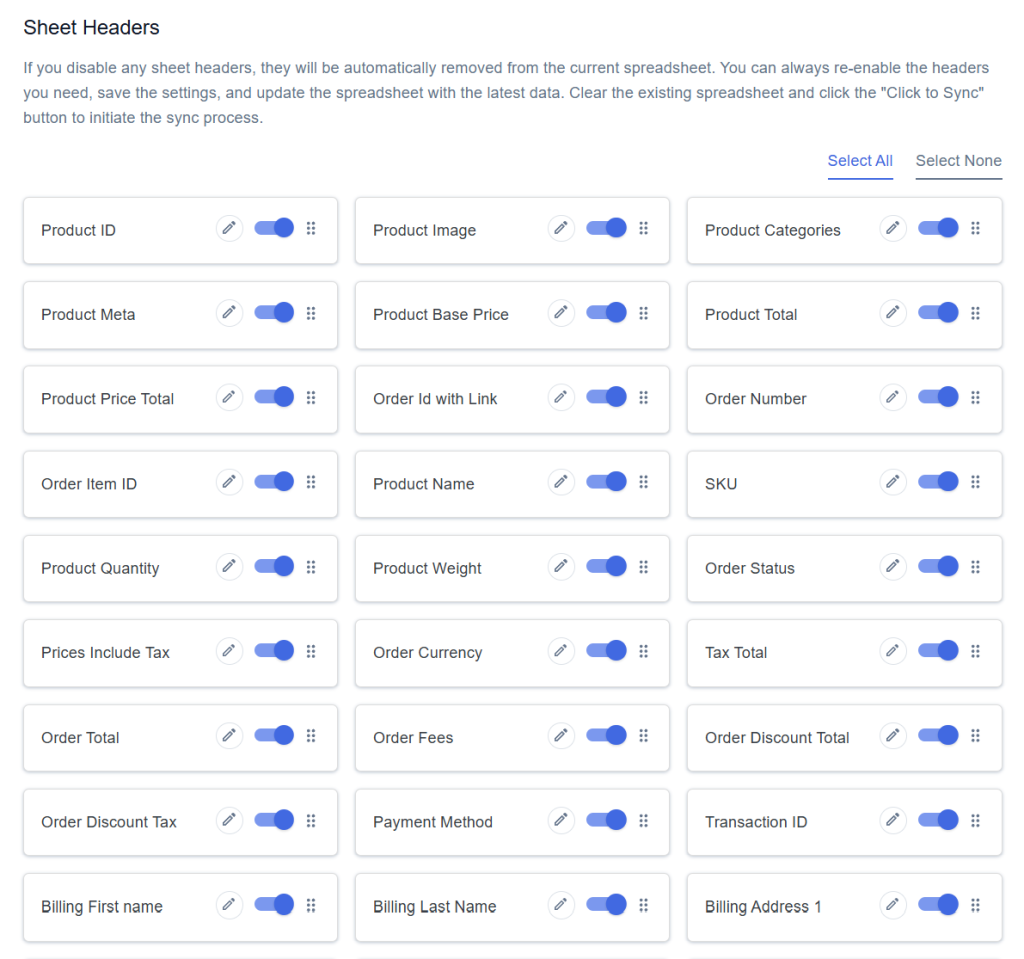
Step 5: Enable/Disable Sheet Headers
Enable/Disable sheet headers which you want to sync.
Step 6: Select Spreadsheet Row Order
‘Spreadsheet Row Order’ option will allow you to manage order data in ascending and descending order, that option will be available only while creating a new spreadsheet.

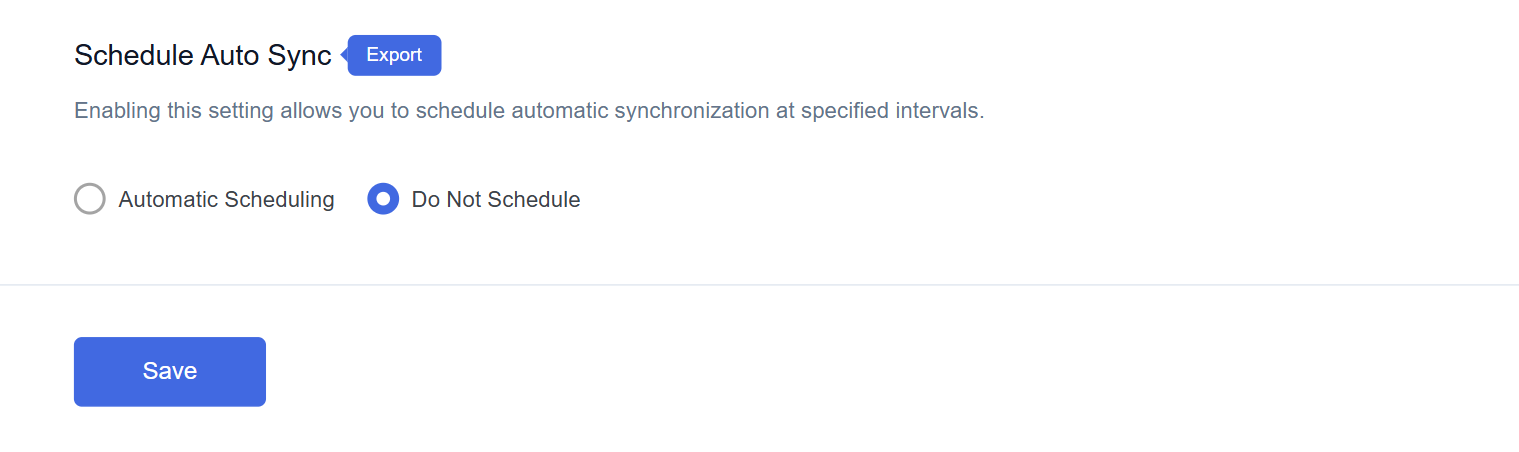
Step 7: Save Settings
At the end of the page, click on the “Save” button.
Step 8: Export Orders with Click to Sync
Once you save all your settings then it will enable the option called ‘Click to Sync’.
This section will give you two options:
- All Orders
- Date Range
- If you want to export all orders from the beginning to till now to your Google Spreadsheet, select ‘All Orders’ and then click on ‘Click to Sync’.
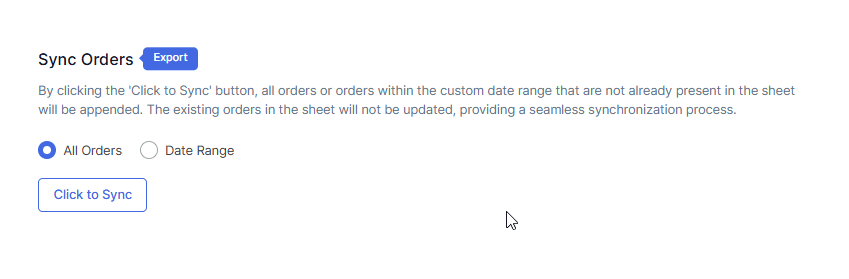
- If you want to export orders within a custom date range, select the ‘Date Range’ option and choose the start and end dates as per your requirement. After setting the dates, click on ‘Click to Sync’.
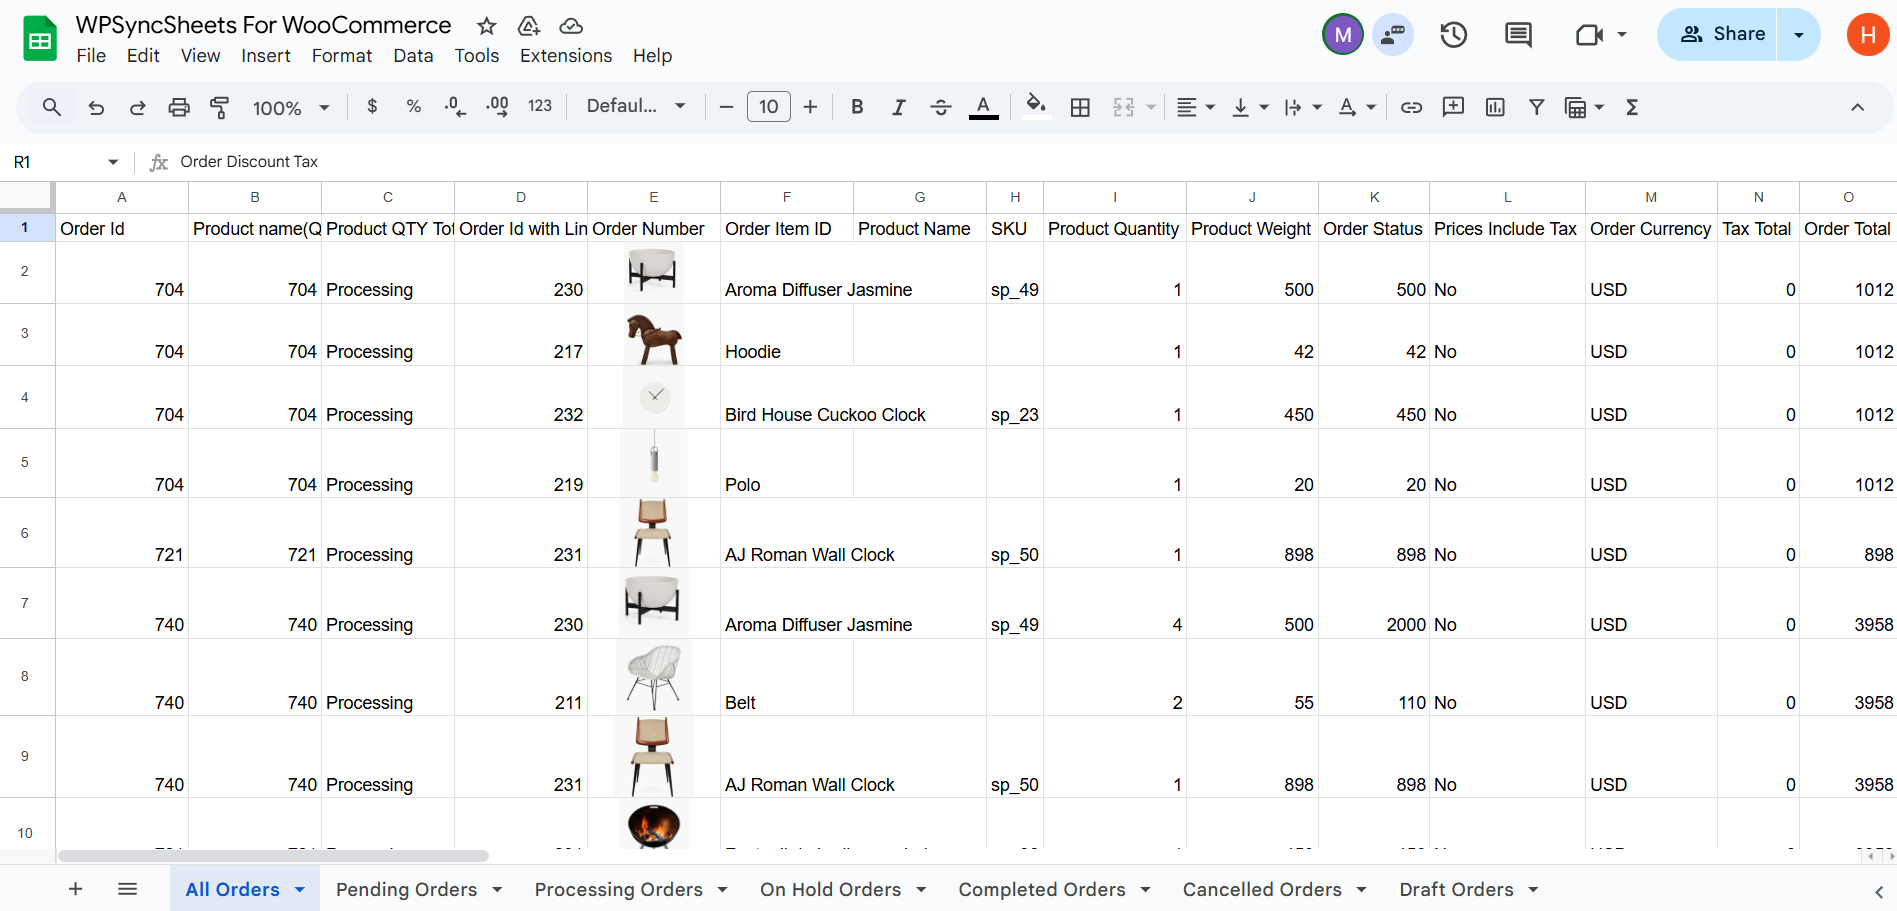
Final Spreadsheet