Plugin Settings
General Settings
The default post types for sheets are post and page. A different sheet is available for each post type which is Posts and Pages.
For creating a new spreadsheet, perform the following steps:
> WPSyncSheets For Core => General Settings
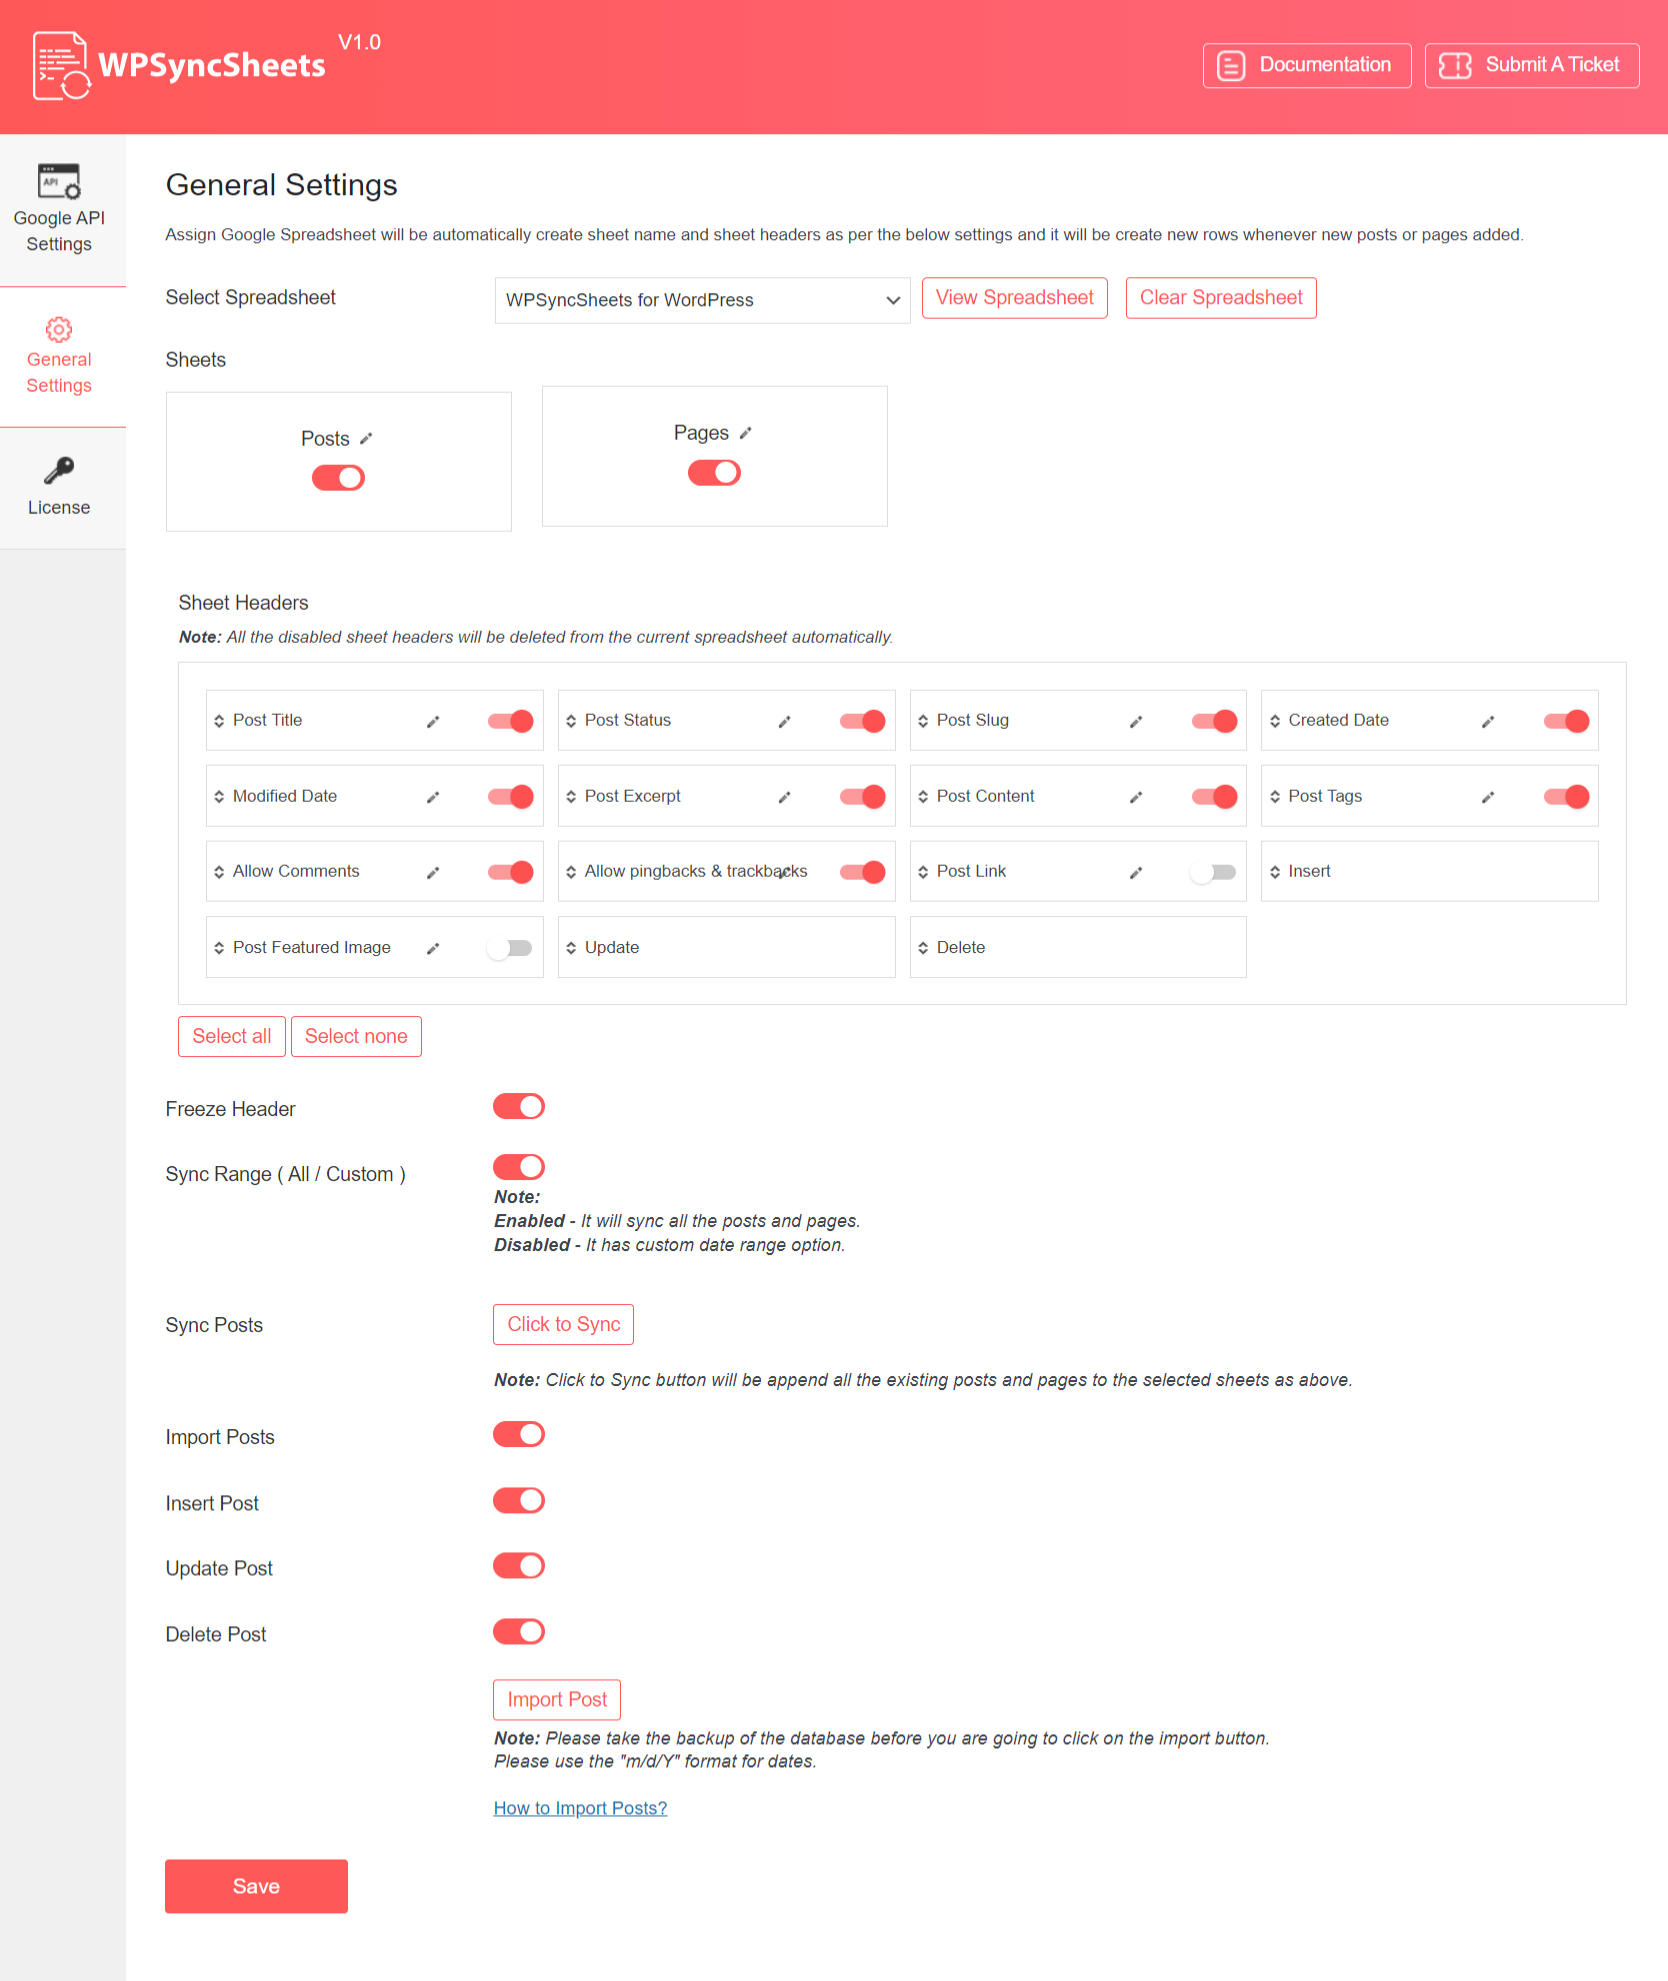
1. Create New Spreadsheet.
- Select Create New Spreadsheet option from the given list in the select spreadsheet field.
- Enter the name of the new spreadsheet.
- In sheets, it shows the WordPress default post type. Each type indicates the different sheets in the spreadsheet. In case, if some of them are not useful, you can disable them too.
- The sheet headers will automatically get sorted as per the selected option in the sheet headers section. Select all button will select all the sheet headers. You can disable some of them manually. If you want to disable all the sheet headers just click on the Select none button.
- When you click the save button, the spreadsheet will get updated and you can also view it by clicking the View Spreadsheet.
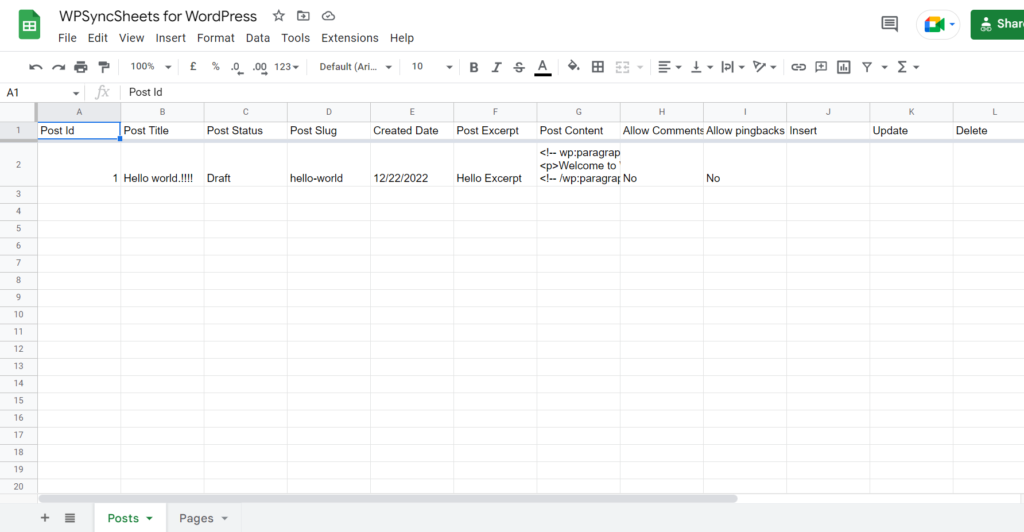
2. Updated Google Spreadsheet.
After saving the above settings, the spreadsheet is shown below.
3. Sync posts
When the user clicks on the button called Click to Sync then it will synchronize/add existing or Custom date range posts within the selected spreadsheet with a selected sheet as per the value of the Sync Range ( All / Custom ) button. If Sync Range ( All / Custom ) is enabled then all the existing posts will be synchronized/added and if Sync Range ( All / Custom ) is disabled then the posts within the date range (From date to To date ) will be synchronized/added to the selected spreadsheet.
Keep in mind that click to sync will only append/sync those entries which are not present in the sheet it will not update the existing posts within the sheet.
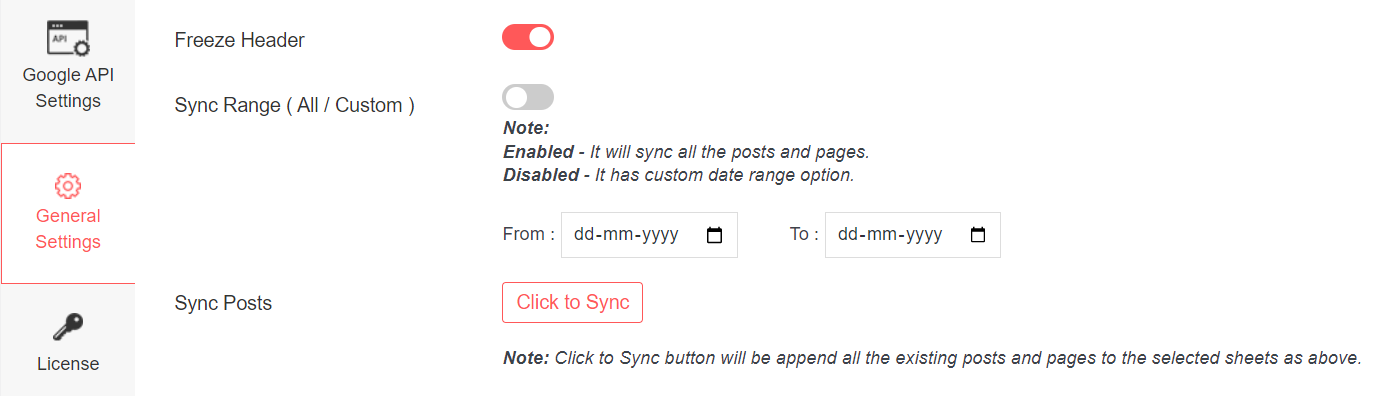
4. Freeze Headers
When the user wants to freeze the first row i.e., the header (title) row while scrolling down the page it will remain on top of the page when the user enables this button.

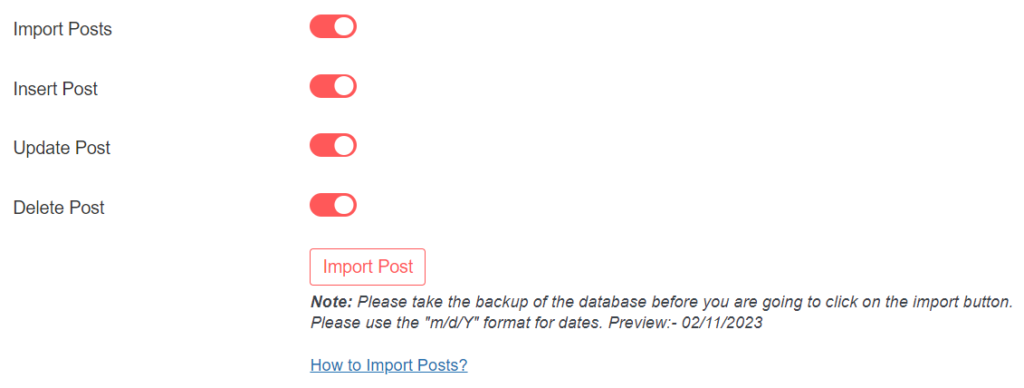
5. Import Posts
Import posts with Insert, Update, and Delete Post Options. Follow this documentation for How to Import Posts?
User Settings
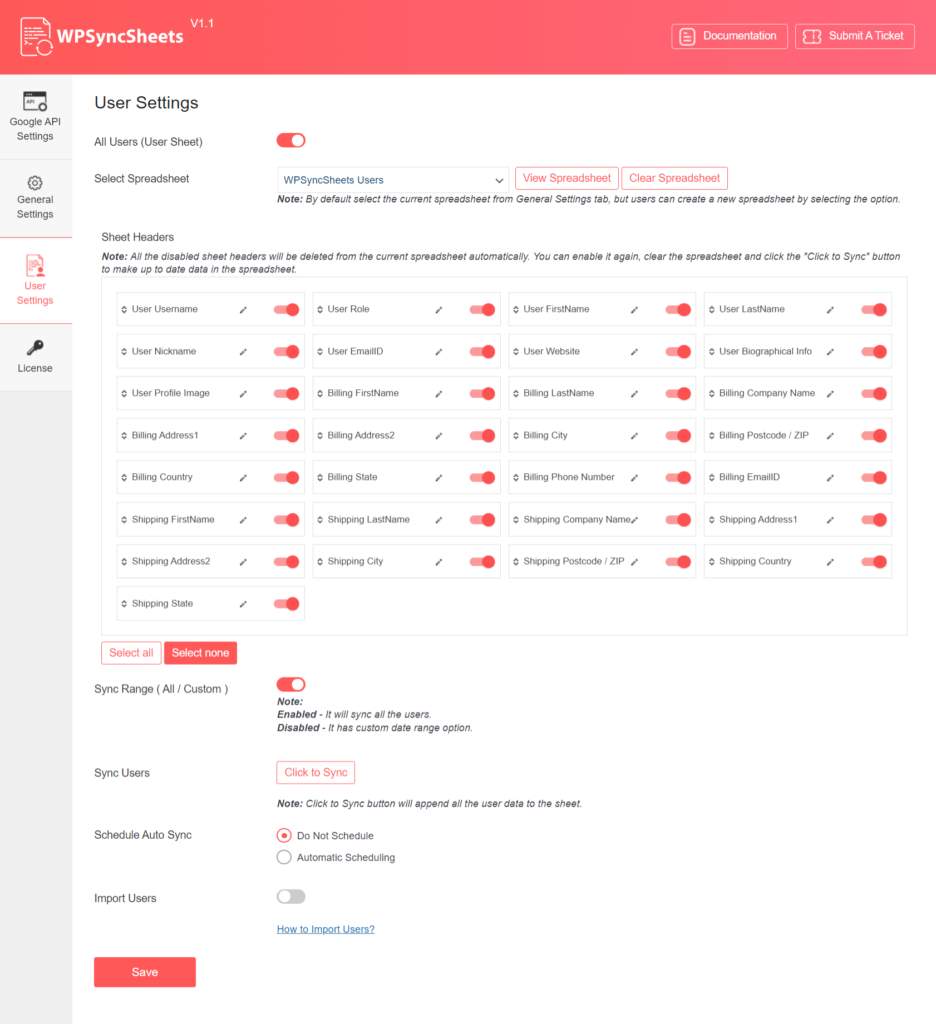
1. Create New Spreadsheet
- Select Create New Spreadsheet option from the given list in the select spreadsheet field.
- Enter the name of the new spreadsheet.
- By default, it creates an All Users sheet in the spreadsheet.
- The sheet headers will automatically get sorted as per the selected option in the Sheet Headers section. Select all button will select all the sheet headers. You can disable some of them manually. If you want to disable all the sheet headers just click on the Select none button.
- When you click the save button, the spreadsheet will get updated and you can also view it by clicking the View Spreadsheet.
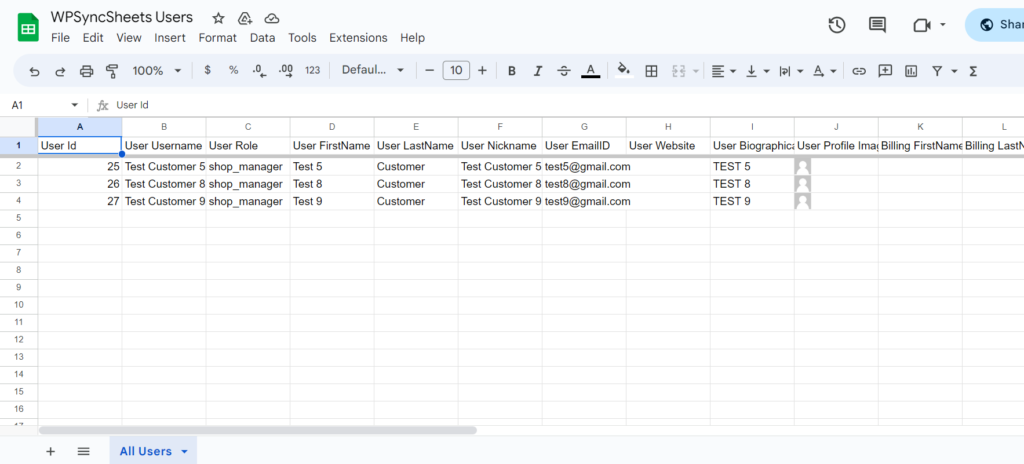
2. Updated Google Spreadsheet.
After saving the above settings, the spreadsheet is shown below.
3. Sync Users
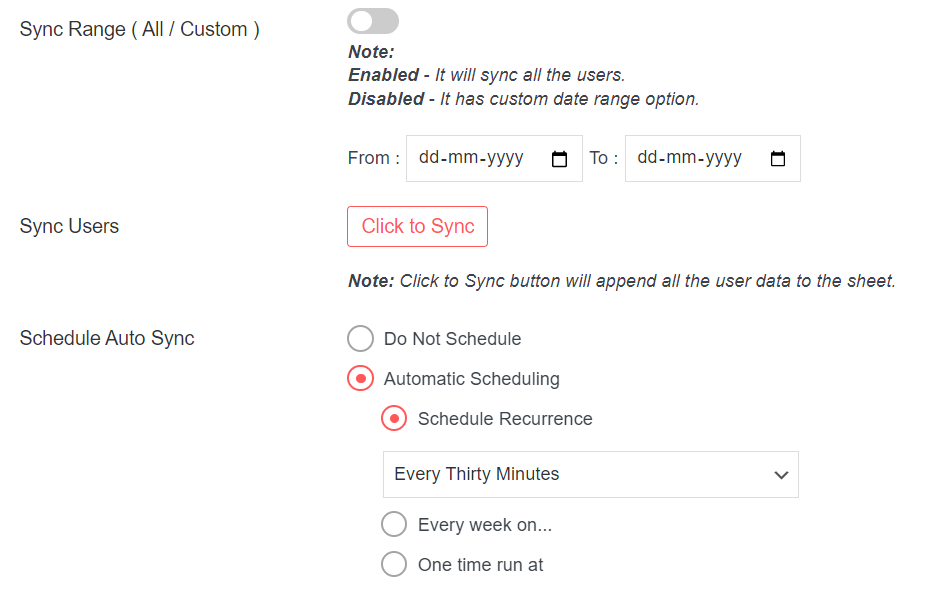
When the user clicks on the button called Click to Sync then it will synchronize/add the existing All or Custom date range users within the selected spreadsheets All Users sheet as per the value of the Sync Range ( All / Custom ) button. If Sync Range ( All / Custom ) is enabled then all the existing users will be synchronized/added and if Sync Range ( All / Custom ) is disabled then the users within the date range (From date to To date ) will be synchronized/added to the selected spreadsheet All Users sheet.
Users can even schedule to sync all the user data with Schedule Auto Sync settings. The user has to set the settings once and it will automatically sync all user’s data at the scheduled time.
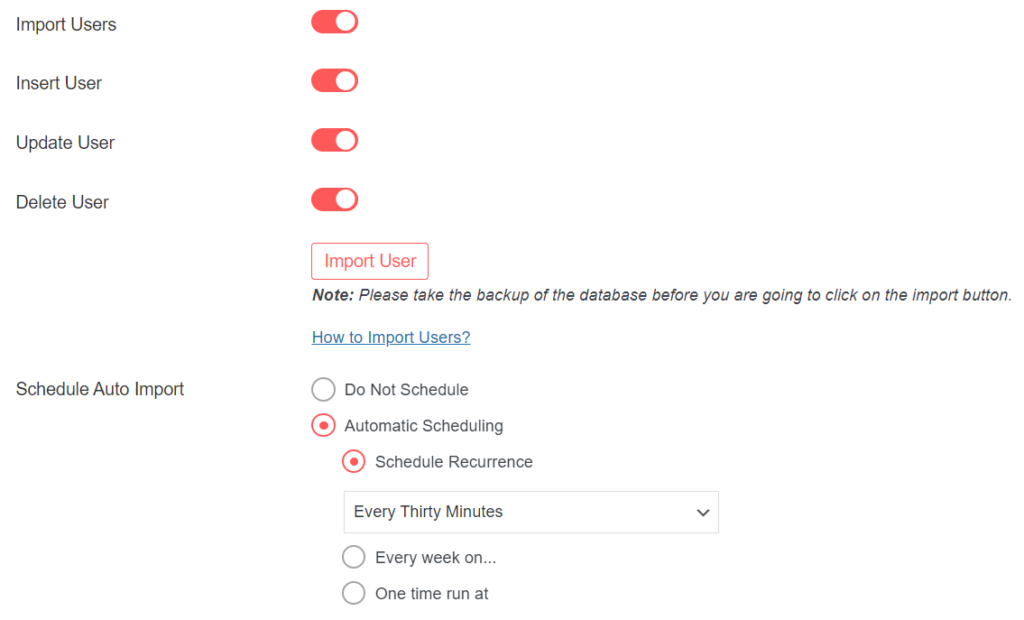
4. Import Users
User can import user’s data with Insert, Update, and Delete User options. Follow this documentation for How to Import Users?
Users can also schedule the import with Schedule Auto Import.