Import Pages with WPSyncSheets For WordPress plugin
If an admin wants to create or update multiple posts or pages in bulk, they can use Import Posts/Pages to sync data from Google Sheets. This saves time, reduces manual entry errors, and allows for efficient content management across their WordPress site.
How to Import Pages?
Step 1
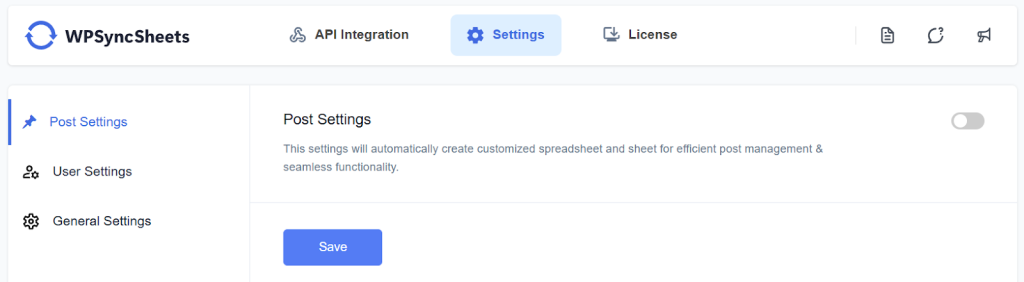
Navigate to Settings > Post Settings and enable the Post Settings option.
Step 2
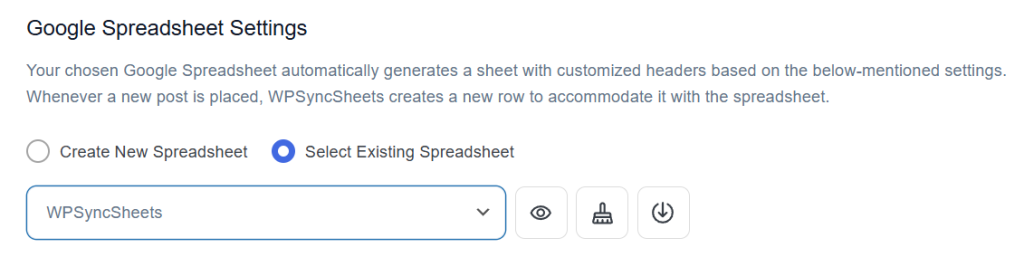
Click “Create New Spreadsheet” and give a name of your spreadsheet or “Select Existing Spreadsheet”
Step 3
Enable the Pages type in Default Post Type as Sheets

Step 4
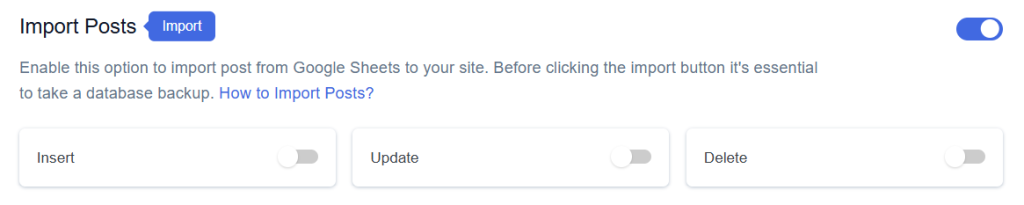
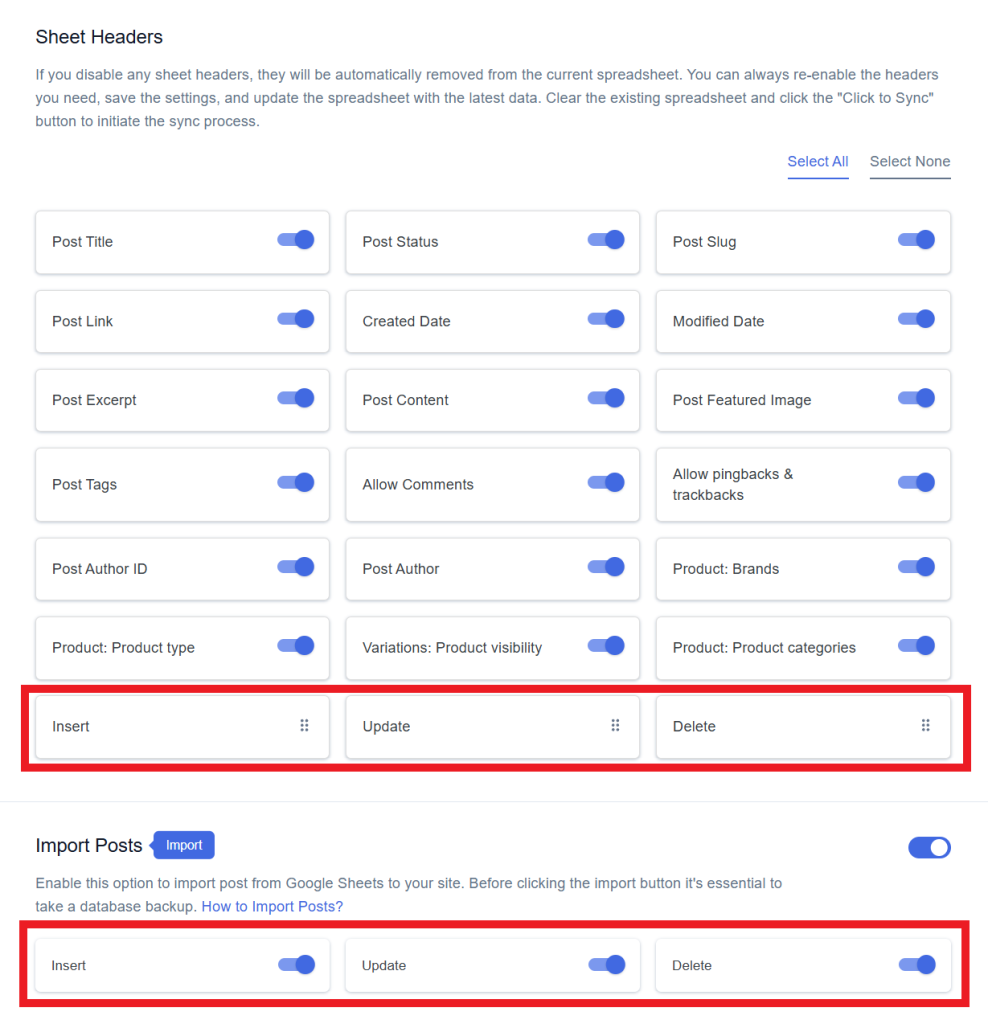
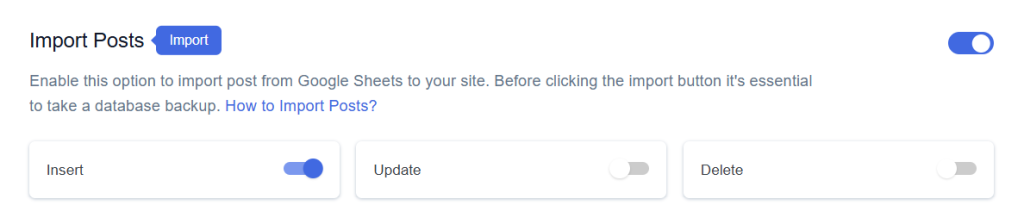
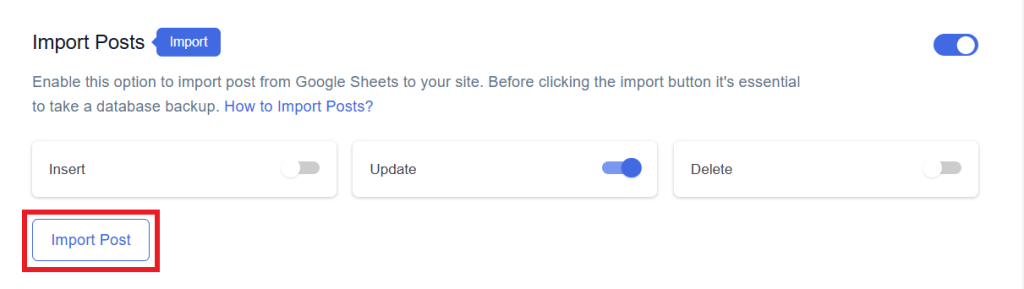
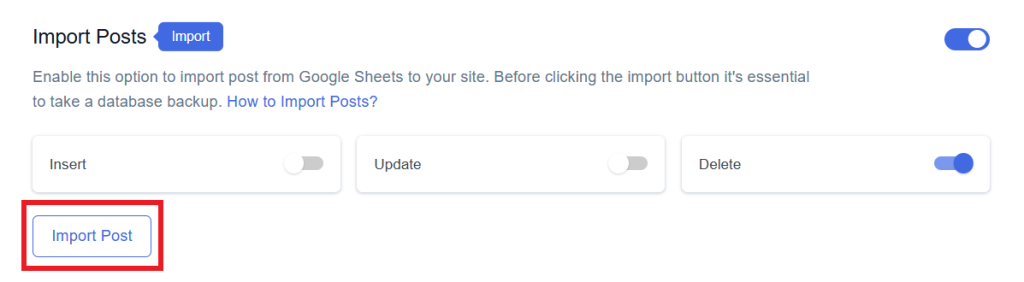
Find and enable the Import Post option.

Step 5
Enable/Disable the options insert/update/delete as per your requirement and Save Settings.
Step 6
Enable the option which task you want to do and the enabled option will be displayed in the Sheet headers.
You can Enable/Disable the sheet headers as per your requirement.
Step 7
After that in Google Spreadsheet Settings click on View Spreadsheet.
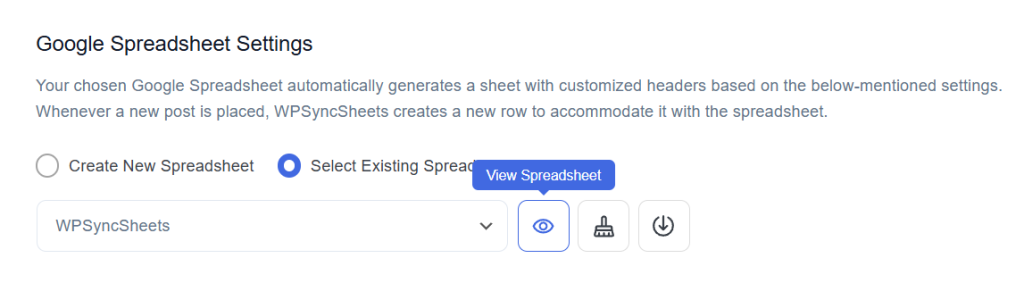
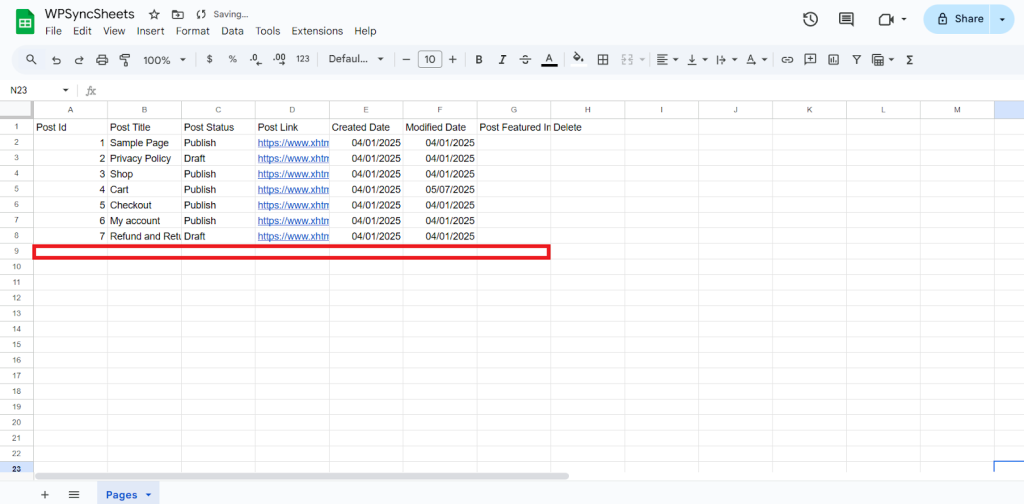
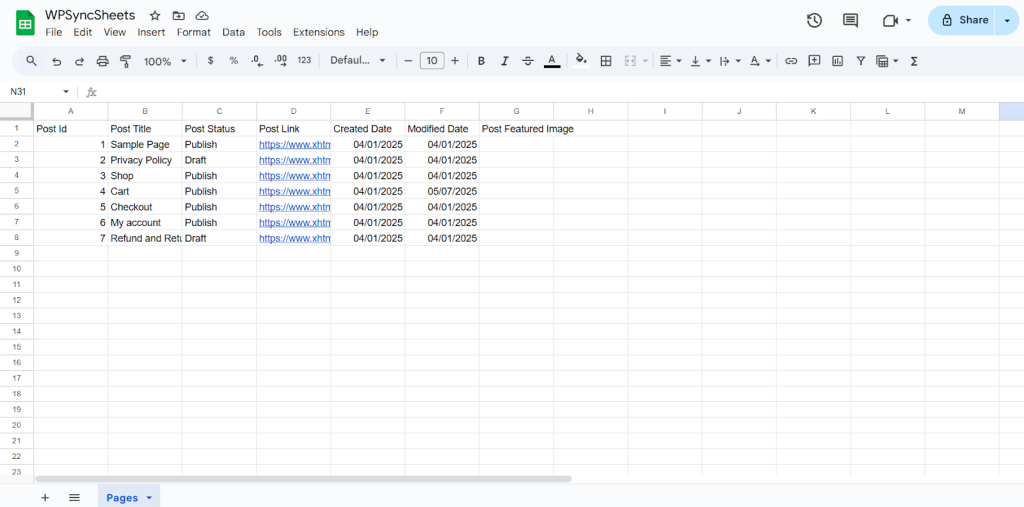
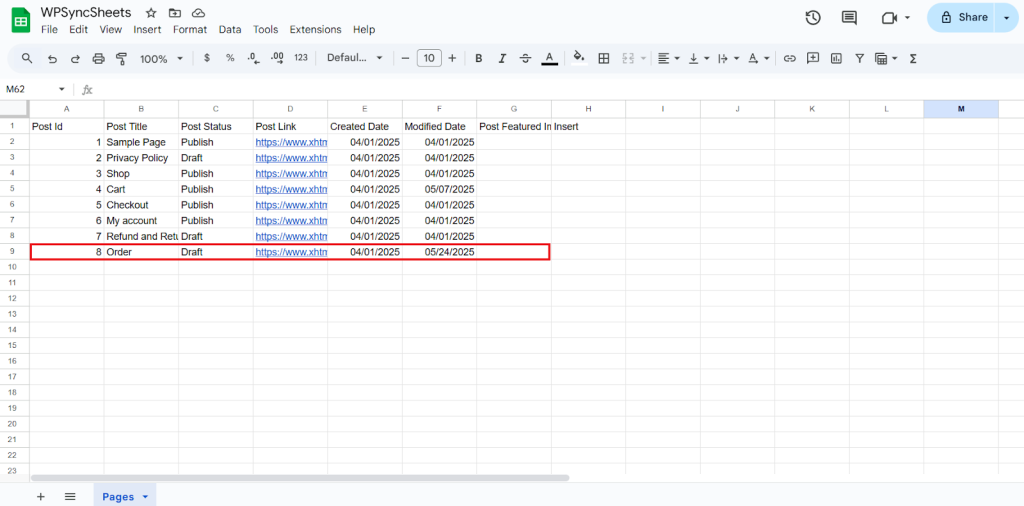
Original Spreadsheet
Insert Pages
Step 1
Enable Insert to import your desired data and click on save settings.
Step 2
After you save the settings you will have the “Insert” column in your connected Google Spreadsheet parallely Import Post option in the form settings page.
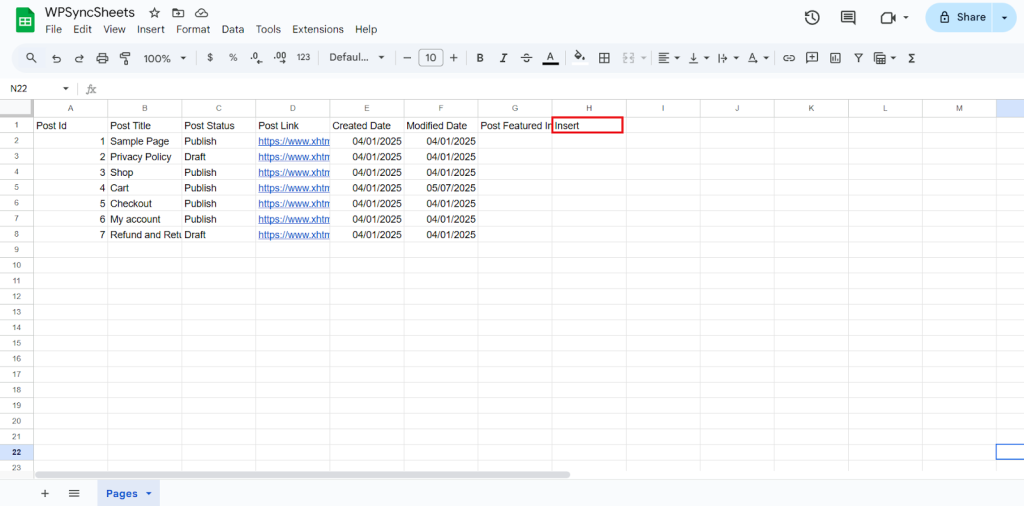
Step 3
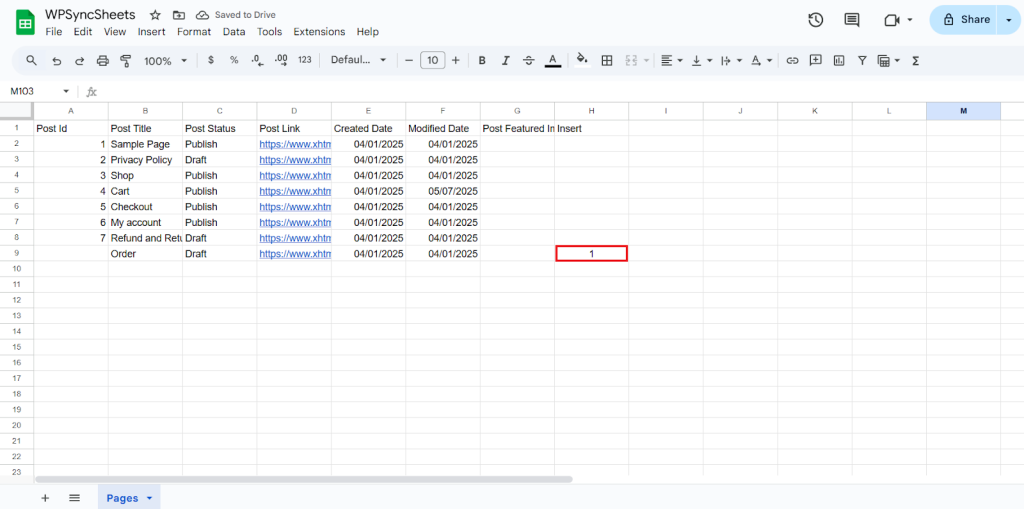
Fill in the required post details. Go to the Insert column and type “1” in the row you want to create a new page.
Required Fields
- Post Title (Required): Enter the title of your post.
Optional Fields
- Post ID: Auto-generated automatically.
- Post Status: Choose post visibility (Draft / Published / etc.)
- Post Link: Auto-generated URL.
- Created Date: If blank, current date will be used.
- Modified Date: Updates automatically on changes.
- Post Featured Image: Optional image upload or URL.
Step 4
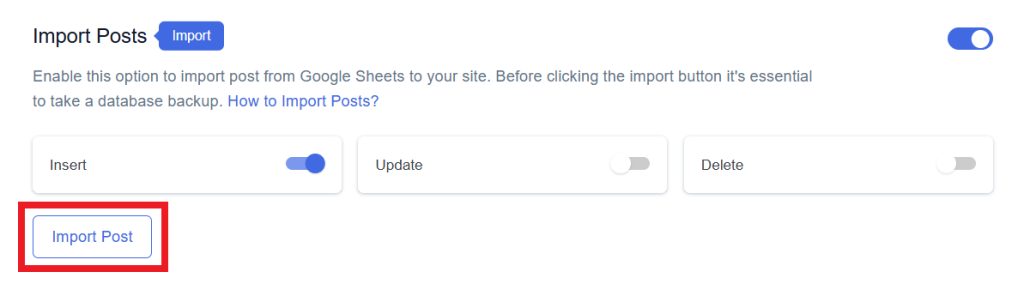
Click to Import Post.
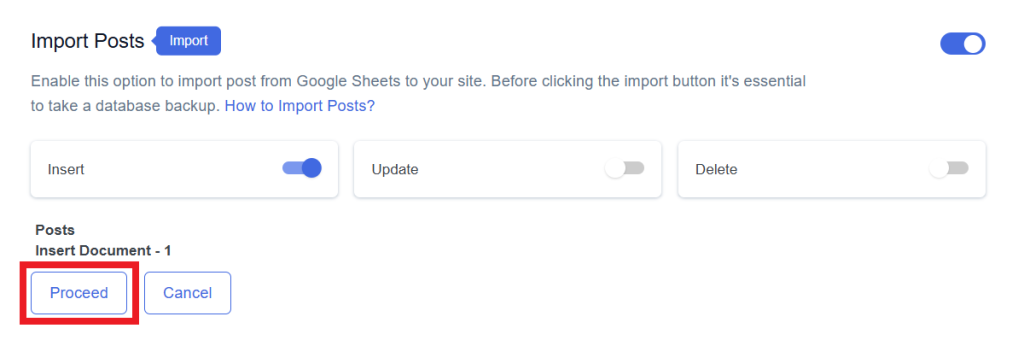
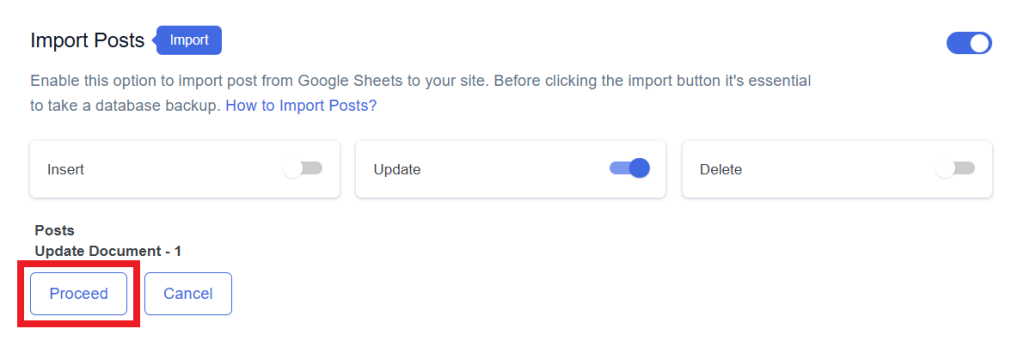
Step 5
Now, you will have the Proceed option, click on it.
Final Spreadsheet
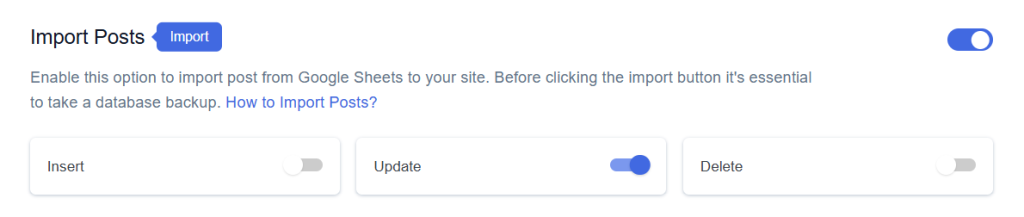
Update Pages
Step 1
Enable Update button to update your desired data and click on save.
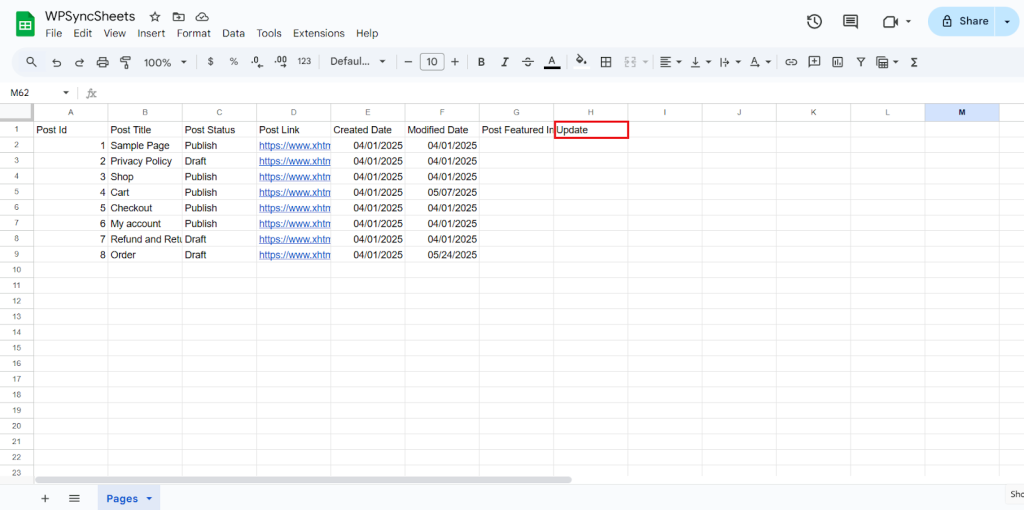
Step 2
After you save the settings you will have the “Update” column in your connected Google Spreadsheet parallely Import Post option in form settings page.
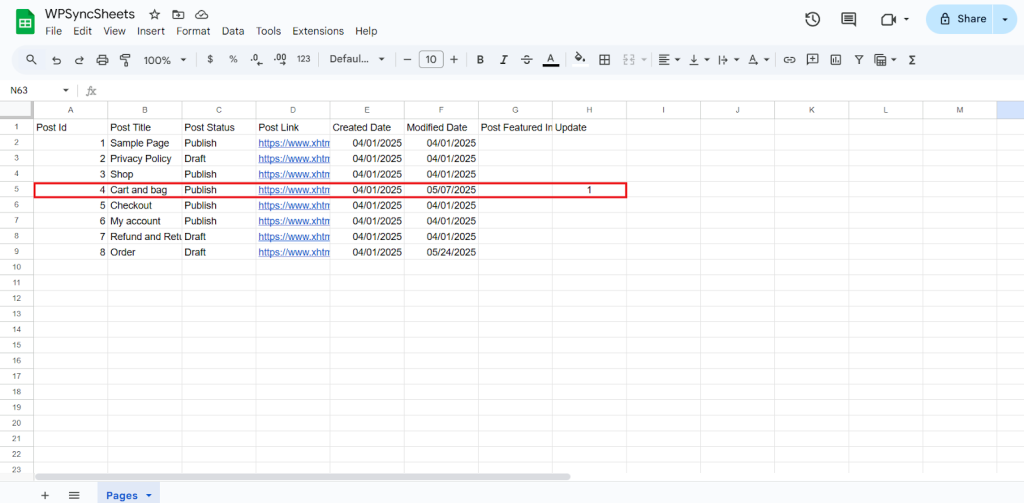
Step 3
Make the changes you want and in the Update column of that row, type “1”, to update a particular column.
Step 4
Click on the Import Post button to apply the updates.
Step 5
Now, you will have the Proceed option, click on it.
Final Spreadsheet
Delete Pages
Step 1
Enable the Delete button to update your desired data and click on save.

Step 2
After you save the settings you will have the “Delete” column in your connected Google Spreadsheet parallely Import Post option in the form settings page.
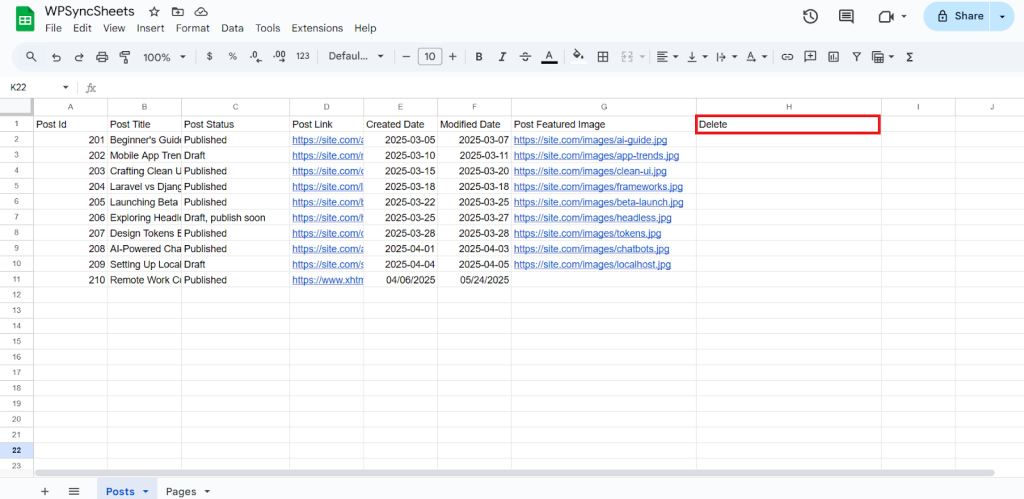
Step 3
In the Delete column of that row, type “1”, to delete a particular column.
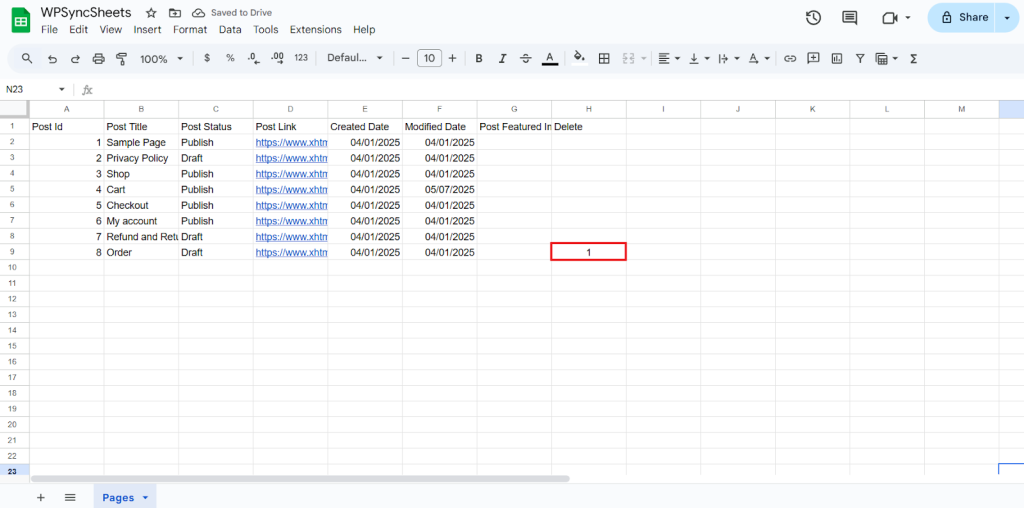
Step 4
Click on Import Post
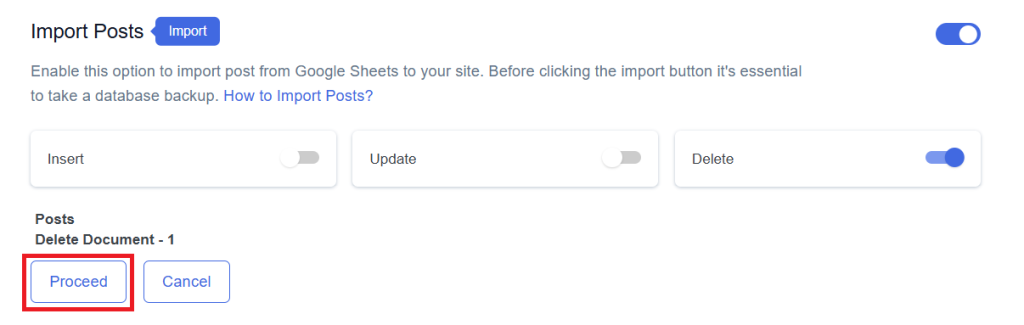
Step 5
Now, you will have the Proceed option, click on it.
Final Spreadsheet