Export Users with WPSyncSheets For WordPress plugin
If the admin wants to export WordPress users data, they can instantly move all users information into Google Sheets and track updates in real-time. Exporting helps maintain accurate records, simplifies reporting, and is useful for user segmentation or audits.
How to Export Users?
In case you haven’t installed and activated the plugin yet, go to the Setup Guide and follow the steps.
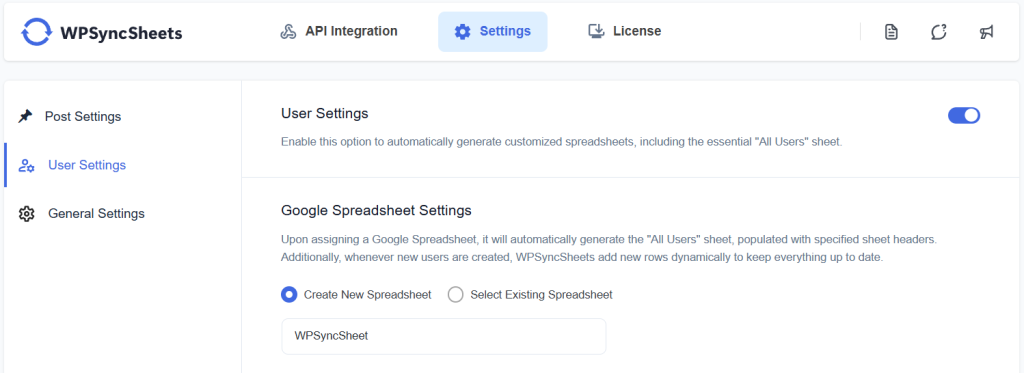
Step 1: Enable User Settings
Navigate to: Settings > User Settings.
Enable the User Settings option.

Step 2: Choose New or Existing Google Spreadsheet
This section will give you two options:
- Create New Spreadsheet
- Select Existing Spreadsheet
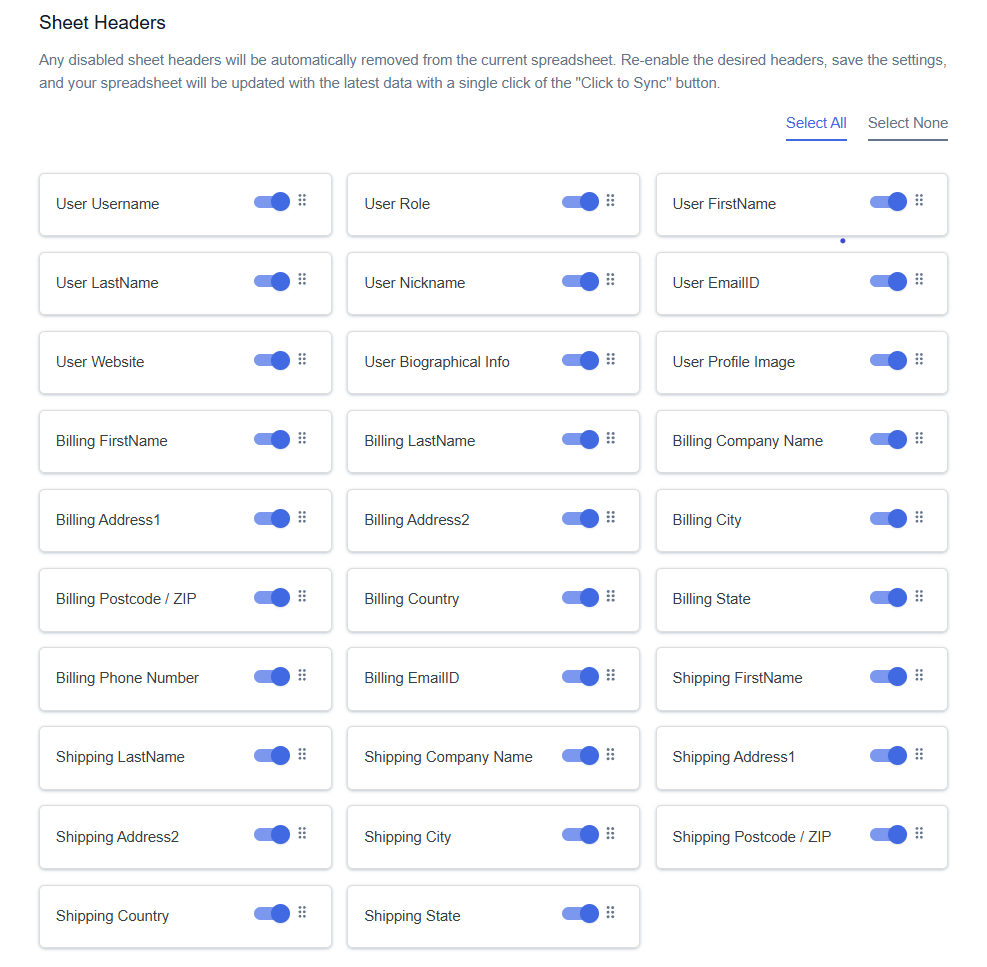
Step 3: Enable/Disable Sheet Headers
Enable/Disable sheet headers which you want to sync.

Step 4: Save Settings
At the end of the page, click on the “Save” button.

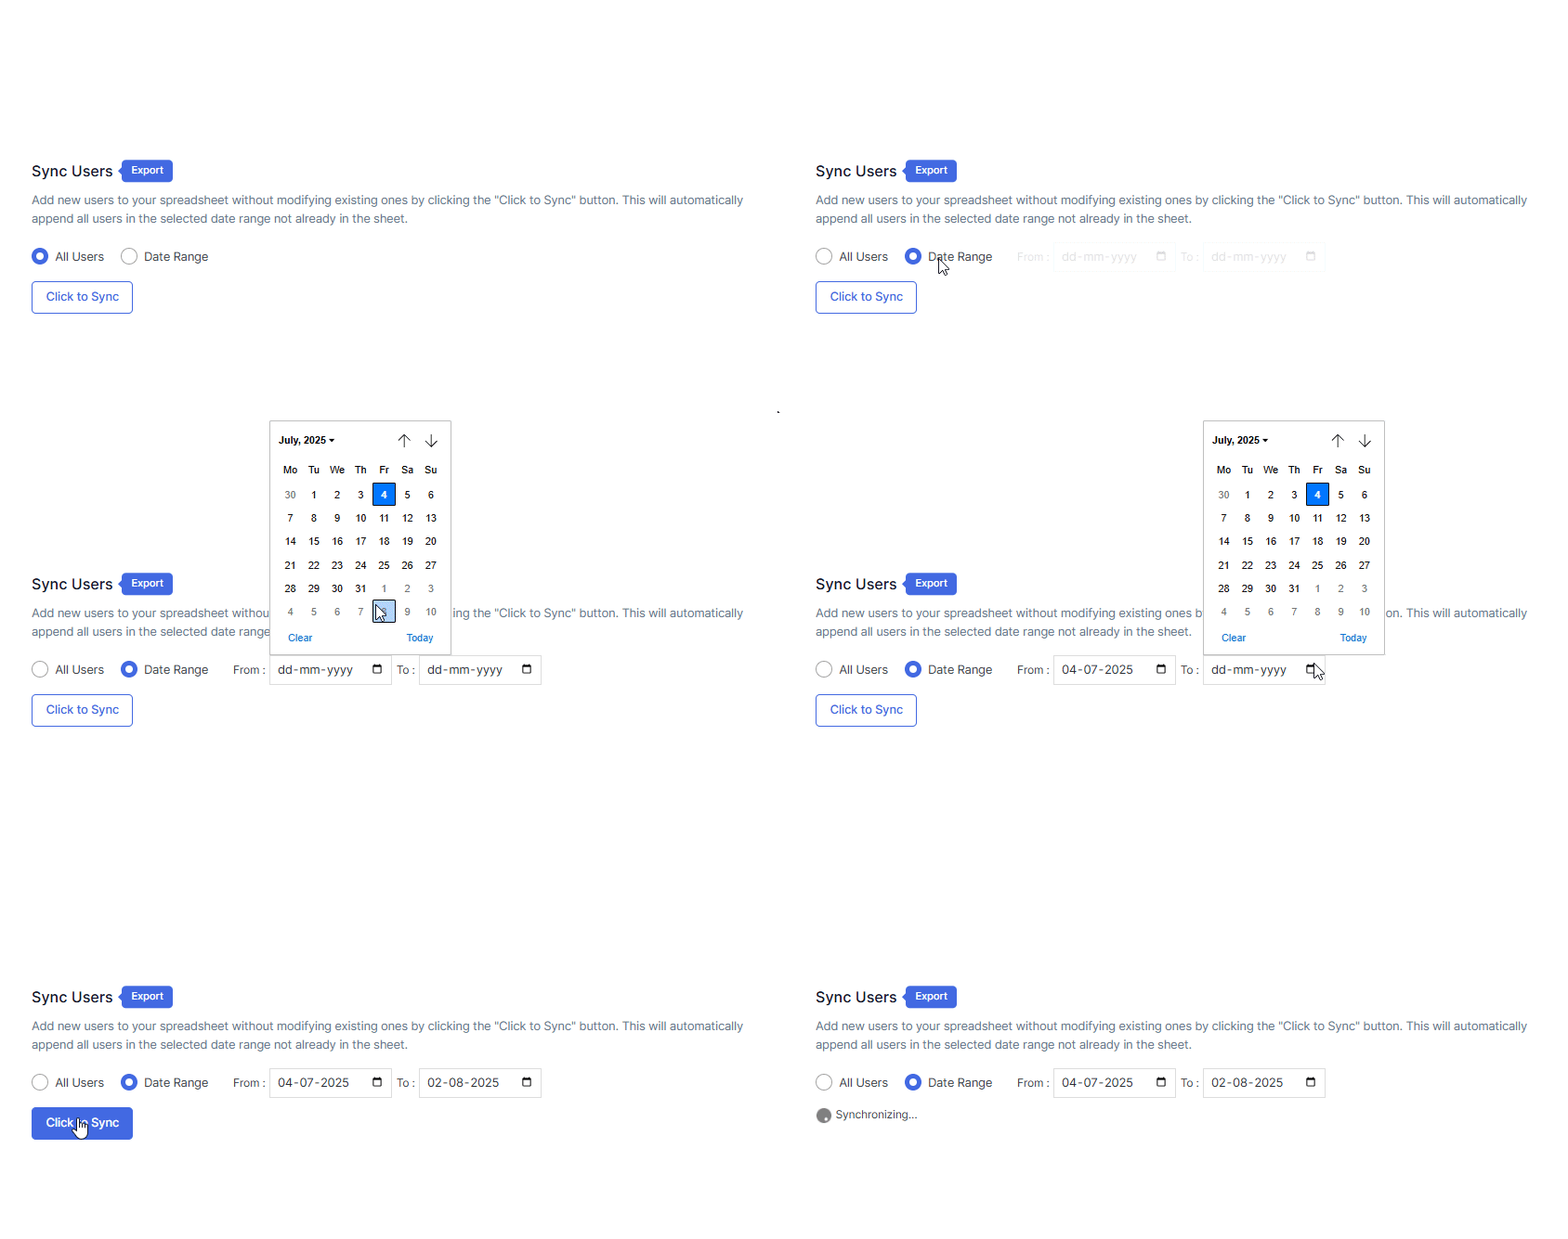
Step 5: Export Users with Click to Sync
Once all the settings are saved, the ‘Click to Sync’ option will be enabled.
This section will give you two options:
- All Users
- Date Range
- If you want to export all users from the beginning to till now to your Google Spreadsheet, select ‘All Users‘ and then click on ‘Click to Sync’.

- If you want to export users within a custom date range, select the ‘Date Range’ option and choose the start and end dates as per your requirement. After setting the dates, click on ‘Click to Sync’.

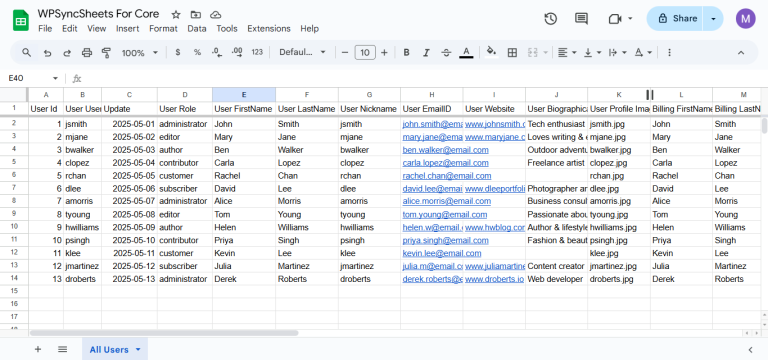
Final Spreadsheet


