 Documentation
Ask Your Favorite AI
Copy this article in AI-ready Markdown for ChatGPT, Claude, Gemini, and more.
How to Create New Client ID and Client Secret Keys?
Users have to use the Google API to connect the plugin to the Google Sheet in order to enable automated data transfer and real-time synchronization between their website documents and Google Sheets.
Go to WPSyncSheets > For Document Library Pro > Google API Settings
For guidance on creating Google API settings, please refer to the Video Tutorial
Step 1
Log in to your Google account and open the Google Cloud Console by clicking here.
Step 2
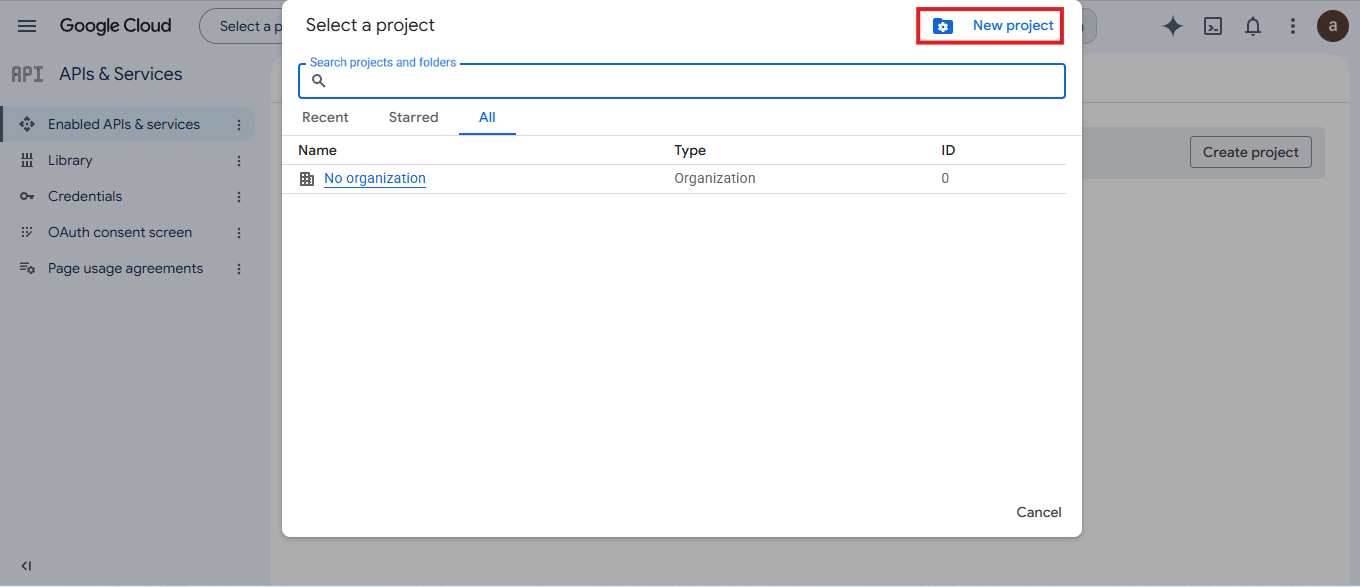
Create a New Project as shown below.
Step 3
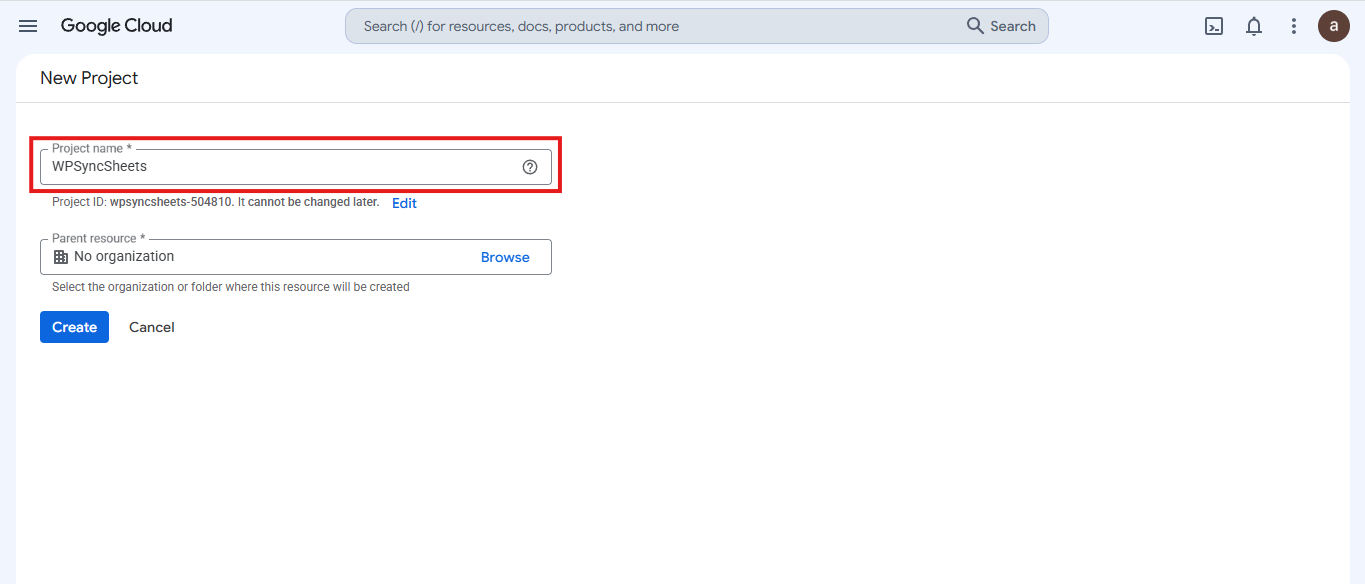
To create a new project, enter your preferred Project Name and click CREATE.
Step 4
Once the project is created, click the Project Selector in the top navigation bar and select your newly created project.
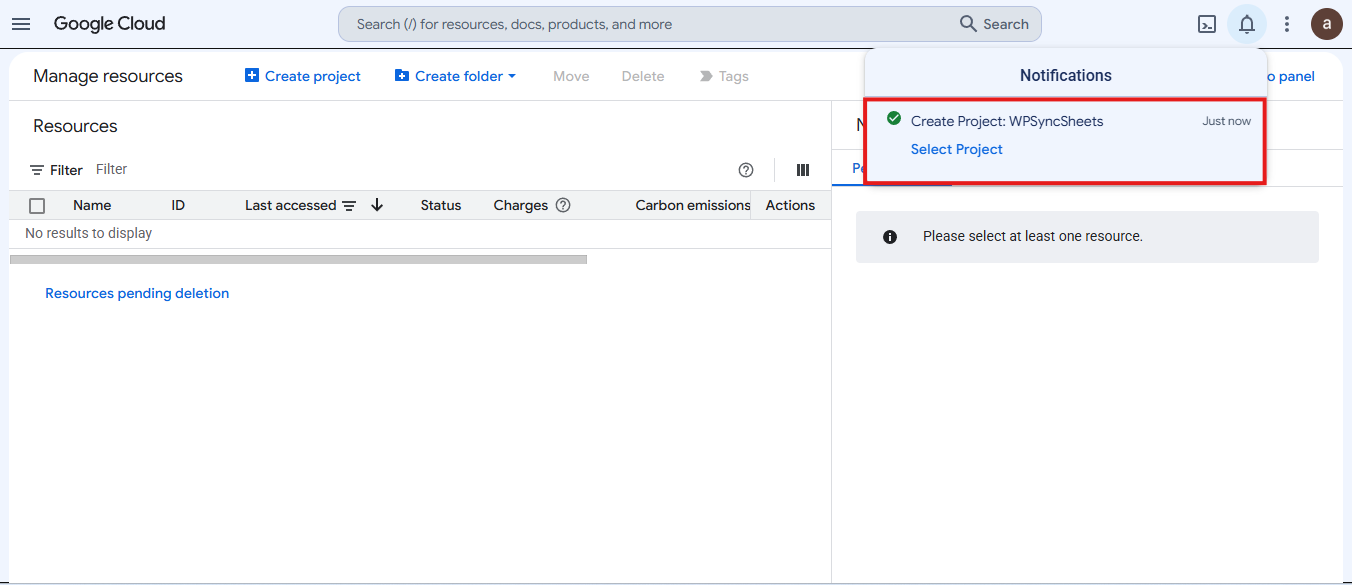
Step 5
In the left sidebar, navigate to APIs & Services > Library.
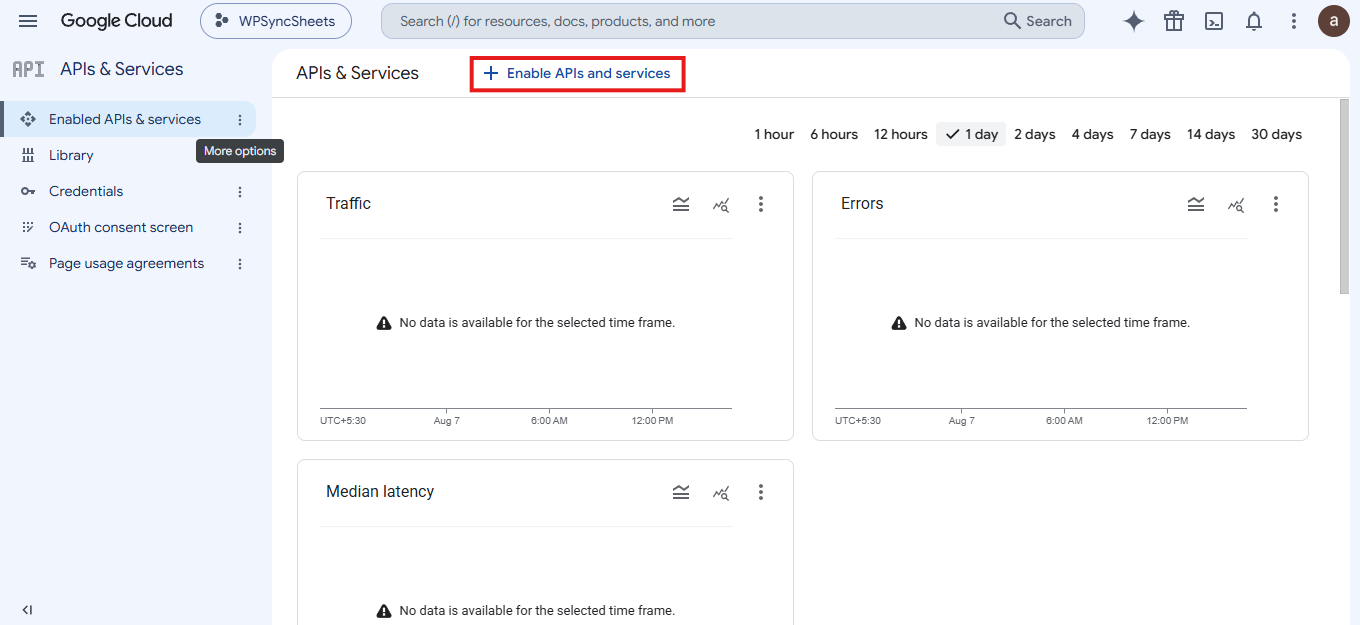
Step 6
In the API Library, search for Google Drive API and select it.
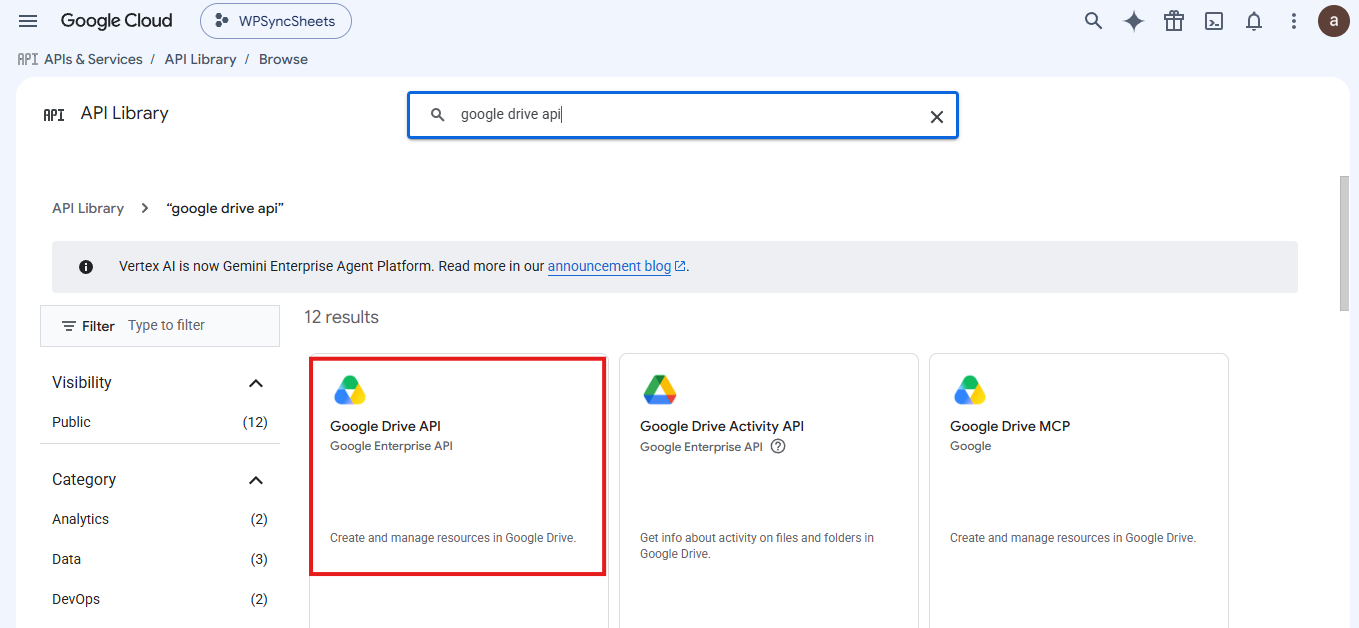
Step 7
Click on Enable.
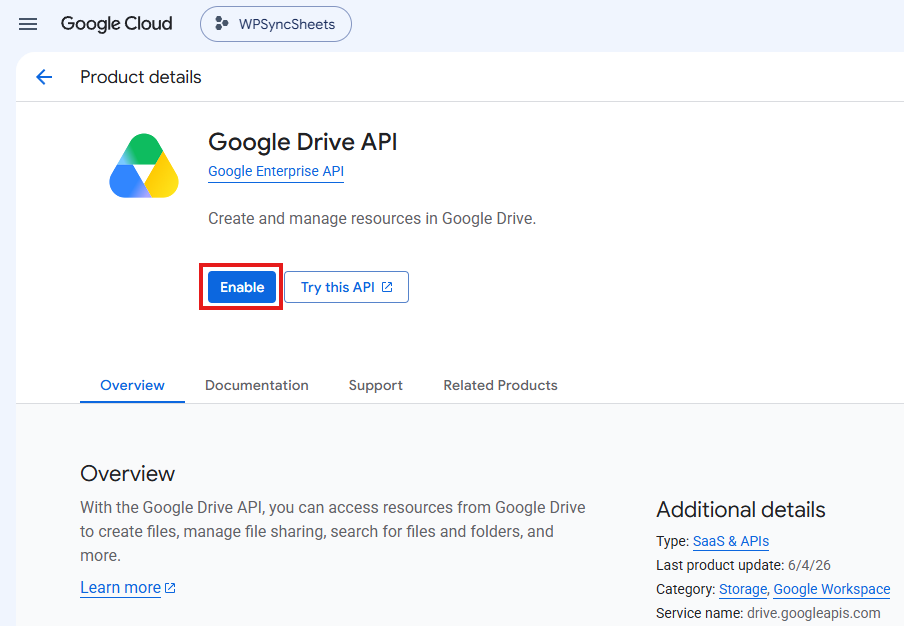
Step 8
Navigate to APIs & Services > Library.
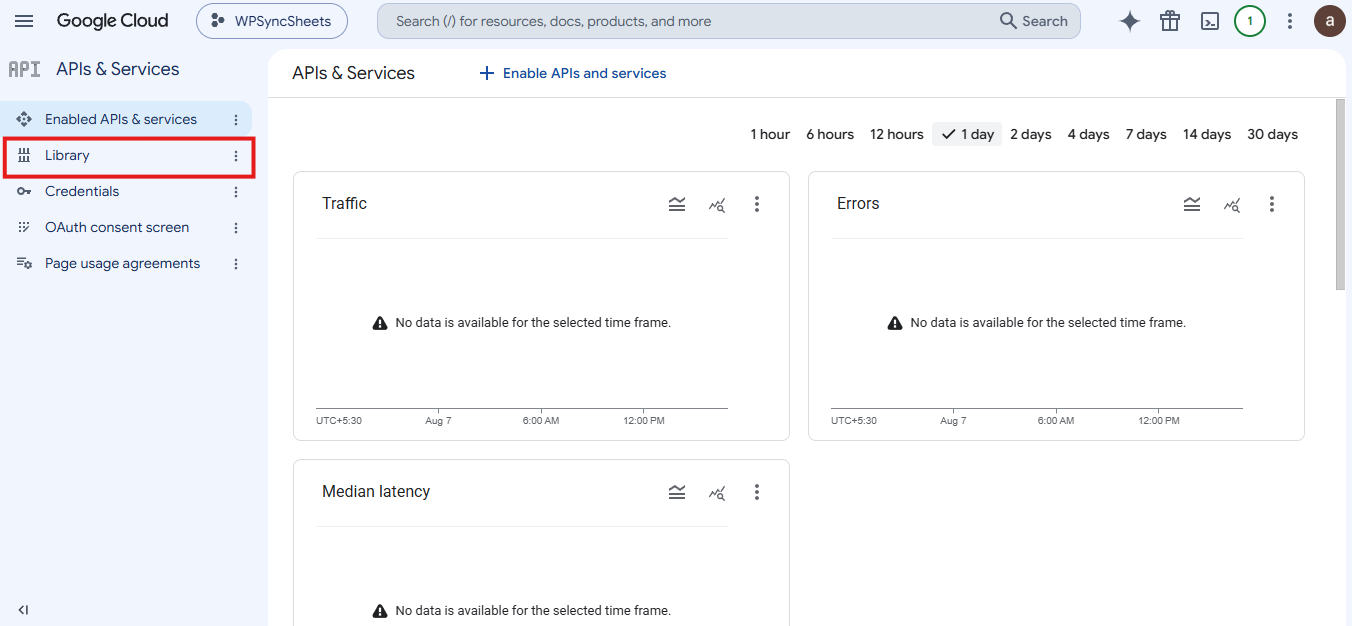
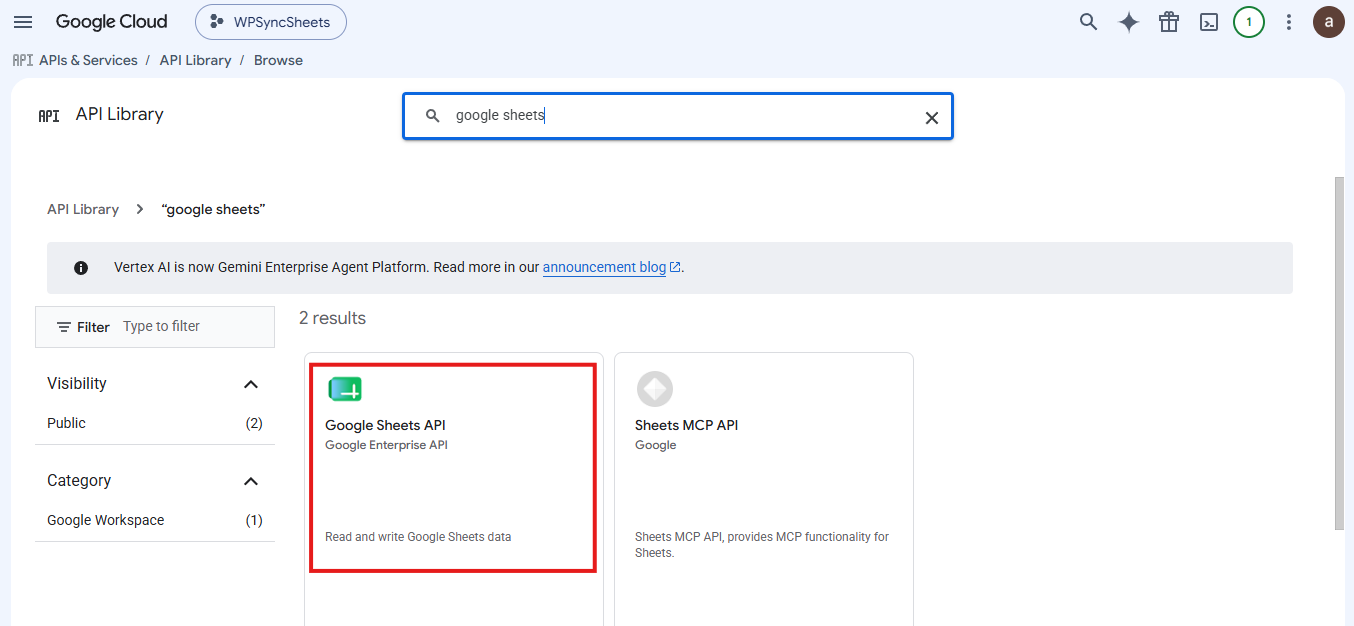
Step 9
Search for and select Google Sheets API.
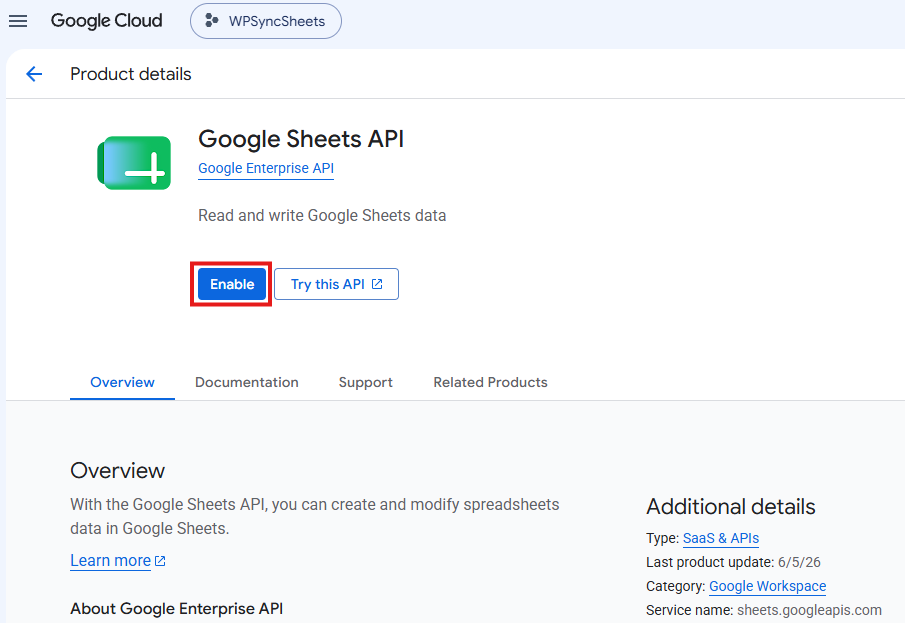
Step 10
Click on Enable
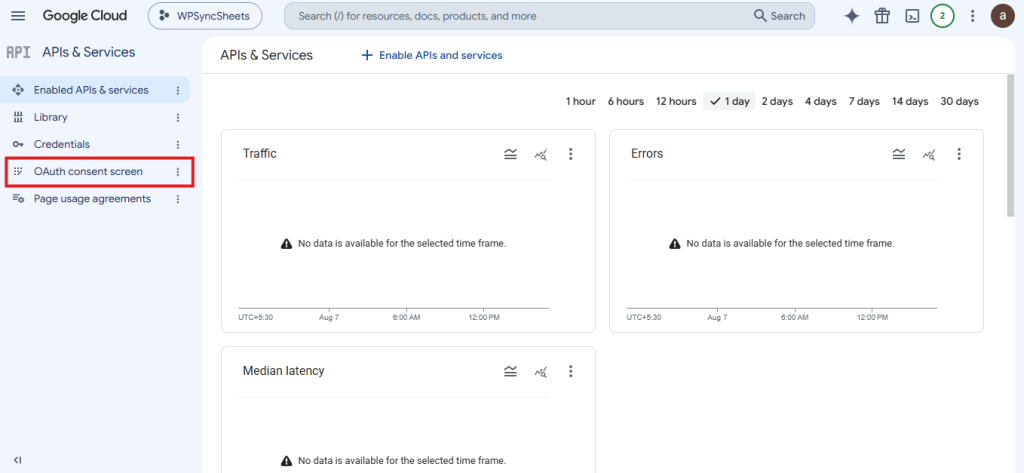
Step 11
Navigate to APIs & Services > OAuth consent screen.
Step 12
Click on Get Started
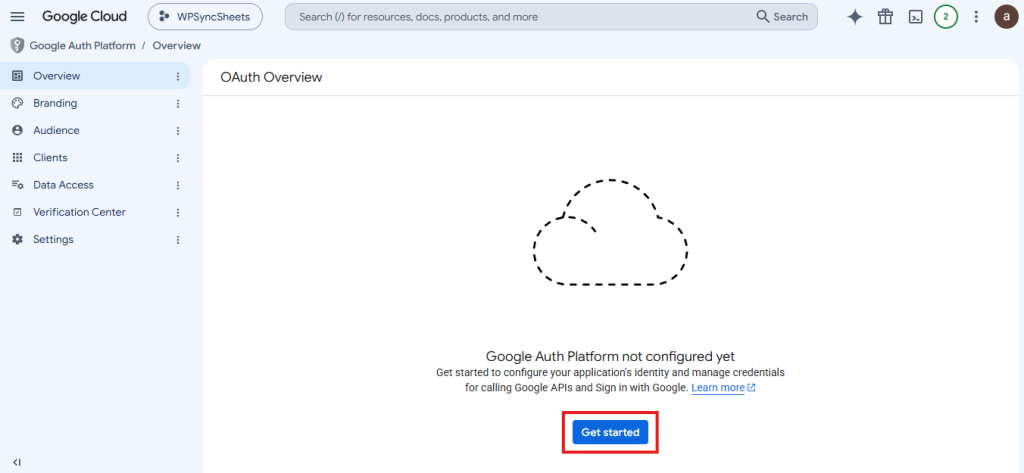
Step 13
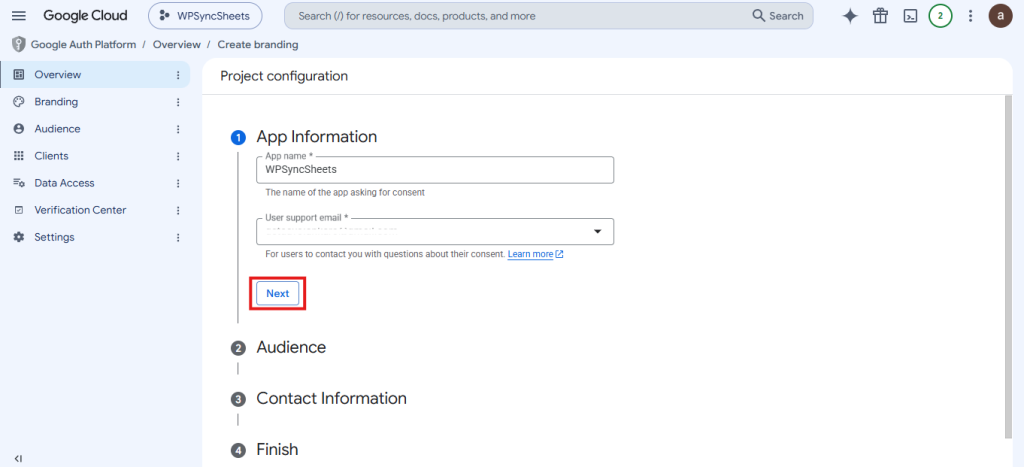
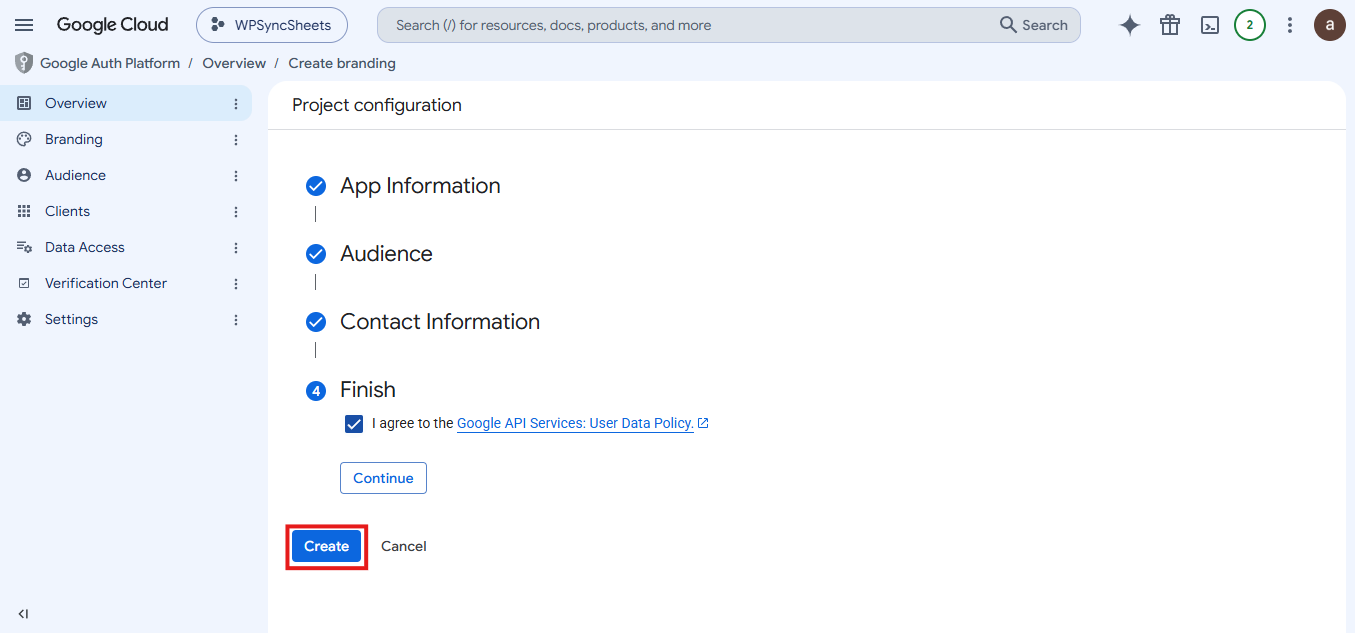
- App Information: Enter the App Name and select the User Support Email, then click Next.
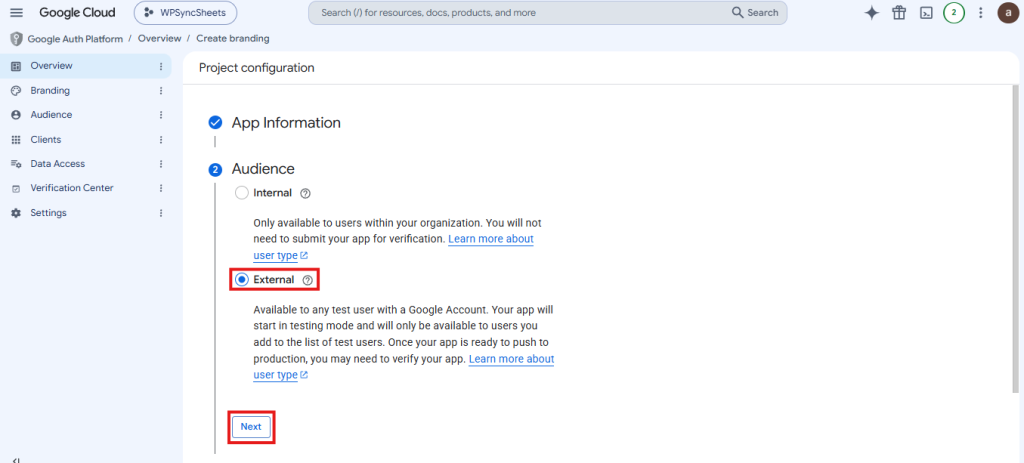
- Audience: Choose External and click Next.
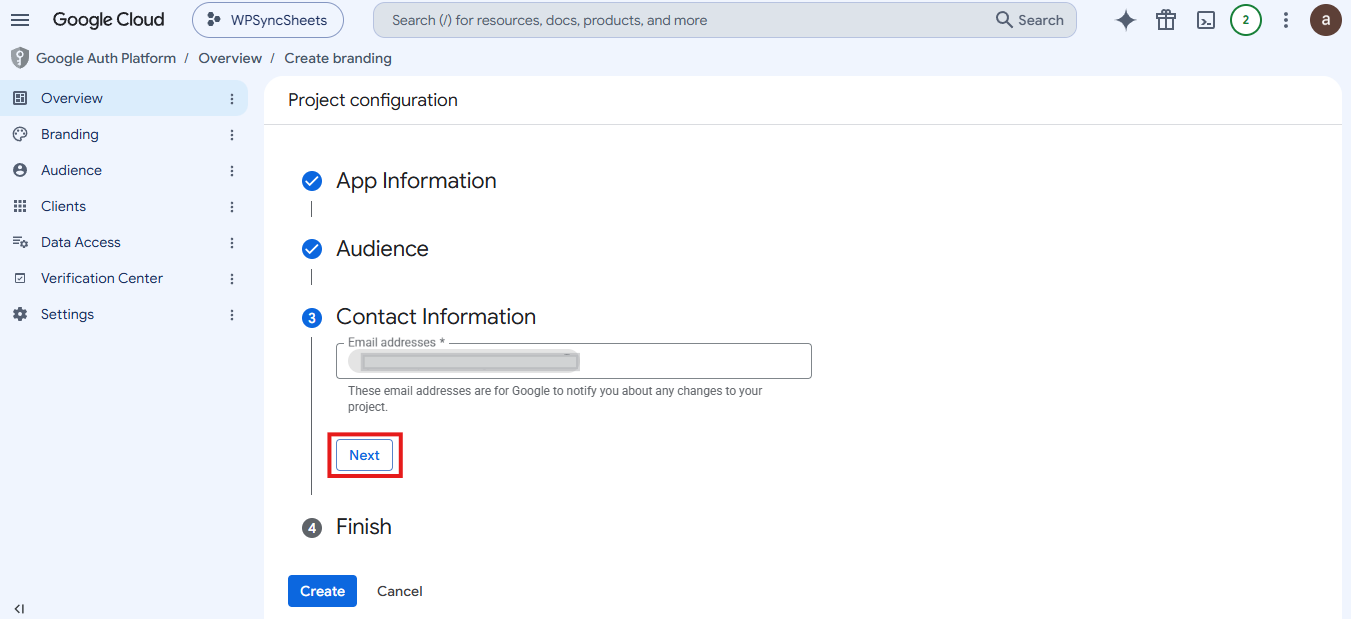
- Contact Information: Enter the Developer Contact Email and click Next.
- Finish: Accept the required agreement and click Create.
“Email address” → Developer Contact Email (this is the current Google Cloud field).
Step 14
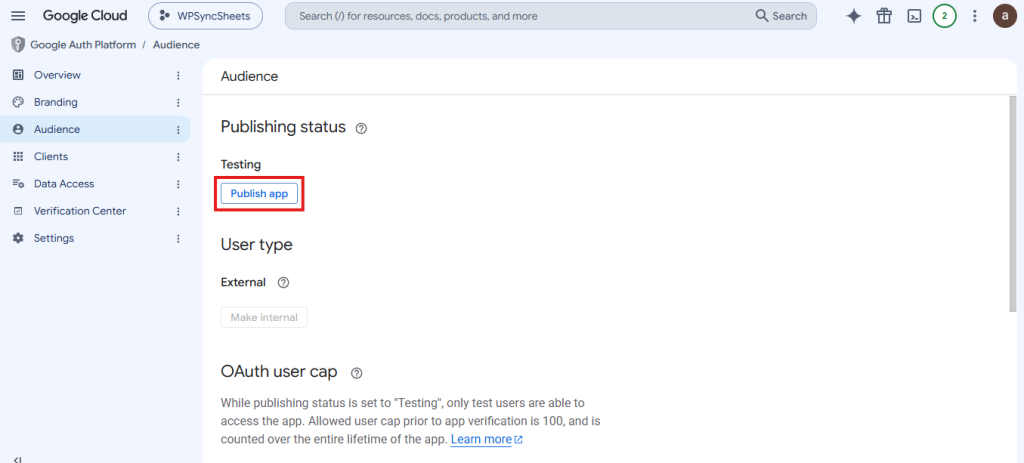
Navigate to Audience, click Publish App, and then click Confirm.
Step 15
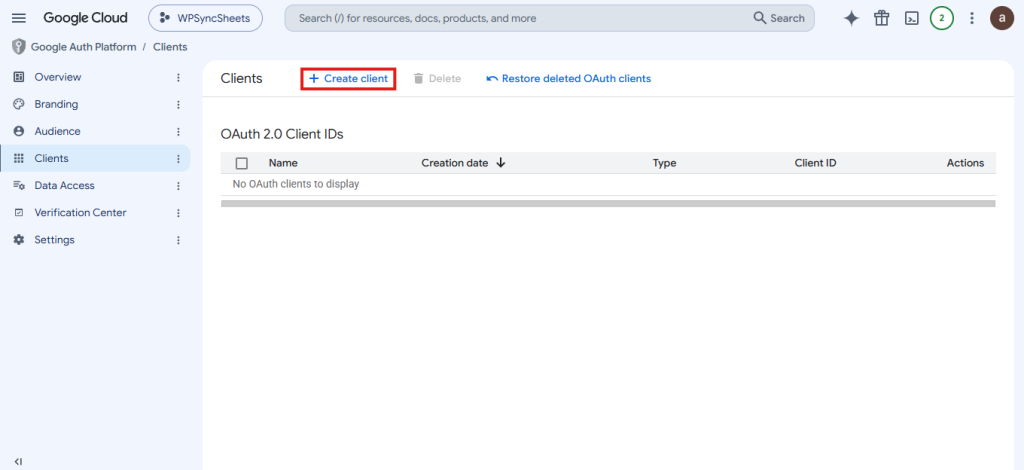
Navigate to Clients and click Create Client.
Step 16
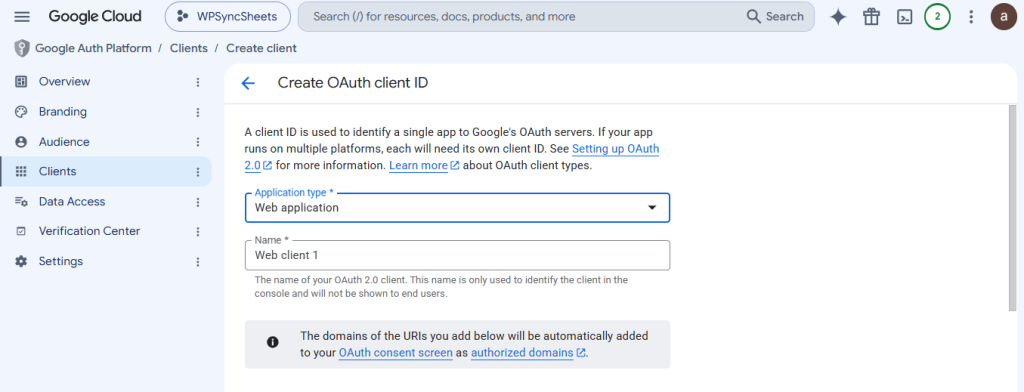
Select OAuth Client ID, choose Web Application as the Application Type, enter a name, and click Create.
Step 17
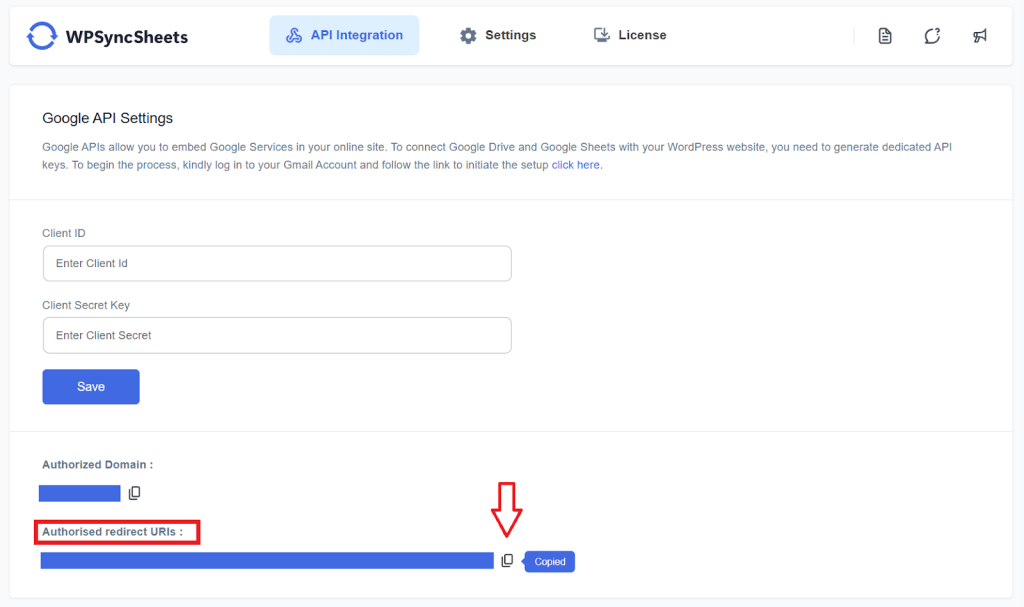
Copy the Authorized Redirect URI from the plugin’s API Integration tab.
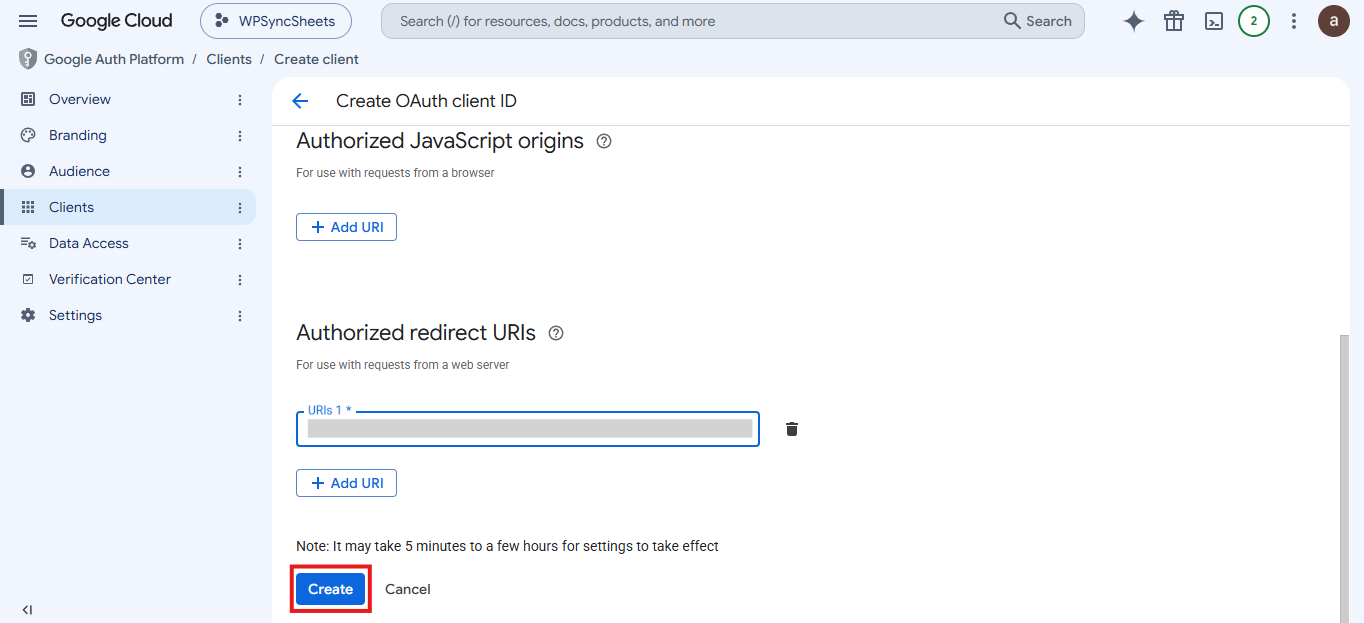
Paste it into the Authorized Redirect URIs field and click Create.
Step 18
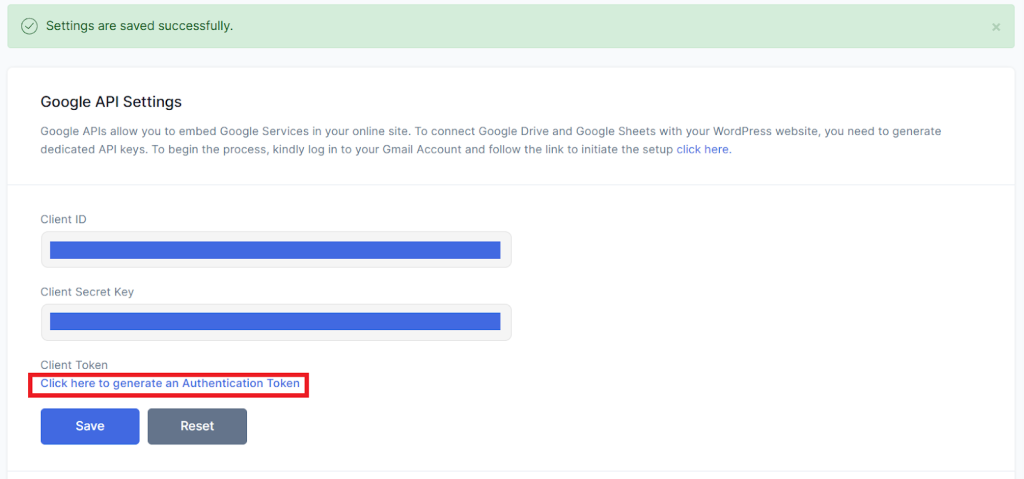
Your Client ID and Client Secret will be generated.
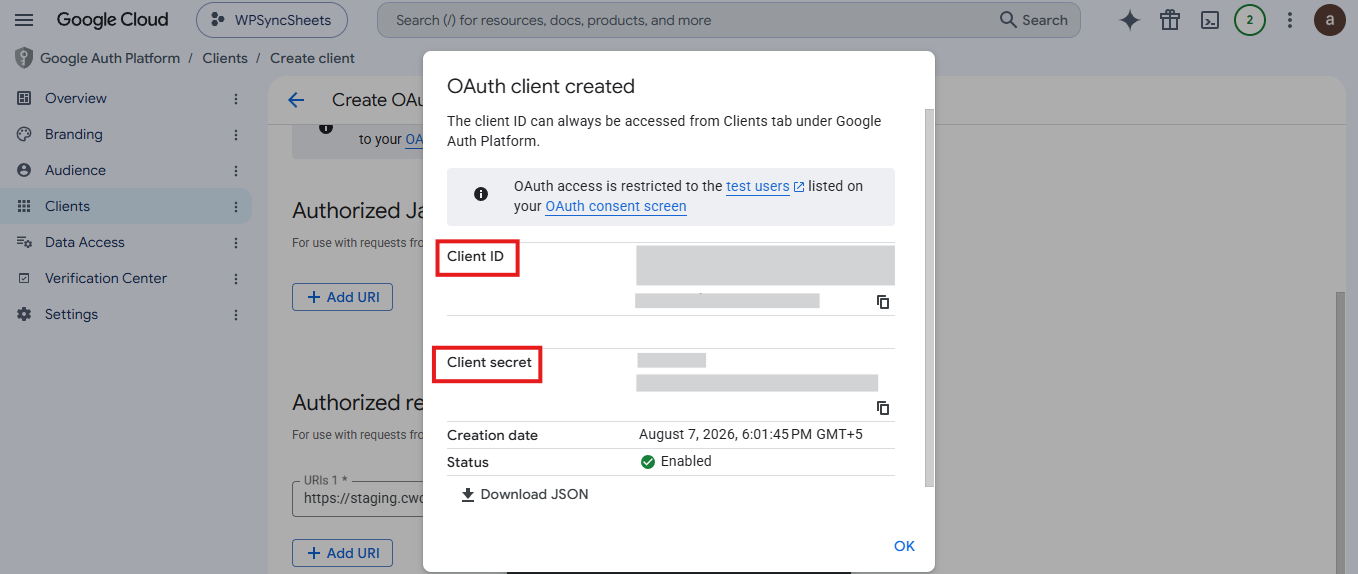
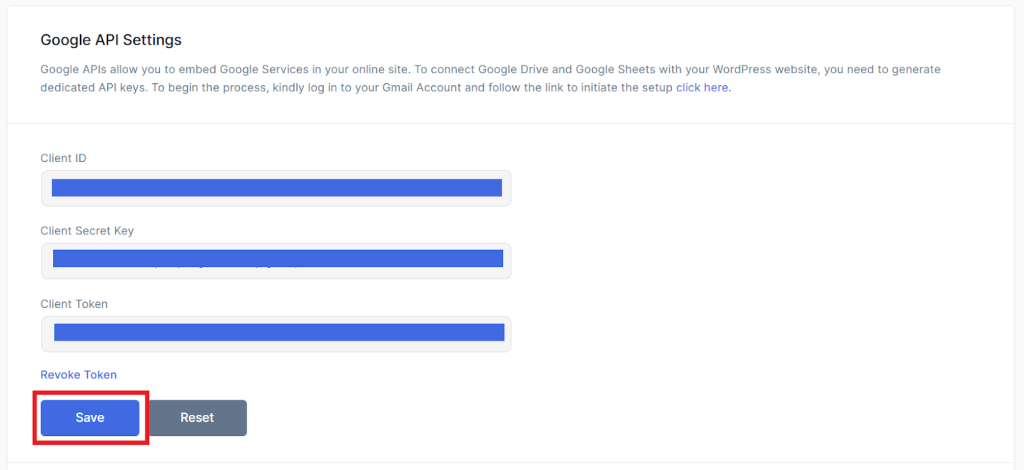
Copy both values and paste them into the plugin’s API Integration tab, then click Save.
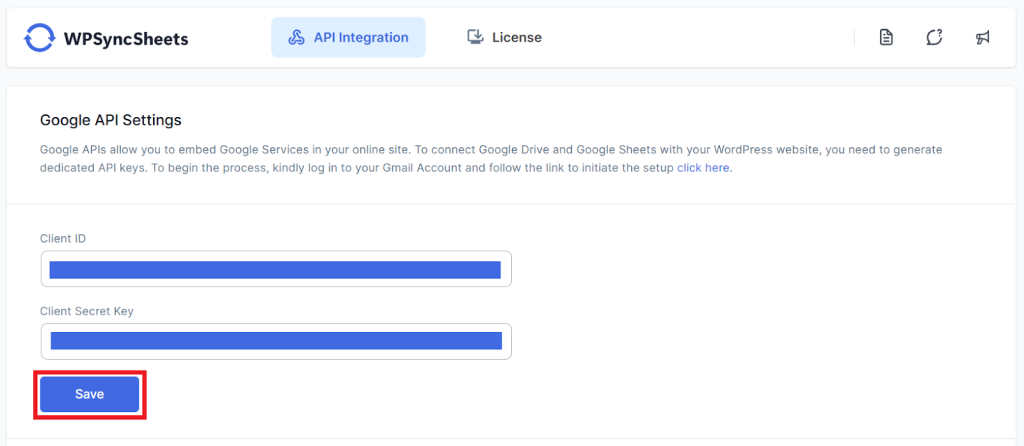
After saving, click Generate Authentication Token.
Step 19
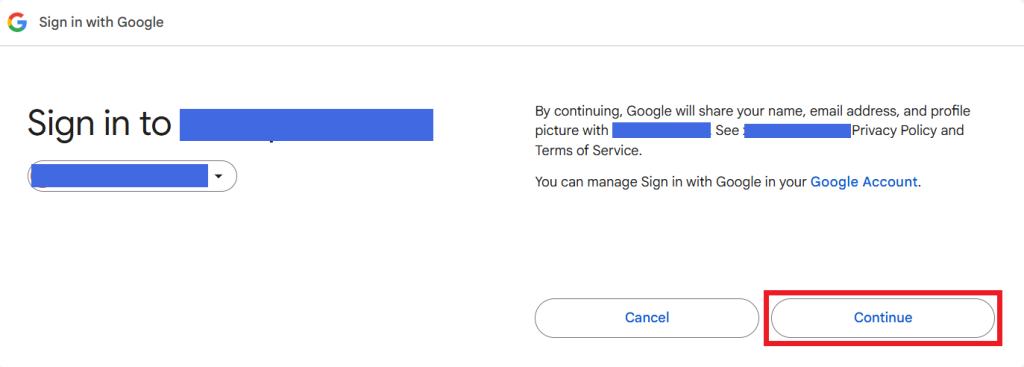
Select the same Google account that was used to create the Client ID and Client Secret.
Step 20
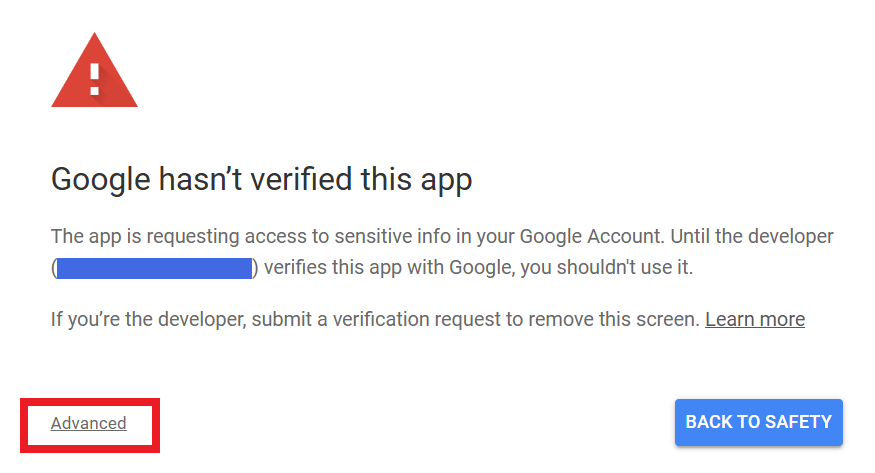
Click Advanced as per the screenshot below.
Step 21
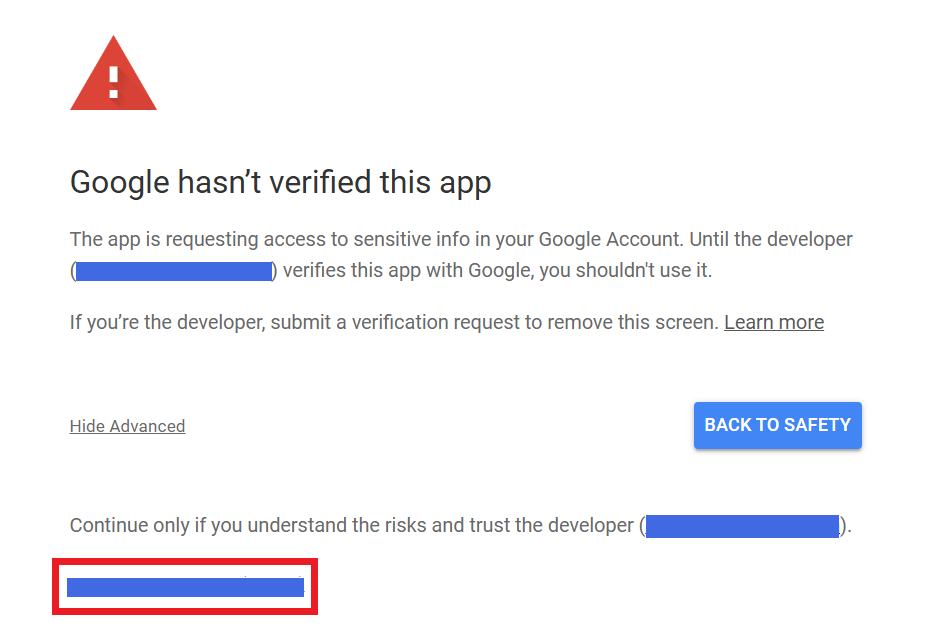
Click Go to Your App Name (unsafe) to continue.
Step 22
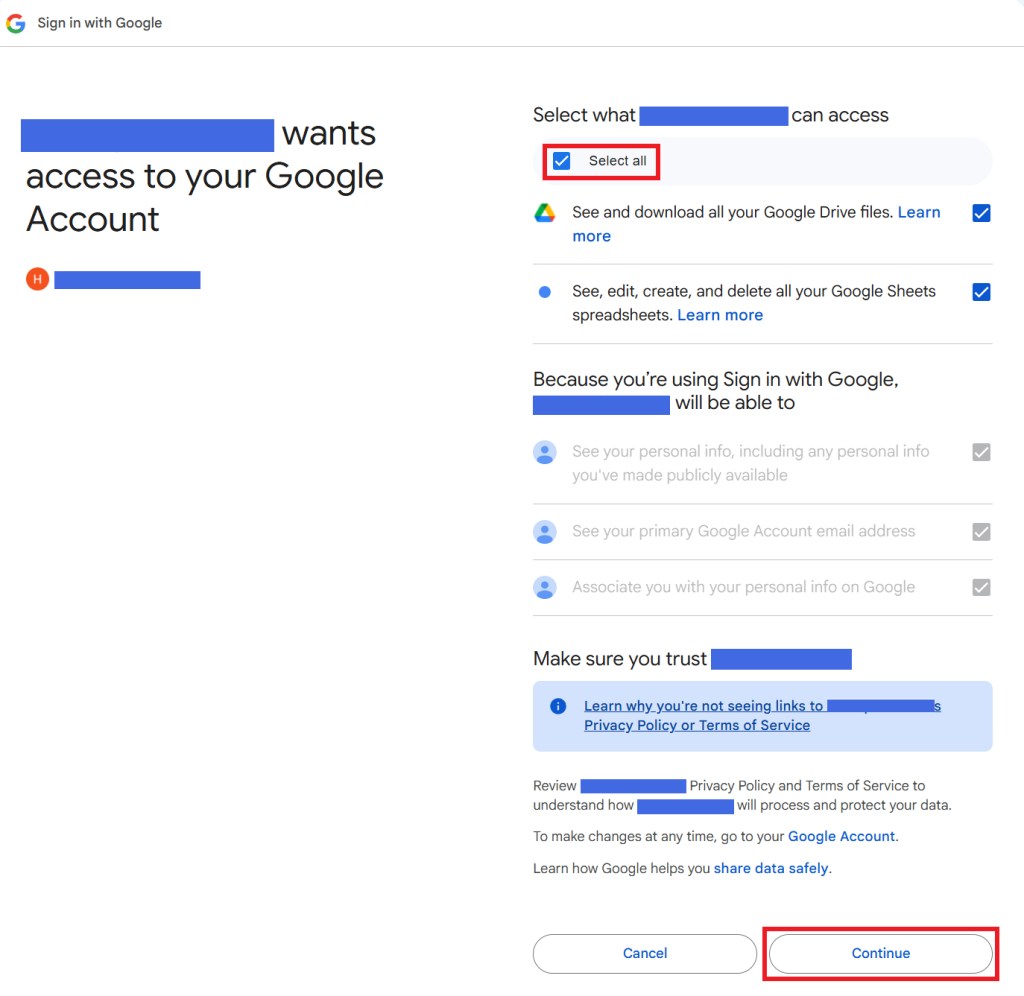
Review the requested permissions, select all required permissions (if prompted), and click Continue.
Step 23
After successful authorization, the Authentication Token will be generated automatically. Click Save to complete the setup.