Export Elementor Entries With WPSyncSheets For Elementor Plugin
Automatically sync all Elementor Form submissions to Google Sheets, helping you keep records organized, collaborate smoothly, and maintain a secure backup of your form data.
How to Export Entries?
In case you haven’t installed and activated the plugin yet, go to the Setup Guide and follow the steps.
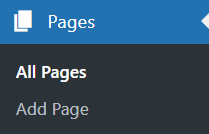
Step 1: Navigate to Pages and open All Pages
Navigate to Pages > All Pages
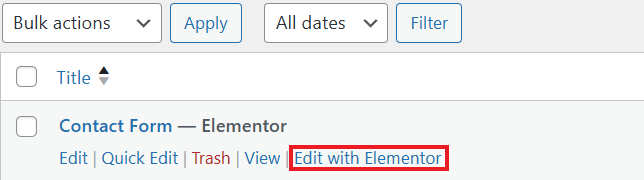
Step 2: Click on “Edit with Elementor”
After navigating to All Pages, locate the Contact Form page and click on “Edit with Elementor.”
Hover your mouse over the Contact Form, do not click on it. You will see Edit with Elementor option.
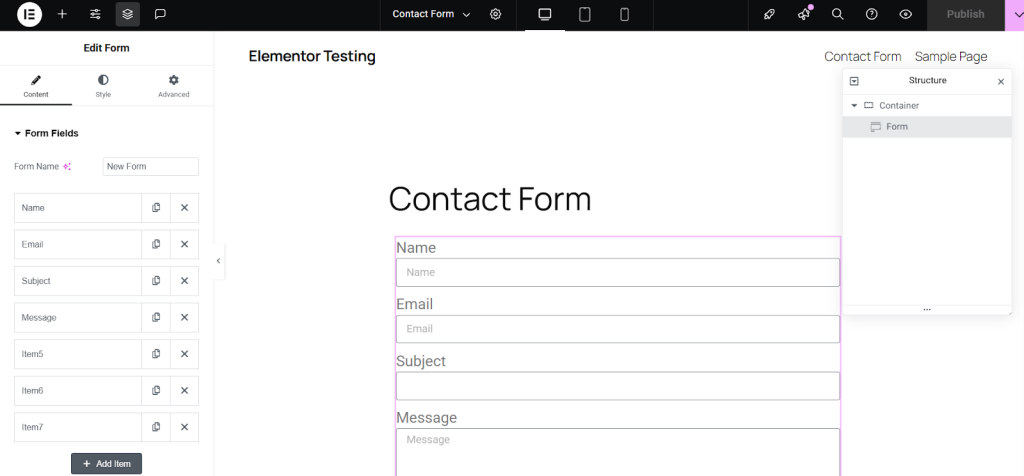
Step 3: Open the Form Settings
Once the Elementor editor loads:
- Select the Form widget on your page.
- All Form settings will appear in the left panel.
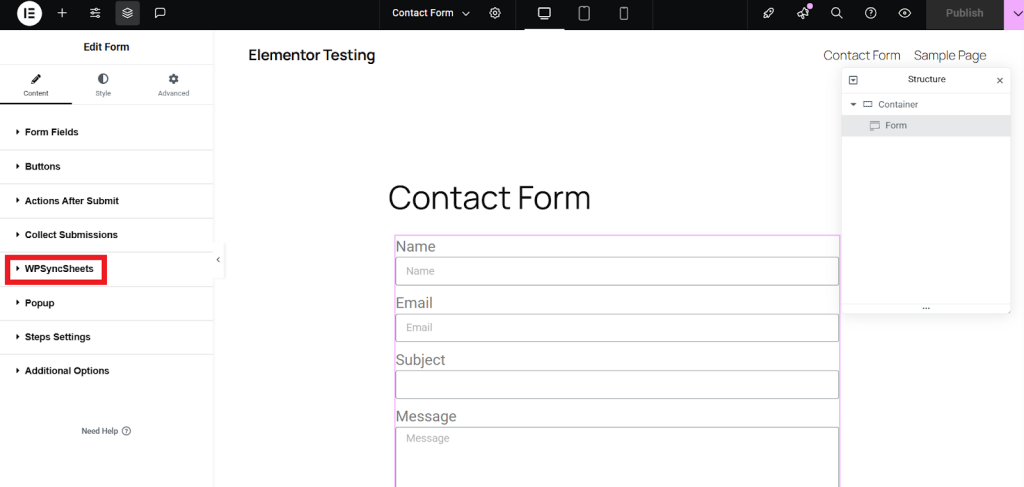
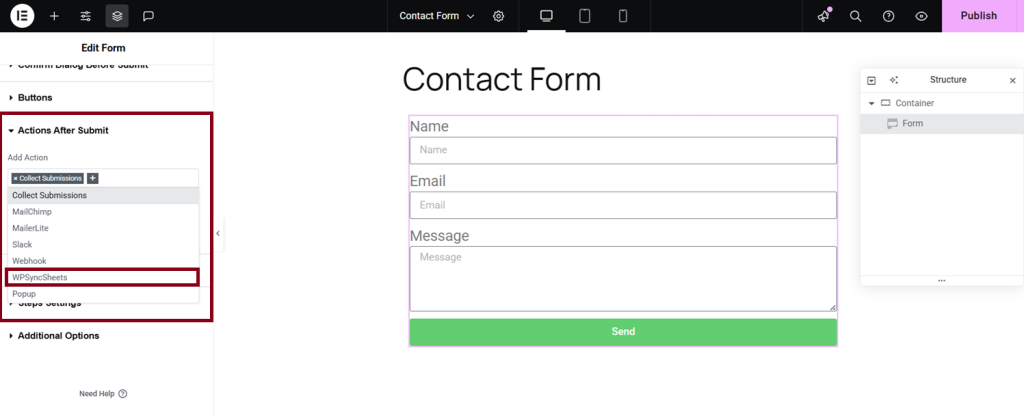
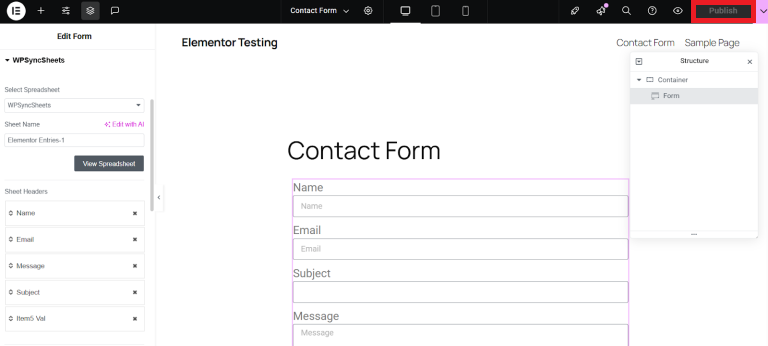
Step 4: Open the WPSyncSheets Tab
Scroll down in the Form widget settings and open the WPSyncSheets tab.
- This tab will appear only after you have added and saved the WPSyncSheets action in the Form Actions section.
- If the tab is already visible and you don’t need to update anything, you can skip to Step 9.
WPSyncSheets Action Setup (Steps 5–8)
Step 5: Select the WPSyncSheets Action
- Open the Actions tab in the Form settings.
- Select WPSyncSheets from the dropdown to display its configuration panel.
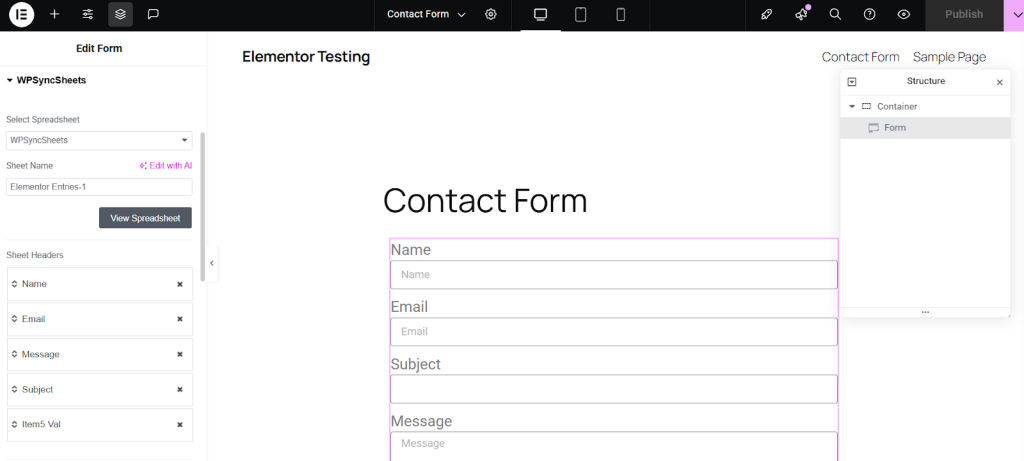
Step 6: Select Spreadsheet and Enter Sheet Name
Inside the WPSyncSheets panel:
- Select whether to create a new spreadsheet or use an existing one.
- Enter the Sheet Name where your form entries should be exported.
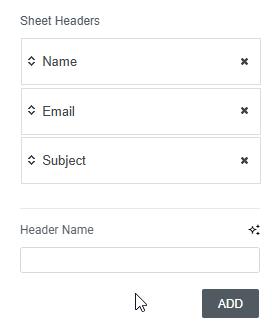
Step 7: Manage and Map Sheet Headers
In the Sheet Headers section:
- Reorder headers using drag-and-drop.
- To add headers, enter a name in the Header Name field and click ADD.
- Remove a header using the × (cross) icon.
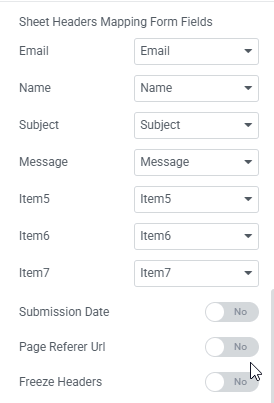
Auto-Mapping
The plugin auto-maps sheet headers to form fields only during the initial setup of the WPSyncSheets action — and only if the form has been saved at least once.
If the form is brand new and hasn’t been saved yet, no headers will be auto-generated, and you’ll need to add them manually.
Save your form first, then add and configure the WPSyncSheets action for the best auto-mapping results
Step 8: Save Action Settings
Click Update or Publish on the Elementor panel to save your form changes.
After updating any WPSyncSheets action settings, refresh the editor page to ensure all configuration values load correctly and prevent misconfiguration.
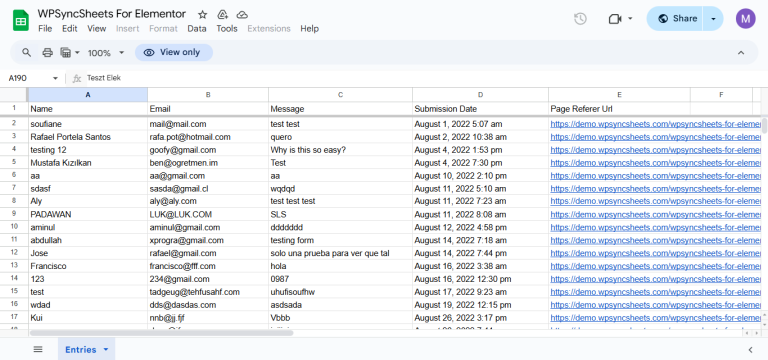
Step 9: View Your Spreadsheet in Google Sheets
- After saving the WPSyncSheets action, a View Spreadsheet button will appear.
- Clicking this button opens the linked Google Spreadsheet directly in your Google Sheets account.
- Any spreadsheet created or updated by WPSyncSheets is stored in your Google Drive, where you can view, manage, or edit the exported data at any time.
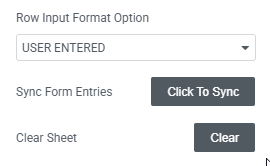
Step 10: Export Entries with Click to Sync
- After saving your WPSyncSheets action settings, a Click to Sync button will appear.
- Clicking this button will immediately export all existing form submissions to the selected spreadsheet and sheet in your Google Sheets account.
- Use this option whenever you need to bulk-sync past entries or refresh your sheet with the latest form data.
Elementor Multiple Forms Not Syncing to Sheets? FIXED!
In this video, I’m going to show you the new Pro version update in WPSyncSheets for Elementor Forms that allows you to connect multiple Elementor forms on the same page to separate Google Sheets.
Previously, when multiple Elementor forms were added on the same page, they shared the same configuration and Google Sheets mapping. Because of this, submissions from different forms could be sent to the same sheet.
With this new Pro update, each Elementor form can now have its own configuration and spreadsheet mapping, allowing entries from different forms to be synced to separate Google Sheets.
This makes it easier to organize and manage form submissions without mixing data from different forms.


